

The fastest way to test mic sound in the United States is to open your device’s sound settings, choose the correct microphone, speak, and watch the input meter move. Then make a short recording and listen for clear speech, low background noise, and no crackle or echo.
This guide covers Windows 11 and 10, Mac, iPhone, Android, web browsers, Zoom, Discord, and other common apps used in the U.S. You do not need special equipment. A quiet room, your microphone, and a few minutes are enough.
What a microphone test should check
A good mic test checks more than whether your voice can be heard. It should confirm that:
- Your device detects the microphone.
- The correct microphone is selected.
- Your voice is loud enough.
- Your voice is not distorted.
- Background noise is not too strong.
- The microphone does not create an echo.
- Your voice stays clear when you turn your head or move slightly.
- The microphone works inside the app you plan to use.
A microphone can pass one test and fail another. For example, Windows may detect a USB microphone, while Zoom still uses the laptop’s built-in mic. An app may also apply noise removal or automatic gain control, which can change the sound.
The most reliable test uses two steps:
- Check the input meter in your device settings.
- Record your voice and play it back.
The input meter shows whether sound reaches the device. The recording shows what your voice actually sounds like.
How to test mic sound on Windows 11 or Windows 10
Windows includes a built-in microphone test. It is the best first check for a Windows computer because it confirms both the selected input device and its signal level.
Test a microphone in Windows 11
- Connect your microphone.
- Select Start > Settings.
- Open System > Sound.
- Scroll to Input.
- Select the microphone you want to test.
- Speak in your normal voice.
- Watch the input level bar.
The bar should move when you speak. If it does not move, Windows may be using the wrong device, the microphone may be muted, or access may be blocked.
For a deeper check, open the selected microphone’s properties. Windows may show a Test your microphone option. Speak for a few seconds, stop, and review the result. A low result usually means the input level is too low or you are too far from the mic.
Test a microphone in Windows 10
- Right-click the speaker icon in the taskbar.
- Choose Open Sound settings.
- Find the Input section.
- Select your microphone.
- Speak and watch the test meter.
You can also open Sound Control Panel, select the Recording tab, choose the microphone, and open Properties. Under Levels, raise the microphone level if your voice is too quiet. Use Microphone Boost only when needed because too much boost can add hiss and distortion.
What the Windows meter means
A moving meter confirms that Windows receives sound. It does not prove that the sound is pleasant or clear.
Use these clues:
| Result | Likely meaning | Next step |
|---|---|---|
| No movement | No signal or wrong device | Check the connection, mute switch, permissions, and input choice |
| Small movement | Input is too quiet | Move closer or raise the input level |
| Strong movement with red peaks | Sound may clip | Lower the input level or move farther away |
| Movement when you do not speak | Noise or interference | Reduce fan noise and check cables |
| Normal movement but poor playback | App or recording issue | Make a short recording and test the target app |
For digital audio, 0 dBFS is the maximum level. A signal that reaches it can clip. You do not need to make the meter as loud as possible. Clear speech with some headroom is safer than a very loud signal.

How to test mic sound on a Mac
macOS lets you select and test a microphone in System Settings. The exact labels may vary slightly by macOS version.
- Open the Apple menu.
- Select System Settings.
- Choose Sound.
- Open the Input section.
- Select the microphone.
- Speak at a normal distance.
- Watch the input level.
If the meter responds, the Mac is receiving sound. Use the input volume control to make your voice louder or softer. Do not place the microphone directly beside a laptop fan, speaker, or hard reflective surface.
You should also check app permissions:
- Open System Settings.
- Select Privacy & Security.
- Choose Microphone.
- Turn on access for the app you want to use.
Close and reopen the app after changing permission. Some programs do not detect a new permission until they restart.
Make a recording on a Mac
Use Voice Memos or another trusted recording app. Record 10 to 15 seconds while you:
- Speak at your normal volume.
- Move slightly from side to side.
- Pause between sentences.
- Say a few words with “p,” “t,” and “s” sounds.
Listen with headphones. Headphones help you hear hiss, echo, popping, and room noise that may be hard to notice through speakers.

How to test mic sound in a web browser
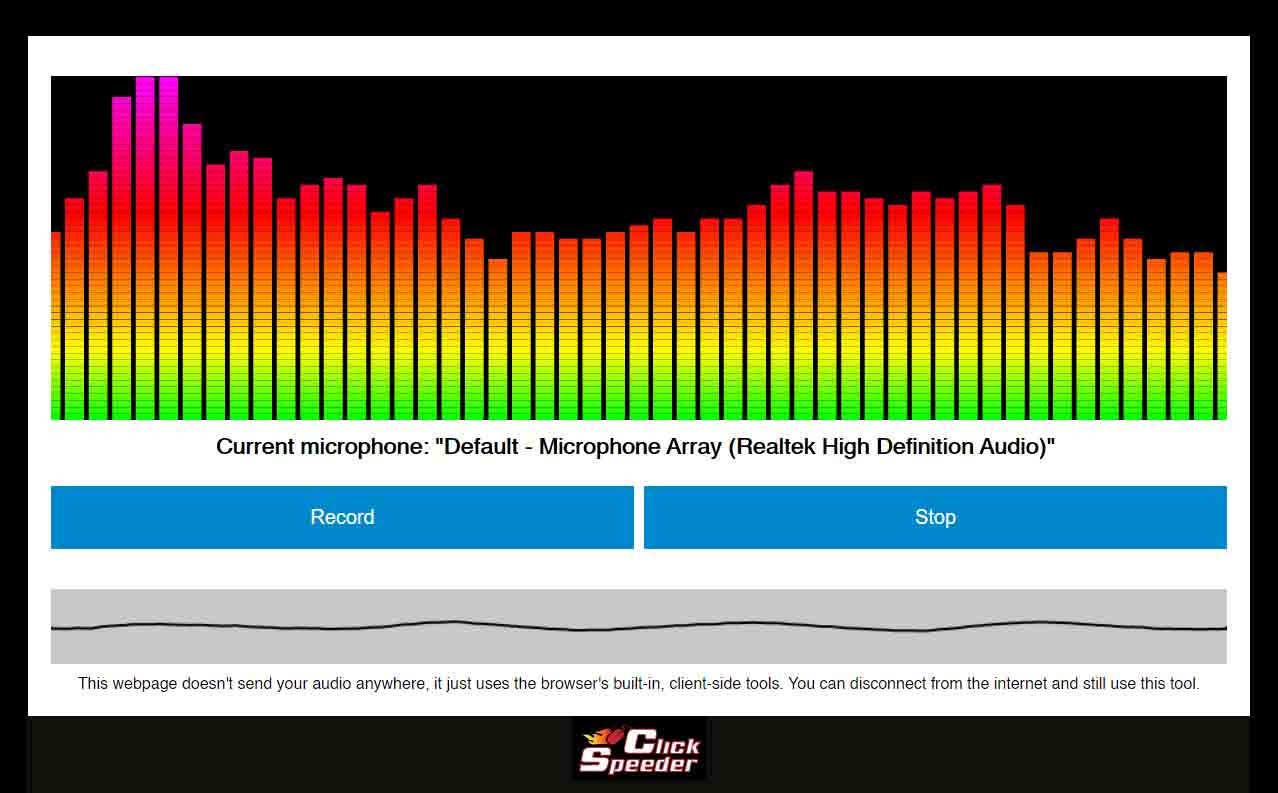
A browser microphone test can be useful, but it needs permission to access your microphone. Use a trusted site, and do not grant access to unknown pages without a clear reason.
To test a microphone in Chrome, Edge, or Firefox:
- Open the browser’s microphone test or recording page.
- Approve microphone access when asked.
- Select the correct microphone if the page offers a device menu.
- Speak for several seconds.
- Play the recording or review the level display.
- Remove the site’s microphone permission when finished if you do not plan to use it again.
If the browser cannot access the microphone, check three settings:
- The operating system’s microphone permission.
- The browser’s site permission.
- The microphone selected on the webpage.
A browser test may not match a video call. The browser, website, and operating system can each choose a different input device. Always test again inside the service you plan to use.
Protect your privacy during an online mic test
A microphone test can capture your voice. Avoid sharing personal details while testing. Do not upload a recording that contains private conversations, addresses, account information, or other sensitive data.
After the test, use the padlock or site information icon near the address bar to review or remove microphone permission.
How to test mic sound on an iPhone or Android phone
Test the microphone on an iPhone
The iPhone has more than one microphone. Different microphones support calls, video recording, and other functions. A simple test should check the microphone used by the task you care about.
For a basic recording:
- Open Voice Memos.
- Tap the record button.
- Speak for 10 seconds.
- Stop the recording.
- Play it back with headphones.
For video, open the Camera app and record a short clip with the front camera and another with the rear camera. Play back both clips. If one recording sounds clear and the other sounds muffled, a different microphone or opening may be blocked.
Check the case, screen protector, and microphone openings. Do not push pins or sharp tools into the openings. Use the cleaning guidance supplied by Apple and avoid liquids.
Test the microphone on an Android phone
Android menus differ by manufacturer, such as Samsung, Google, Motorola, and OnePlus. The most reliable basic method is to use the phone’s built-in recorder.
- Open Recorder, Voice Recorder, or a similar app.
- Record your voice for 10 seconds.
- Play the file back.
- Repeat the test with a video call or camera app if that is your main use.
If the phone has a permission manager, check that the app can use the microphone. On many Android phones, this is under Settings > Privacy > Permission Manager > Microphone, though the wording can vary.
Remove a thick case and test again. If the recording remains quiet, distorted, or full of static across several apps, the problem may be hardware-related.
How to test mic sound in Zoom, Microsoft Teams, Discord, and other apps
Always test the microphone inside the app you will use. The app may select a different input than Windows, macOS, iOS, or Android.
Zoom
In Zoom, open the audio settings and select the correct microphone. Use the microphone test option to record and play back a sample. Speak at your normal meeting distance rather than holding the microphone close to your mouth.
Check whether automatic microphone volume is enabled. Automatic control can help during a call, but a steady manual level may sound more consistent for recording.
Microsoft Teams
Open the Teams audio settings and choose the microphone under the device options. If available, use the test call feature. Speak, listen to the playback, and check whether the selected device changes when you connect a headset.
Discord
Open User Settings > Voice & Video. Choose the input device, speak, and watch the input indicator. Discord may use input sensitivity and noise control settings that affect when your voice starts and stops.
Other video and voice apps
Look for settings named:
- Audio
- Voice
- Input device
- Microphone
- Sound
- Test call
- Audio settings
If other people hear an echo, use headphones or lower speaker volume. If they hear doubled speech, two devices may be sending audio from the same room.

How to tell whether mic sound is good
A microphone sounds good for speech when the recording is easy to understand at a comfortable volume. You should not need to strain to hear words, and loud words should not break up.
Listen for these signs:
- Clear words: Consonants such as “t,” “k,” and “s” remain distinct.
- Stable volume: Your voice does not jump up and down without a reason.
- Low noise: There is little hum, hiss, fan noise, or room rumble during pauses.
- No clipping: Loud words do not sound harsh, crushed, or fuzzy.
- Low echo: Your voice does not bounce around the room.
- No popping: “P” and “B” sounds do not cause strong bursts of air.
- No dropouts: The recording does not cut out or become robotic.
A quiet room helps, but do not judge sound only by silence. A microphone can capture a quiet room well and still make speech dull or distorted.
For voice calls, speech clarity matters more than a wide frequency range. For music, podcasts, and videos, you may also need to test tone, room sound, mouth noise, and handling noise.

Troubleshoot a microphone that does not work
Start with the simplest and safest checks. Change one thing at a time so you know what fixed the problem.
No sound at all
Check these items in order:
- Make sure the microphone is connected.
- Check the physical mute switch.
- Select the correct input device.
- Confirm that the app has microphone permission.
- Close other apps that may be using the microphone.
- Restart the app.
- Try another USB port or cable.
- Restart the computer or phone.
- Test the microphone on another device.
A USB microphone may need more power than a low-quality hub can provide. Connect it directly to the computer when possible.
The microphone is too quiet
Move the microphone closer, but do not place it directly against your mouth. Raise the input level in the operating system or app. Check whether a headset boom has rotated away from your mouth.
Do not rely on extreme microphone boost. It raises wanted sound and unwanted noise together. If the signal remains very quiet at a normal distance, test another cable or device.
The sound is distorted or crackles
Lower the input level. Move slightly farther away. Check whether the microphone is touching a desk, stand, or cable. Try another USB port and close high-load apps if the problem appears only during calls.
Crackling can come from a damaged cable, a loose connector, electrical interference, a driver problem, or an app setting. A short recording helps separate a microphone problem from an internet problem.
People hear an echo
Use headphones. Lower the speaker volume. Keep the microphone away from speakers. Check whether another person in the room is connected to the same call.
If the echo happens only in one app, review that app’s echo cancellation and audio routing settings. If it happens in a local recording, the room or speaker setup is more likely to be the cause.
The sound is muffled
Check whether the microphone opening is covered by a case, foam, dust, or clothing. Reposition a headset boom. Avoid placing the microphone behind a monitor or inside a closed laptop stand.
Clean only according to the device maker’s instructions. Do not spray cleaner into a microphone opening.
A simple mic test checklist
Use this checklist before a meeting, stream, interview, class, or recording:
- Connect the microphone.
- Select it as the input device.
- Turn off mute.
- Check operating system permission.
- Open the target app.
- Confirm the same microphone is selected there.
- Speak and watch the input meter.
- Record 10 to 15 seconds.
- Listen with headphones.
- Fix volume, distance, noise, or echo.
- Test again after each change.
Keep the microphone at a steady distance. For many headset microphones, the boom should sit near the corner of your mouth rather than directly in front of it. The best position depends on the microphone design, so use the recording as the final judge.

Common mistakes when testing mic sound
Testing only the input meter
A moving meter proves that sound enters the device. It does not prove that the recording is clear. Always listen to a short sample.
Testing only in the operating system
An app may use its own microphone choice, gain, noise filter, or echo control. Test in the app that matters.
Speaking too close to the microphone
A close mic can sound loud but may create popping, harsh “s” sounds, and distortion. Keep a steady distance and speak normally.
Using laptop speakers during a call
Speakers can send the other person’s voice back into the microphone. Headphones are the simplest way to reduce this risk.
Changing many settings at once
If you change volume, microphone choice, noise removal, and app permissions together, you may not know what solved the problem. Make one change, then test again.
Assuming an online test is always accurate
A web test can show whether a browser receives audio. It cannot fully predict how your meeting app, internet connection, headphones, or noise filters will behave.
Key Takeaways
- Use the device’s sound settings to confirm that the microphone is detected.
- Make a short recording and listen for clarity, noise, echo, popping, and distortion.
- Test the microphone inside Zoom, Teams, Discord, or the app you plan to use.
- Select the correct input device at both the operating system and app levels.
- If no app can record clear sound, test another cable, port, or device.
- Protect your privacy when using browser-based microphone tests.
Frequently asked questions
How can I test my microphone without joining a call?
Use the built-in sound settings on Windows or Mac, or record a short sample with Voice Memos, Voice Recorder, or another local recording app. This lets you test the mic without sending your voice to other people.
How do I know if my mic is muted?
Check the microphone’s physical mute button, the operating system’s sound controls, and the app’s microphone icon. Speak while watching the input meter. If the meter stays still, the microphone may be muted or the wrong device may be selected.
Why does my mic work in one app but not another?
Each app can use a different input device and permission setting. Open the app’s audio settings, choose the microphone directly, and confirm that the operating system allows microphone access.
Should my microphone level be at 100 percent?
Not always. A maximum setting can cause clipping or reveal more background noise. Set the level high enough for clear speech, then check a recording. Leave some room below the maximum when you speak loudly.
Can I test a microphone with headphones?
Yes. Headphones help you hear hiss, echo, crackle, and room noise. If your headset has a built-in microphone, confirm that the computer or phone selects the headset mic rather than its internal microphone.
Conclusion
The best way to test mic sound is to combine a level check with a real recording. First confirm that the device detects the correct microphone. Then listen to a short sample for clear speech, steady volume, low noise, and no echo or distortion.
If the microphone fails, check mute controls, permissions, device selection, distance, cables, and ports in that order. Test again inside the app you plan to use before an important call or recording.
