

Place each microphone with phase, bleed, and balance in mind, then tune the kit before recording.
Knowing how do you mic a drum kit is less about owning many microphones and more about controlling sound, placement, and room reflections. A well-miked kit should feel balanced before heavy mixing begins. This guide explains practical microphone choices, placement methods, gain settings, phase checks, and proven recording workflows for studios, home setups, and live rooms.
How do you mic a drum kit?
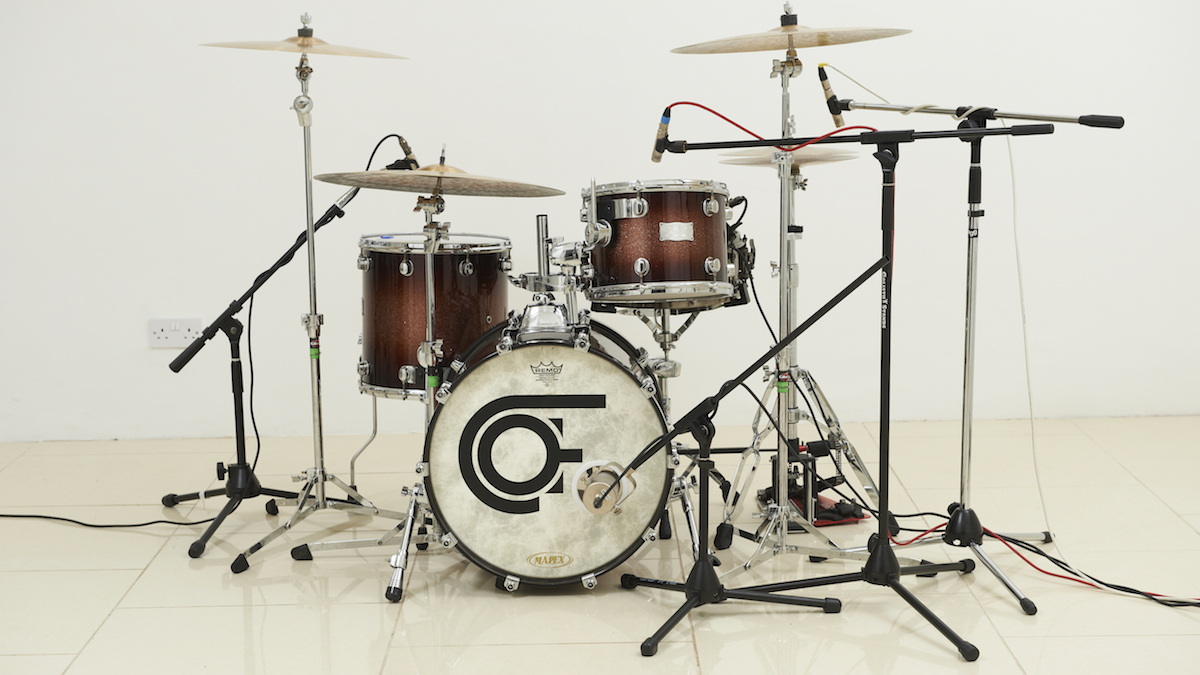
The best way to mic a drum kit is to start with the sound you want, not with a fixed microphone count. A simple setup may use one microphone over the kit and one on the kick drum. A larger setup may place separate microphones on the kick, snare, toms, hi-hat, and cymbals.
Before placing any microphone, tune the drums and listen from the drummer’s position. Walk around the kit while someone plays. You may find that the snare sounds bright near the rim, the kick sounds deeper at the front, or the toms blend better from a few feet away.
A reliable drum miking plan includes:
- Use a kick microphone to capture low-end weight and attack.
- Use a snare microphone to capture crack, body, and articulation.
- Use overhead microphones to capture cymbals and the overall kit image.
- Add tom microphones when you need more control or impact.
- Add a hi-hat microphone only when the overheads do not provide enough detail.
- Use room microphones to capture space, depth, and natural decay.
The overhead microphones are often the most important part of the setup. They act like the camera lens for the entire kit. Close microphones add detail, but the overheads should make the kit sound musical and believable.
Choose the right drum microphones
You can mic a drum kit with dynamic, condenser, or ribbon microphones. Each type reacts differently to volume, frequency, distance, and room sound.
Dynamic microphones
Dynamic microphones are common on kick drums, snare drums, and toms. They handle high sound pressure levels well and often have a focused sound that rejects some bleed.
A dynamic microphone is useful when you want:
• Strong attack on the snare
• Focused tom sounds
• Reliable performance in loud rooms
• Good rejection of nearby cymbals
• A durable microphone for live work
Many classic drum recordings use dynamic microphones because they capture punch without making the setup too sensitive.
Condenser microphones
Condenser microphones are common as overheads, room microphones, hi-hat microphones, and sometimes kick or snare microphones. They capture more detail and usually extend higher and lower in frequency than many dynamics.
Use condensers when you want:
• Clear cymbal detail
• A wider stereo image
• More room and ambience
• Natural attack from the drum heads
• A more open and detailed sound
Most condenser microphones need phantom power. Turn phantom power off when using microphones that should not receive it, especially some passive ribbon microphones.
Ribbon microphones
Ribbon microphones can sound smooth and natural on overheads or room channels. They often soften harsh cymbals and add a warm sense of depth.
However, ribbons can be more delicate. Keep them away from strong air blasts, careless handling, and excessive wind pressure from a kick drum port. Check the manufacturer’s instructions before using phantom power.
Microphone polar patterns
The polar pattern describes how a microphone hears sound around its body.
• Cardioid microphones pick up sound mainly from the front and reject much of the rear. They work well on close drum microphones.
• Supercardioid microphones offer tighter rejection but may hear more sound from a small area behind them.
• Omnidirectional microphones hear sound from all directions and can sound natural in a good room.
• Figure eight microphones hear from the front and back while rejecting the sides. They can work well for room recording and mid-side techniques.
When learning how do you mic a drum kit, remember that polar pattern matters as much as microphone model. A great microphone in the wrong pattern may create more bleed than useful sound.

Prepare the drum kit and recording space
Good drum recordings begin before the first microphone is connected. A poorly tuned kit will make microphone placement much harder.
Start with the following checks:
• Replace damaged or badly worn drumheads.
• Tune the batter and resonant heads to suit the style.
• Tighten loose hardware and stands.
• Remove rattles from pedals, stands, and cymbals.
• Place the kit on a stable surface.
• Add rugs if the floor creates unwanted reflections.
• Control harsh wall reflections with curtains, panels, or soft furniture.
Do not try to fix every room problem with acoustic treatment. A room that is completely dead can make drums sound flat. A room with hard, uneven reflections can make the kit sound harsh. Aim for controlled life rather than total silence.
Ask the drummer to play the loudest parts of the song during soundcheck. Drum levels can change sharply between verses and choruses. Set microphone gain for the loudest expected hits, not the quietest groove.
Keep microphone stands away from moving pedals and cymbal paths. A loose stand can fall into the kit, create noise, or cause an expensive accident.
How do you mic a drum kit with a basic setup?
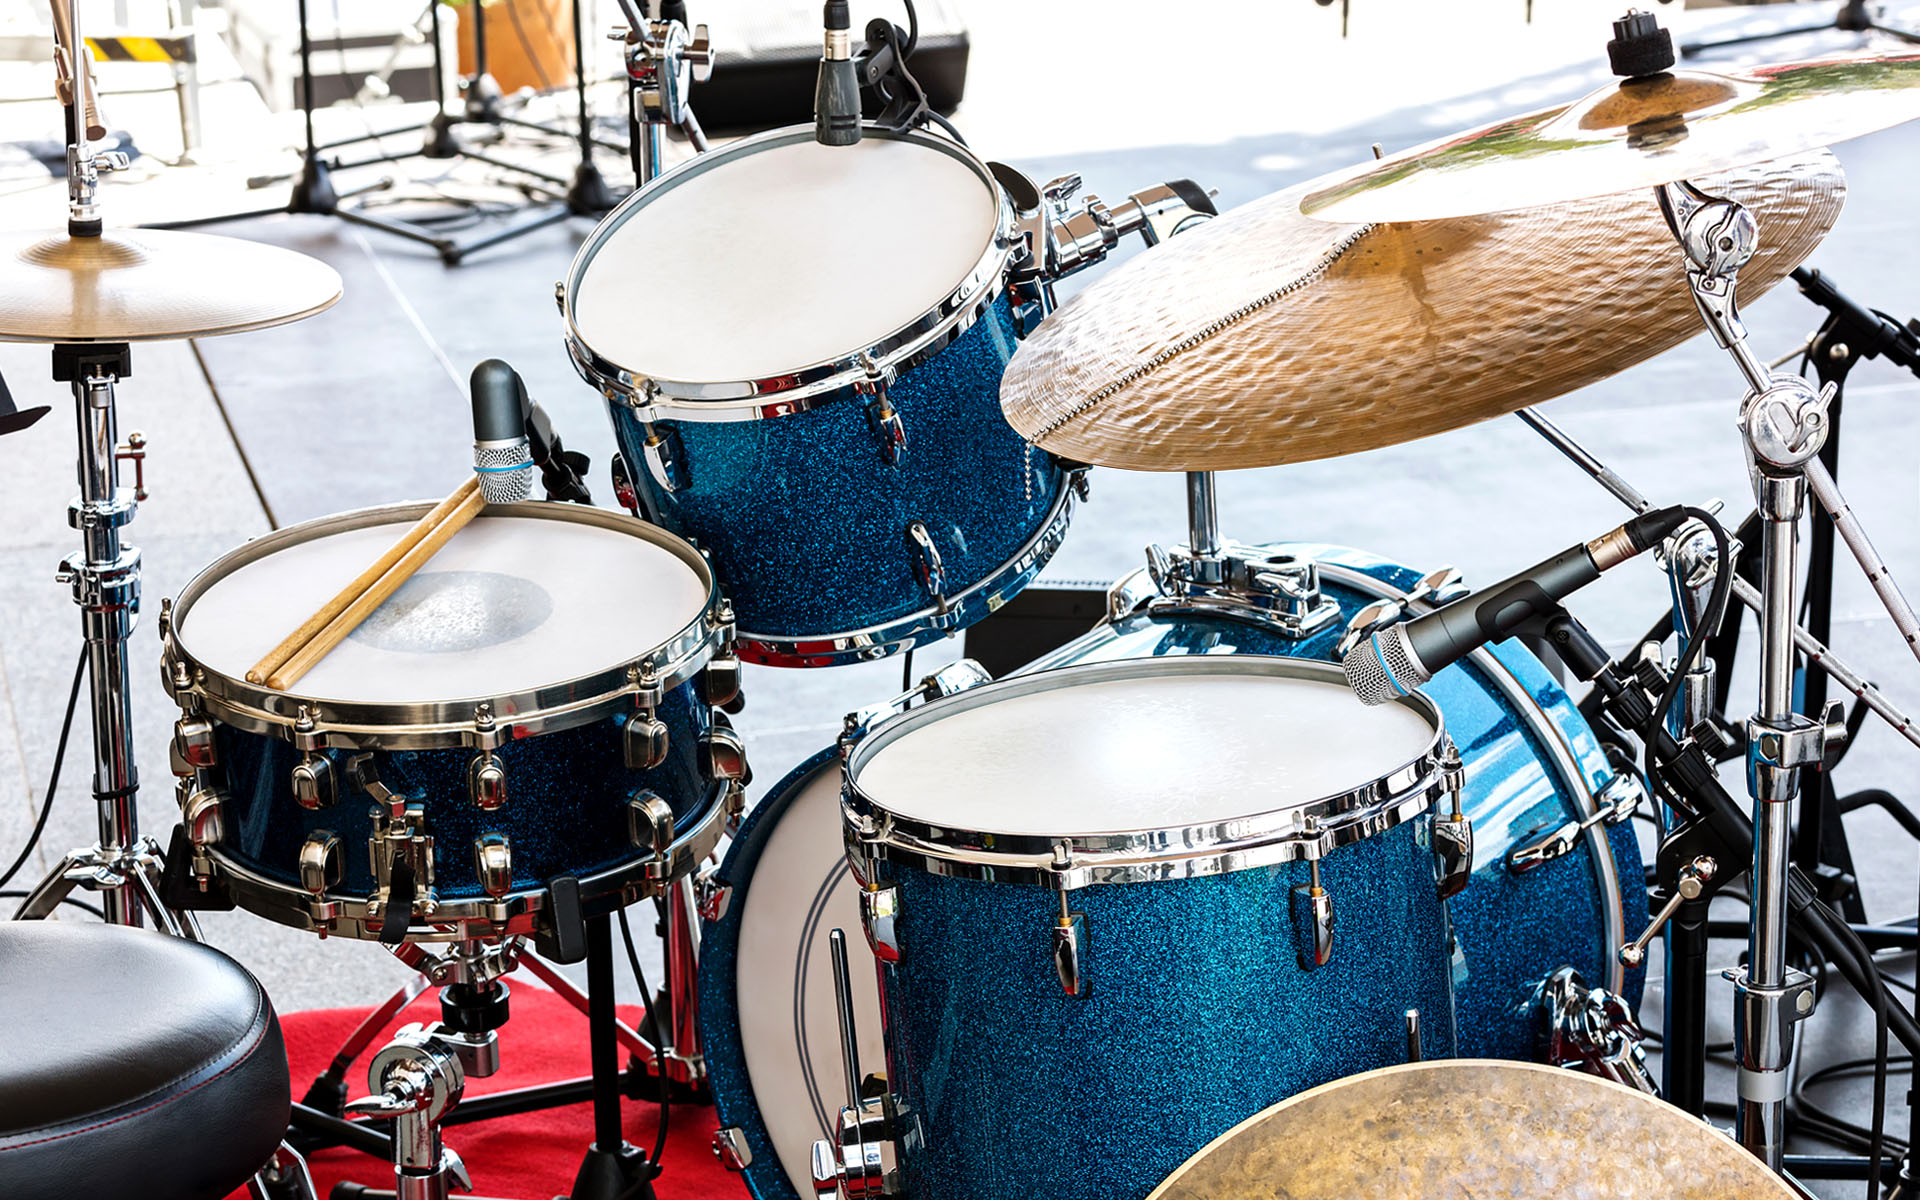
A basic drum setup can produce a strong recording with three or four microphones. This approach is useful for home studios, demos, rehearsal rooms, and natural-sounding music.
Three-microphone setup
Use:
• One kick microphone
• One snare microphone
• One overhead microphone
Place the overhead above the center of the kit. Move it forward or backward until the kick, snare, and cymbals feel balanced. Keep the microphone high enough to capture the full kit, but not so high that the room dominates.
The snare should sit near the center of the overhead image. If the snare sounds too far to one side, adjust the microphone position rather than using extreme panning later.
This setup rewards careful placement. I have found that a single overhead often sounds more natural when it is placed based on the snare and kick relationship, not simply centered above the cymbals.
Four-microphone setup
Use:
• One kick microphone
• One snare microphone
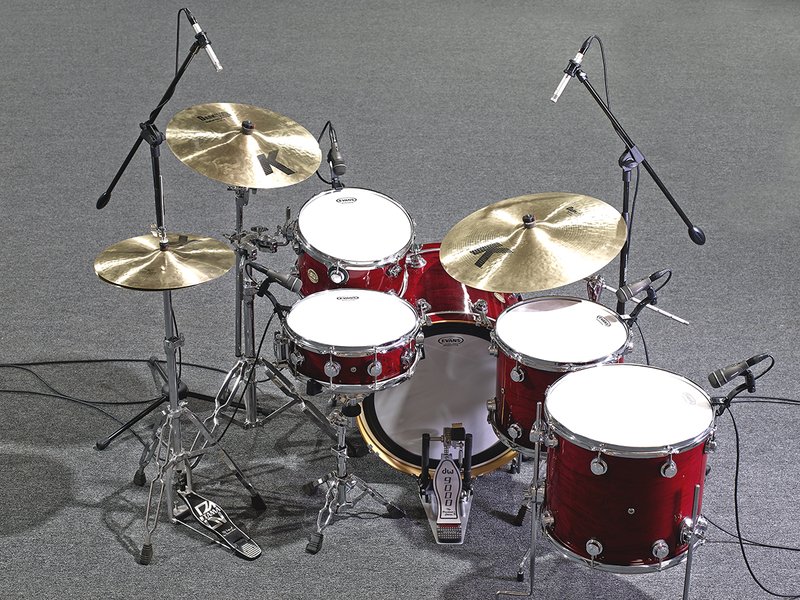
• Two overhead microphones
A spaced pair gives a wide stereo image. A matched pair is helpful, but two microphones with similar tonal balance can also work if you check phase and level carefully.
The classic four-microphone approach is simple:
- Place the kick microphone inside or just outside the front head.
- Place the snare microphone above the rim, aimed toward the head.
- Place the overheads so the snare is centered between them.
- Listen to the overheads in mono.
- Adjust one overhead until the snare and kick retain their body.
This setup gives you more control than a single overhead while keeping the kit open and realistic.
How do you mic a kick drum?
Kick drum microphone placement controls the balance between low-end weight, beater attack, and natural resonance. There is no single correct position.
Inside the kick drum
Place the microphone through the port in the resonant head. Moving it closer to the beater increases attack. Moving it farther away usually adds more body and resonance.
Try these positions:
• Near the beater impact point for click and definition
• Halfway inside the shell for a balanced tone
• Near the front head for a rounder and more natural sound
Avoid pushing the microphone so far inside that it touches the drumhead. The vibration can damage the microphone and create unwanted noise.
Outside the kick drum
Place the microphone a few inches in front of the resonant head. This position captures more of the drum’s full tone and can sound less aggressive.
An outside microphone may need more gain and may pick up more room sound. It can work well when the kick already sounds balanced in the room.
Two kick microphones
A two-microphone kick setup can combine attack and low-end body. For example, use one microphone inside the drum and a second microphone outside the front head.
Check phase before blending them. Move one microphone slightly if the combined sound becomes thin. A small timing difference can cause low frequencies to cancel.
A common mistake is adding too much sub-bass. The kick may sound impressive alone but become muddy with bass guitar. Judge the kick with the full arrangement playing.
How do you mic a snare drum?
The snare microphone usually sits above the top head, just inside or outside the rim. Aim it toward the area between the center and edge of the head.
Moving the microphone toward the center gives more body and attack. Moving it toward the rim captures more brightness and wire response.
Keep the microphone close enough to reject some hi-hat bleed. Angle the rear of the microphone toward the hi-hat if the polar pattern allows it. This can reduce unwanted cymbal sound without using extreme equalization.
A top snare microphone often captures:
• Stick attack
• Midrange body
• Rimshot crack
• Some snare wire response
• A controlled amount of hi-hat bleed
A bottom snare microphone captures more of the wire sound. If you use one, reverse its polarity relative to the top microphone and listen carefully. Polarity reversal may help, but it does not replace a full phase check.
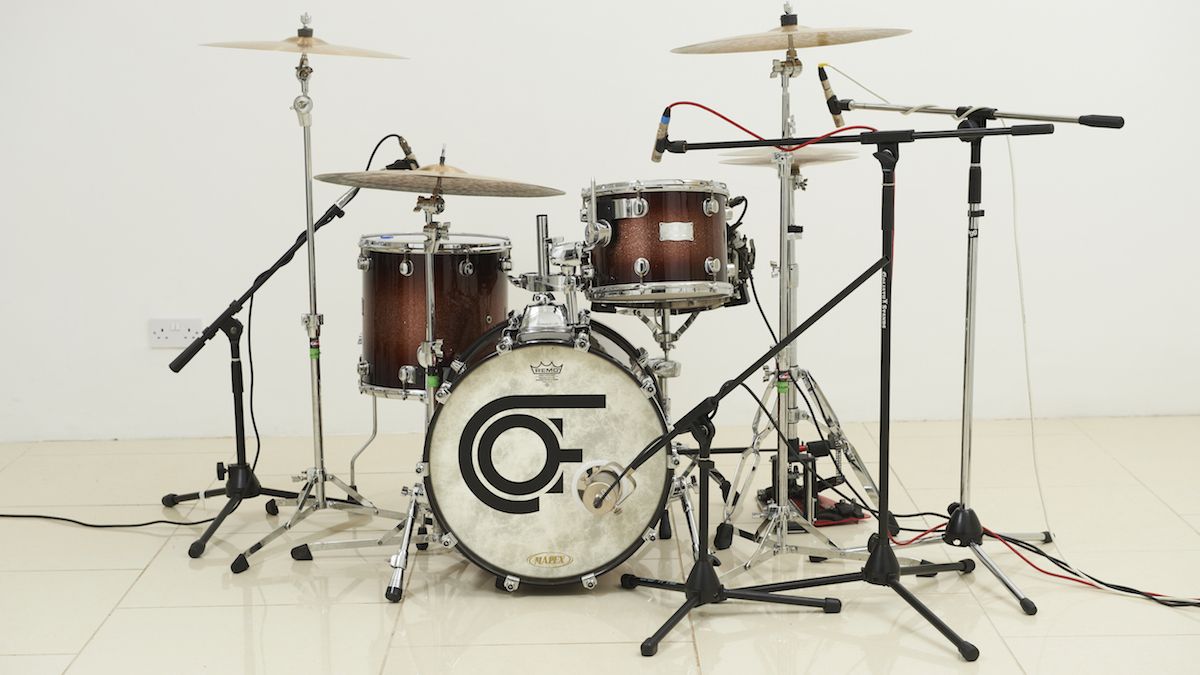
Leave enough space for the drummer’s stick movement. A microphone that is too low can get hit. I once watched a perfectly placed snare microphone take a direct stick strike during a loud chorus. A slightly higher angle would have saved the microphone and preserved nearly the same tone.
How do you mic a tom drum?
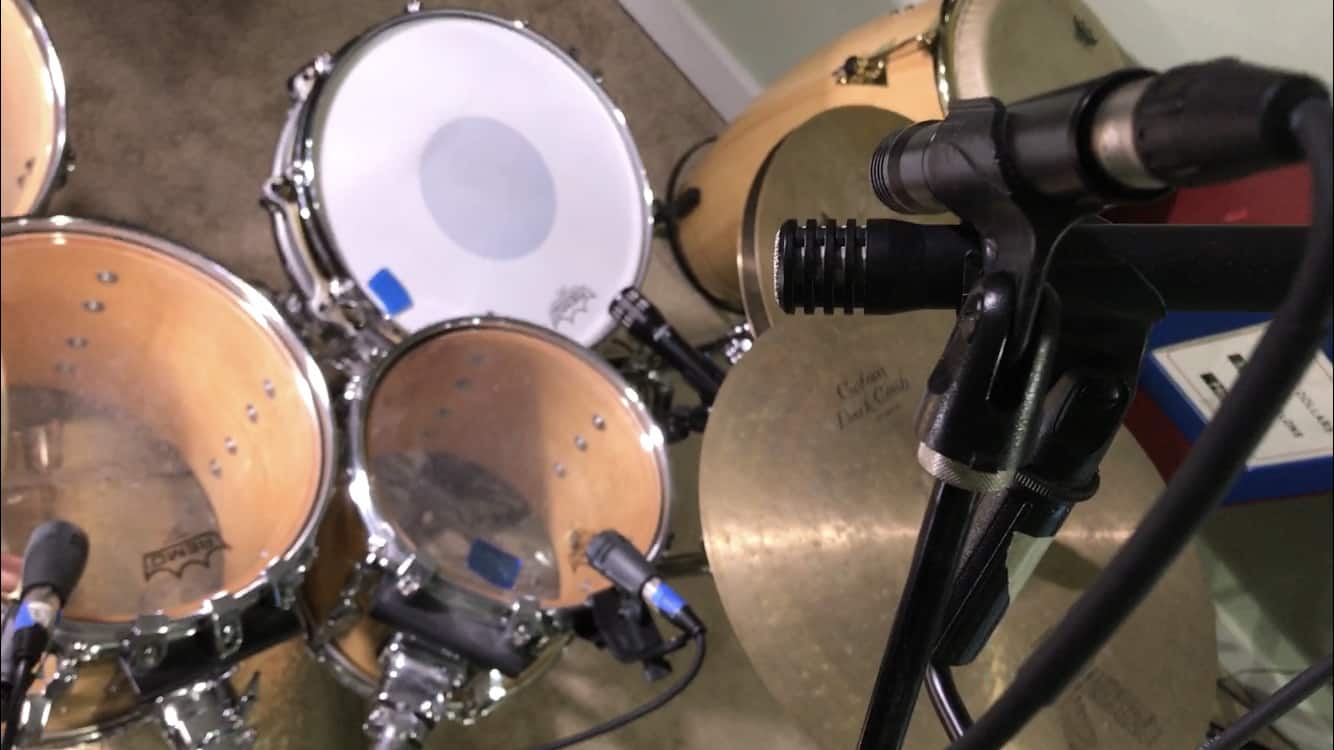
Place each tom microphone above the drumhead and aim it toward the area between the center and edge. Keep the microphone close enough to reduce cymbal bleed, but not so close that the drum sounds narrow or overly aggressive.
For rack toms, angle the microphone slightly across the head. For floor toms, you can often place the microphone a little farther away because there is more space around the drum.
Use a similar distance for each tom when possible. Consistent placement makes the kit easier to mix and helps the toms respond evenly when panned.
Consider these placement changes:
• Closer placement creates more attack and less room sound.
• Farther placement creates more body and air.
• Aiming toward the center increases attack.
• Aiming toward the edge softens the attack.
• Angling away from cymbals can reduce harsh bleed.
Do not gate toms during recording. Record the full sound first. Gates can be useful during mixing, but they may remove natural decay or make the toms feel disconnected from the room.

How do you mic overheads?
Overhead microphones capture cymbals, stereo width, and the main character of the kit. They also pick up the room, so placement has a major effect on the final sound.
There are several useful overhead techniques.
Spaced pair
Place one microphone over the left side of the kit and one over the right side. This creates a wide stereo image and can sound large and open.
The limitation is phase difference. Since each microphone hears the snare and kick at different times, low frequencies may weaken when summed to mono.
X/Y pair
Place two microphone capsules close together at an angle. This creates a stable stereo image with strong mono compatibility.
X/Y is useful when:
• The room is small or uneven
• Mono playback matters
• You want a focused stereo image
• You want fewer phase problems
ORTF pair
Place the microphones close together with angled capsules and a small spacing between them. ORTF can offer a natural stereo image with more width than X/Y.
Recorderman technique
This technique uses two microphones. One microphone points toward the snare from above. The second microphone sits near the floor tom and points toward the snare.
Measure the distance from each microphone to the snare and kick. Keeping those distances similar helps the kit remain centered and reduces phase problems.
Glyn Johns-style technique
This approach uses one overhead above the kit and another microphone to the drummer’s side. The microphones should have similar distances to the snare.
It can create a large, punchy image with fewer microphones. It also depends heavily on drummer balance and room quality.
When learning how do you mic a drum kit, do not compare techniques only by how wide they sound. Listen for the position of the snare, the weight of the kick, and the balance between cymbals and shells.
How do you mic a hi-hat and ride cymbal?
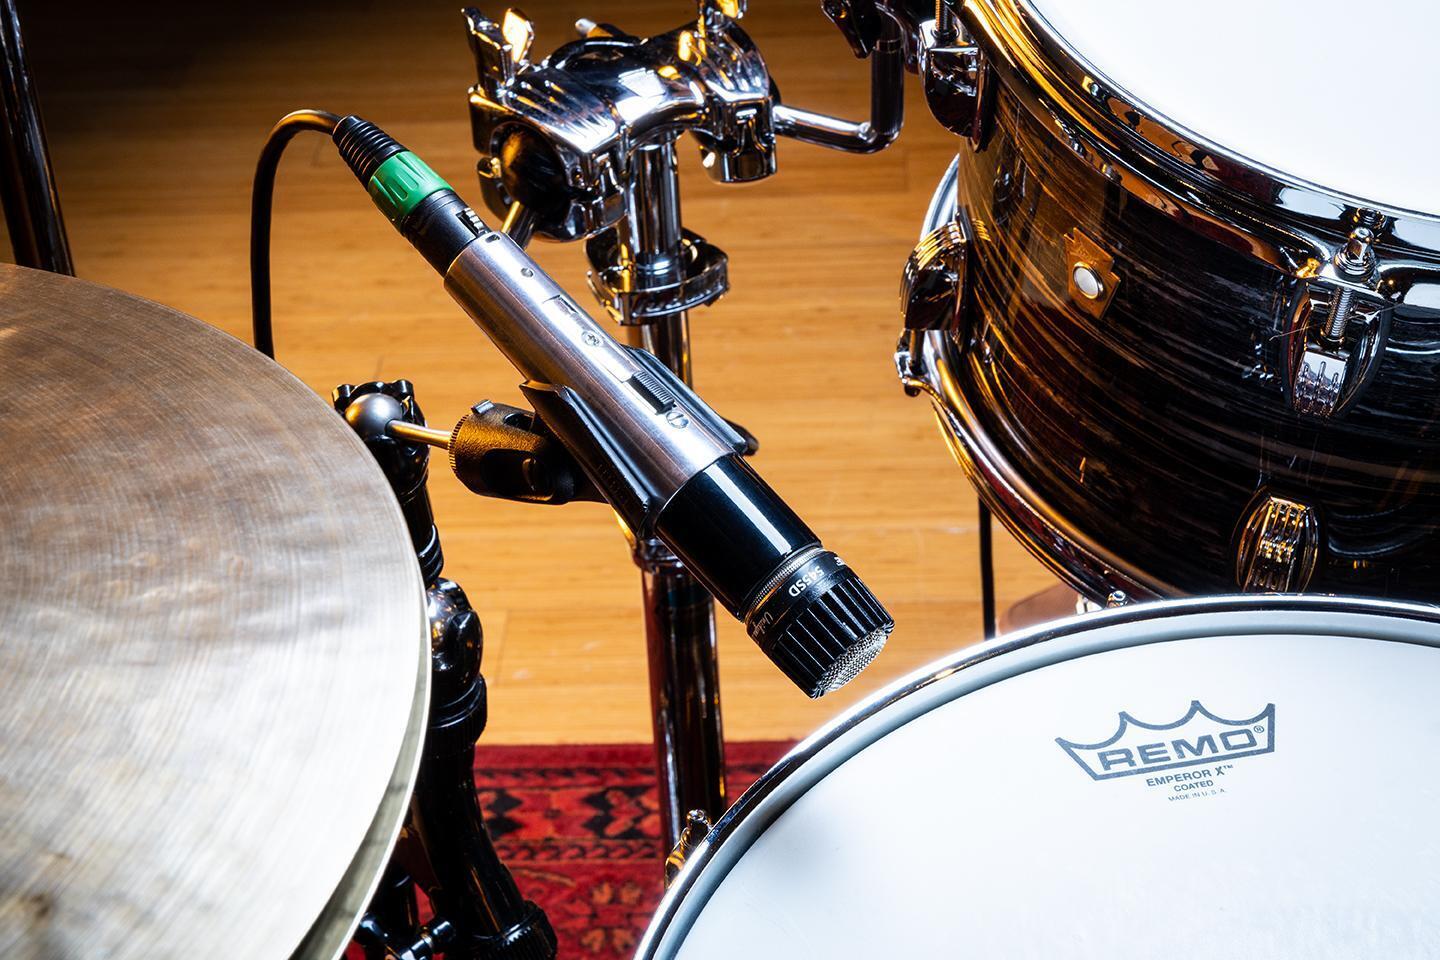
A hi-hat microphone is optional. In many sessions, the overheads capture enough hi-hat detail. Adding a close microphone can help when the hat needs more definition or control.
Place the microphone above the edge of the top cymbal. Aim it slightly away from the opening between the cymbals. This reduces the rush of air and limits harsh mechanical noise.
Do not aim directly at the edge if the sound is too bright. Move the microphone higher or angle it toward the top surface.
For a ride cymbal, place the microphone above the bow or bell based on the sound you need. The bow provides wash and stick detail. The bell provides a sharper, more focused tone.
Watch for cymbal overload. Condenser microphones can capture a great deal of high-frequency energy. If the cymbals sound painful, move the microphones or reduce the input level before reaching for equalization.

How do you mic a drum kit in a small room?
Small rooms can produce strong reflections and uneven bass. The goal is to capture more direct drum sound and less uncontrolled room sound.
Use these strategies:
• Place the kit away from corners.
• Avoid putting the kick directly against a wall.
• Use cardioid microphones for close sources.
• Keep overheads lower if the ceiling creates harsh reflections.
• Add soft treatment behind the kit when reflections sound sharp.
• Test several kit positions before setting microphone stands.
• Use room microphones only after listening to the close and overhead tracks.
A small room is not automatically bad. Many excellent drum sounds come from modest spaces. The key is to identify what the room adds. A short, lively reflection can add energy. A long, boxy reflection can make every drum sound trapped inside a cardboard box.
For a dry sound, keep the room microphones low or muted. For a bigger sound, place one room microphone several feet in front of the kit and compress it during mixing.
How do you mic a drum kit for live sound?
Live drum miking requires more focus on isolation, feedback control, and physical safety. Stage microphones must survive movement, loud monitors, and quick setup changes.
Use close microphones with suitable polar patterns. Position the rear rejection area toward loud wedges or stage monitors. Keep microphone cables secured so the drummer and crew do not trip.
A typical live setup includes:
• Kick microphone
• Snare microphone
• One microphone on each tom
• One or two overhead microphones
• Optional hi-hat microphone
In a live setting, overheads may be used mainly for cymbals rather than the full kit. Too much overhead room sound can increase feedback and make the mix harder to control.
Check the kit from the audience position. A microphone placement that sounds good through headphones may create too much cymbal level in the house system. Always make final decisions through the actual playback system when possible.
Set gain, polarity, and phase correctly
Microphone placement comes first, but technical setup determines whether the recording stays clean.
Set preamp gain
Ask the drummer to play the loudest part of the song. Set the input so peaks have enough headroom. In a modern digital system, leaving around 12 dB of peak headroom is a sensible starting point.
Do not chase maximum level. Digital recording does not need the same high recording levels used by older analog workflows. Clean headroom is more useful than a signal that clips.
Check polarity
Polarity reversal changes the positive and negative direction of a waveform. It can help when two microphones produce a weak combined sound.
A classic example is a top and bottom snare microphone. Try both polarity settings and choose the one with stronger body and low-mid weight.
Check time alignment
Phase problems can occur when microphones hear the same drum at different times. The result may sound thin, hollow, or unclear.
Check the following:
- Listen to the overheads together.
- Switch to mono.
- Add the kick microphone.
- Add the snare microphone.
- Notice any loss of body or punch.
- Move microphones physically before using plug-ins.
- Use sample alignment only when it improves the sound naturally.
Do not align every track automatically. Small timing differences can create depth and character. The goal is not perfect mathematical alignment. The goal is a strong, musical drum sound.
Mix the drum microphones without losing realism
A good drum mix usually starts with the overheads. Bring them up first and create a natural kit image. Then add the kick and snare until the groove has enough weight and focus.
Use close microphones to support the overhead picture, not replace it. If the close microphones are much louder than the overheads, the kit may lose its sense of space.
Useful mixing moves include:
• High-pass room and overhead tracks only when low-end buildup requires it.
• Cut muddy low mids before boosting top end.
• Use gentle compression to control peaks.
• Use gates carefully on toms.
• Pan toms according to the drummer’s or audience’s perspective.
• Check the mix in mono.
• Compare the processed sound with the unprocessed sound often.
Compression can make room microphones exciting. A heavily compressed room track may bring out cymbal wash, shell resonance, and the sound of the recording space. Blend it quietly at first, then raise it until the kit feels larger.
Do not overuse noise reduction on cymbal-heavy tracks. Aggressive processing can create watery sounds and remove natural decay.
Common drum miking mistakes to avoid
Even experienced engineers make placement mistakes. Most problems are easier to prevent than repair.
Using too many microphones
More microphones provide more control, but they also create more bleed, phase interaction, setup time, and mixing work. Start with the fewest microphones that can capture the song properly.
Ignoring the drummer’s balance
A drummer who hits the hi-hat much harder than the snare can make the entire kit difficult to mix. Ask for a small playing adjustment before changing every microphone.
Placing microphones by habit
A standard placement is only a starting point. Every kit, drummer, room, and song is different. Move the microphone while listening instead of trusting a diagram alone.
Recording before tuning
Equalization cannot fully repair a badly tuned drum. Tune first, then place microphones.
Relying on solo mode
A microphone may sound impressive alone but harsh in the mix. Always make final choices with bass, guitars, vocals, and keyboards playing.
Forgetting the room
The room becomes part of every open microphone. If the room sounds bad from the drummer’s seat, it may sound worse in the recording.
Skipping the mono test
A wide stereo drum track can hide phase problems. Summing to mono reveals weak low end, a wandering snare, and hollow overheads.
A practical drum miking workflow
Use this repeatable process whenever you record a kit.
- Tune every drum and remove unwanted rattles.
- Place the kit in the best-sounding part of the room.
- Start with one or two overhead microphones.
- Adjust the overheads until the kit sounds balanced.
- Add a kick microphone for low-end focus.
- Add a snare microphone for attack and presence.
- Add tom microphones only if the song needs extra control.
- Add room microphones after checking the direct sound.
- Set gain using the loudest performance section.
- Check polarity and phase in mono.
- Record a short test performance.
- Listen through headphones, monitors, and one small speaker.
- Make physical changes before using heavy processing.
- Save notes about microphone models, distances, and angles.
I recommend recording a short chorus rather than a single drum hit during testing. A full musical passage reveals cymbal buildup, tom transitions, kick and bass conflicts, and changes in the drummer’s dynamics.
When learning how do you mic a drum kit, this test-and-adjust process is more valuable than memorizing one setup. The best engineers treat every drum kit as a new instrument.
Frequently Asked Questions About How Do You Mic a Drum Kit
How many microphones do you need to mic a drum kit?
You can mic a drum kit with one microphone, but three or four microphones offer more control. A common basic setup uses one kick microphone, one snare microphone, and one or two overhead microphones.
Where should overhead microphones be placed?
Place overhead microphones where the kick and snare sound balanced, not only where the cymbals sound bright. Keep the snare centered in the stereo image and check the overheads in mono for phase problems.
Should the kick microphone go inside or outside the drum?
An inside position gives more beater attack and focus. An outside position gives more natural body and room sound, so choose the location that fits the music and the drum’s existing tone.
Do you need a microphone under the snare?
No, a bottom snare microphone is optional. It adds snare-wire detail, but it also increases bleed and may require polarity adjustment when combined with the top microphone.
How do you reduce cymbal bleed in drum microphones?
Use close microphone placement, aim the microphone away from the loudest cymbals, and choose a suitable cardioid pattern. You can also ask the drummer to control cymbal volume, which often helps more than aggressive processing.
Should you record drums in stereo?
Stereo overheads create width and help capture the full kit. A mono overhead or minimal microphone setup can sound excellent when the room and drummer are balanced.
How do you check phase when miking drums?
Listen to related microphones together, then switch the mix to mono. If the kick, snare, or low end becomes thin, try changing microphone distance, angle, or polarity before using digital alignment.
Conclusion
Learning how do you mic a drum kit starts with tuning, listening, and choosing the simplest setup that serves the song. Use overheads to create the main picture, then add kick, snare, tom, hi-hat, and room microphones for control and character.
Good placement usually beats expensive equipment. Test the kit from the drummer’s position, leave enough recording headroom, check phase in mono, and make physical adjustments before reaching for plug-ins.
Set up a few microphones, record a short performance, and trust your ears. Keep experimenting with distance and angle, then share your results or explore more recording techniques to build your skills.