

Introduction
If you cover city council meetings, school events, court briefings, sports, or street interviews in the United States, a simple handheld reporter microphone can make interviews easier. A good DIY model uses an omnidirectional dynamic capsule, a short handle, a windscreen, and a balanced XLR cable.
This guide explains how to build a passive reporter microphone for cameras, field recorders, audio interfaces, and portable mixers. It does not cover wireless transmitters or radio-frequency equipment. You will build the microphone only; the cable or recorder will carry the audio signal.
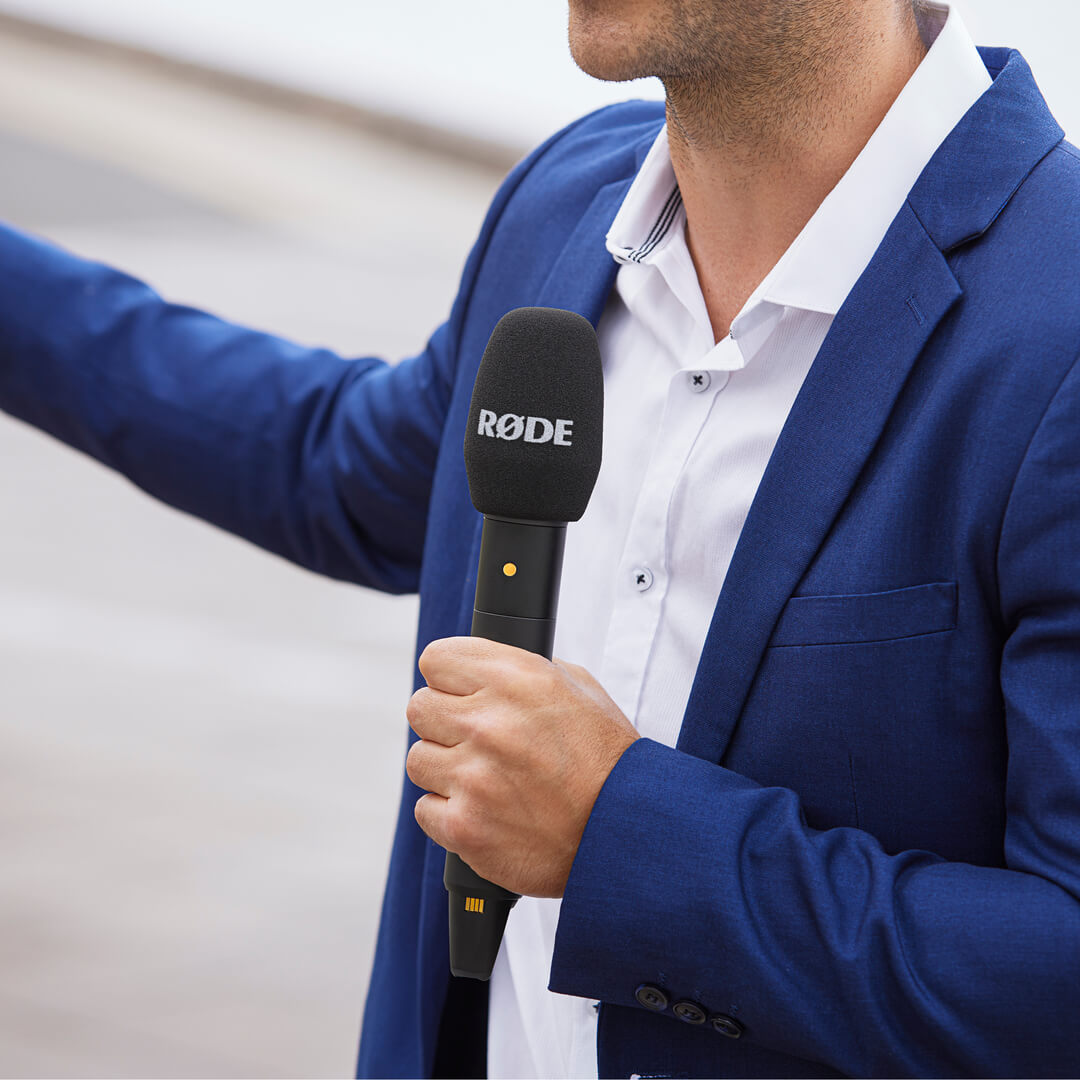
What a Reporter Microphone Does
A reporter microphone is a handheld microphone made for interviews. It is usually held below the speaker’s mouth or shared between two people.
Most professional interview microphones use an omnidirectional dynamic capsule. “Omnidirectional” means the capsule hears sound from many directions. “Dynamic” means it creates an audio signal through motion and electromagnetic induction rather than needing a battery.
This design suits interviews because it:
- Does not need an internal battery.
- Handles close speech and sudden loud sounds well.
- Works in many basic field-recording setups.
- Is less sensitive to handling than many condenser microphones.
- Can capture both the reporter and guest when held between them.
A reporter microphone is not the same as a shotgun microphone. A shotgun mic aims to reject sound from the sides. A handheld interview microphone usually accepts sound from a wider area. That makes it more forgiving when the speaker moves.
What this DIY microphone will and will not do
This project can produce a useful interview microphone, but it will not automatically match a broadcast microphone in every area. Commercial models may have better capsule matching, internal shock control, stronger housings, tighter quality control, and better wind protection.
Your finished microphone should work well when:
- The capsule is wired correctly.
- The cable uses a balanced connection.
- The handle holds the capsule firmly.
- The windscreen does not touch the capsule.
- You test the microphone before using it in an important interview.

Parts and Tools You Need
Gather the parts before you start. The exact size of the handle and capsule can change, but the electrical layout stays much the same.
Main parts
| Part | Recommended choice | Why it matters |
|---|---|---|
| Microphone capsule | Passive omnidirectional dynamic capsule | Gives the classic interview-mic pattern |
| Handle | Plastic, metal, or 3D-printed tube | Protects the wiring and gives you a grip |
| XLR connector | Three-pin male panel or cable connector | Connects to most professional mic inputs |
| Cable | Two-conductor shielded microphone cable | Carries a balanced audio signal |
| Windscreen | Foam or furry slip-on cover | Reduces wind and breath noise |
| Strain relief | Cable gland, rubber grommet, or clamp | Stops cable pulls from reaching the solder joints |
| Mounting material | Foam, rubber, or a small internal bracket | Reduces bumps and rattles |
| End cap or grille | Perforated cap, metal grille, or mesh | Protects the capsule while allowing sound through |
Choose a capsule with a clear data sheet. Check its impedance, sensitivity, size, and terminal labels. Do not assume that every two-terminal capsule has the same polarity or mounting method.
Tools
You will likely need:
- Soldering iron with a fine tip.
- Rosin-core electronics solder.
- Wire cutters and strippers.
- Small pliers.
- Heat-shrink tubing.
- Multimeter.
- Small screwdriver or hex key.
- Drill and bits, if you make the handle yourself.
- Safety glasses.
- A vise or clamp.
Use a ventilated work area. Wash your hands after handling solder, and follow the instructions for your solder product. Keep the hot soldering iron in a stable stand.
Suggested handle dimensions
A practical handheld mic handle may be about 1 to 1.5 inches in outside diameter and roughly 6 to 8 inches long. These are starting points, not strict requirements.
The capsule should sit at the top. The XLR connector can sit at the bottom. Leave enough room inside for:
- The capsule terminals.
- Solder joints.
- Cable bends.
- Strain relief.
- A small amount of soft mounting material.
Do not pack the inside tightly. A cramped handle can press against the capsule or pull on the wiring.

How to Wire the XLR Connector
A balanced XLR microphone connection uses three conductors:
- Pin 1: Shield or ground.
- Pin 2: Audio hot, often called positive.
- Pin 3: Audio cold, often called negative.
For a passive dynamic capsule, the basic connection is:
Dynamic capsule terminal A  ─── XLR pin 2
Dynamic capsule terminal B  ─── XLR pin 3
Cable shield                ─── XLR pin 1
If your capsule has a separate case or shield terminal, follow its data sheet. Do not connect a capsule case to a signal terminal unless the manufacturer specifies that arrangement.
Why balanced wiring helps
A balanced cable carries the audio signal on two conductors with opposite polarity. The receiving input can reject some noise that enters both conductors along the cable.
This helps when the cable runs near:
- Power supplies.
- Lighting equipment.
- Computers.
- Dimmer systems.
- Long AC power cords.
- Event production equipment.
Balanced wiring does not make a microphone immune to noise. Poor soldering, damaged cable, bad connectors, and nearby interference can still create problems.
Solder the cable
- Slide the XLR connector shell and strain-relief parts onto the cable before soldering.
- Strip only enough outer jacket to reach the connector.
- Separate the two insulated conductors from the shield.
- Connect the shield to pin 1.
- Connect one insulated conductor to pin 2.
- Connect the other insulated conductor to pin 3.
- Cover exposed conductors with heat-shrink tubing where needed.
- Inspect each joint for loose strands or accidental bridges.
- Reassemble the connector without crushing the cable.
Cable color is not universal. Use the printed pin numbers on the connector instead of trusting wire color.
Capsule polarity
Polarity can vary by capsule. If the capsule data sheet marks its positive terminal, connect that terminal to XLR pin 2 and the other terminal to pin 3.
If the capsule has no clear polarity marking, the microphone may still produce sound when wired either way. The main issue is phase when you combine it with another microphone. If two microphones are out of polarity, low frequencies may weaken when both record the same voice.
You can check polarity with the capsule documentation or compare it with a known microphone. Avoid applying random battery voltage to an unknown capsule.

Step-by-Step: Build the Microphone
Build the microphone in stages. Test the cable before closing the handle. This makes faults much easier to find.
1. Plan the layout
Place the capsule at the top of the handle and the XLR connector at the bottom. Mark:
- The capsule opening.
- The connector hole.
- Any ventilation or grille area.
- The cable path.
- The strain-relief point.
Keep the capsule away from hard surfaces. A little space around it can reduce mechanical contact noise.
2. Prepare the handle
Drill or cut the handle openings. Remove sharp edges with a file.
If you use a metal handle, make sure no sharp edge can cut the cable insulation. Add a rubber grommet where the cable passes through a hole.
If you use a conductive metal body, prevent accidental contact between the body and the signal terminals. The body may be connected to shield only if the design calls for it.
3. Mount the capsule
Hold the capsule with a small foam ring, rubber sleeve, or purpose-made bracket. The mounting should be firm enough to prevent rattles but soft enough to reduce bumps.
Do not cover the sound inlet. Do not press foam tightly against the capsule grille.
The capsule should point toward the top opening. If you use an omnidirectional capsule, orientation is less critical than it would be with a directional capsule, but the opening must still remain clear.
4. Connect the wires
Solder the two signal wires to the capsule terminals. Keep the bare wire short.
Use heat-shrink tubing if the terminals are close together. Let each joint cool before moving it. Tug each wire lightly after the solder has cooled. A wire that moves in the joint needs to be repaired.
5. Add strain relief
The cable needs mechanical support. A knot, clamp, cable gland, or rubber grommet can stop a pull from reaching the solder joints.
Do not rely on solder joints as cable anchors. Solder is conductive, but it is not a good replacement for strain relief.
6. Secure the XLR connector
Fit the XLR connector into the bottom of the handle. Make sure it cannot twist when you insert or remove a cable.
If the connector moves, it can transfer noise to the microphone and fatigue the wires. Use a locknut, bracket, or suitable adhesive made for the handle material.
7. Close the handle
Before closing the body, check that:
- No wire is trapped under a sharp edge.
- The capsule is not touching the handle.
- The cable has enough slack.
- The connector is secure.
- No bare conductor can touch another terminal.
- The windscreen will fit without pressing on the capsule.
Close the handle only after the electrical tests are complete.
8. Add the windscreen
Fit a foam or furry windscreen over the capsule area. A windscreen helps reduce wind blasts and plosive sounds from words that begin with strong “P” and “B” sounds.
A foam cover is useful indoors and in mild outdoor conditions. A furry cover can help more in moving air, but it is not a substitute for careful microphone placement.
How to Test the Finished Microphone
Test the microphone with a known working cable and input. Start with the recorder gain low, then raise it slowly while speaking near the capsule.
Test sequence
- Turn off phantom power for the first test.
- Connect the microphone to a recorder, mixer, camera adapter, or audio interface.
- Set the input to microphone level.
- Raise the gain gradually.
- Speak at a normal interview distance.
- Tap the handle lightly, not the capsule.
- Move the cable gently.
- Listen for hum, crackle, dropouts, or excessive handling noise.
- Record a short sample and play it back with headphones.
Many passive dynamic microphones do not need phantom power. Some balanced dynamic microphones tolerate phantom power, but a DIY build should be tested with phantom off first. Never send phantom power into an unbalanced adapter or a wiring setup that does not follow the equipment maker’s instructions.
What success sounds like
A working microphone should produce:
- Clear speech.
- A stable signal.
- No loud hum when the cable is still.
- No crackle when the connector is touched.
- Similar sound when the handle is held in different positions.
- Useful output without extreme gain.
The microphone may sound different from a studio condenser. That is normal. The goal is clean, intelligible speech for interviews.
Basic fault checks
| Symptom | Likely causes | First check |
|---|---|---|
| No sound | Open wire, wrong input, bad capsule, bad connector | Check XLR pin continuity |
| Very low output | Capsule sensitivity, broken conductor, wrong input setting | Test with another cable and input |
| Loud hum | Shield fault, damaged cable, nearby interference | Check pin 1 and cable routing |
| Crackle | Cold solder joint, loose connector, broken wire | Gently move each connection |
| Thin sound with two mics | Polarity mismatch | Reverse pins 2 and 3 on one mic only for a controlled test |
| Heavy handling noise | Rigid mounting, loose parts, cable movement | Add soft mounting and strain relief |
| Wind blasts | Missing or weak windscreen | Add a suitable foam or furry cover |
Do not use a continuity tester across a powered audio input. Disconnect the microphone first, and turn equipment off before changing wiring.

How to Improve the Design
The first version may work, but small mechanical changes can make it more useful in the field.
Reduce handling noise
Handling noise often comes from the body, connector, or cable rather than the capsule itself.
Try these changes:
- Add a soft internal capsule mount.
- Use a flexible cable near the handle.
- Add a strain clamp.
- Remove loose parts inside the body.
- Avoid a hollow handle that acts like a resonant tube.
- Hold the mic by the center of the handle rather than near the capsule.
Do not add heavy material directly against the capsule. That can reduce sensitivity or change the sound.
Improve wind protection
A foam windscreen reduces light wind and breath noise. For outdoor work in places such as parks, streets, sports fields, or coastal areas, use a larger windscreen when practical.
Keep the windscreen clean and replace it if it becomes hard, torn, or loose. A dirty windscreen can hold moisture and affect hygiene when several people share the microphone.
Make the handle easier to use
A handle with a slightly textured surface is easier to hold during a long interview. You can also add:
- A removable grip sleeve.
- A small label showing the microphone name.
- A colored ring for channel identification.
- A clip or loop for cable management.
Avoid adding parts that block the microphone opening or make the mic look like a different device. Clear labeling can help prevent a homemade unit from being mistaken for an official press credential or agency microphone.
Choose the right connector
A fixed male XLR connector at the bottom is common for a handheld microphone. A short attached cable can also work, but it creates another point that may wear out.
A replaceable connector is easier to repair. A locking connector is useful when the microphone will be used while moving.

Common Mistakes to Avoid
The most common errors are simple wiring and mechanical problems.
Wiring the shield to the wrong pin
Pin 1 is the shield connection. If the shield is connected to an audio pin, the microphone may hum or fail.
Always read the molded numbers on the XLR connector. Do not identify pins by looking at the connector from the wrong side.
Reversing pins 2 and 3
Reversing pins 2 and 3 usually does not stop one microphone from working. It can create a polarity mismatch with another microphone.
Mark the wiring before soldering. If two microphones are used together, keep their polarity consistent.
Leaving the cable without strain relief
A microphone cable receives repeated pulls. Without strain relief, the cable can break at the connector or capsule.
A strong solder joint cannot make up for poor mechanical support.
Using an unsuitable capsule
A small electret capsule may look similar to a dynamic capsule, but it normally needs bias voltage. It is not a direct replacement for a passive dynamic capsule.
If you use an electret or condenser capsule, follow its circuit requirements. That becomes a different project.
Making the body too resonant
A thin, hollow tube can add unwanted vibration and handling noise. Add suitable damping, but do not fill the entire body with loose foam.
Skipping a field test
A microphone that works on a workbench may fail outdoors. Test it with:
- The same camera or recorder you plan to use.
- The same cable length.
- The same windscreen.
- Headphones.
- Normal interview speech.
- Movement around the cable and handle.
Record a short sample before an important assignment.

Key Takeaways
- Use a passive omnidirectional dynamic capsule for a simple interview microphone.
- Wire the capsule to XLR pins 2 and 3, and connect the shield to pin 1.
- Add strain relief and soft capsule mounting.
- Test with phantom power off first.
- Use a windscreen for outdoor interviews.
- Check the microphone with headphones before relying on it for a real assignment.
- If you need wireless audio, a built-in recorder, or strong directional rejection, build or buy a different type of microphone.
FAQs
Can I make a reporter microphone without an XLR connector?
Yes. You can build one with a 3.5 mm or other connector, but the wiring depends on the input device. Many consumer inputs use different connections, plug-in power, or unbalanced wiring.
XLR is usually the simpler choice when you want compatibility with professional mixers, interfaces, and field recorders.
Does a DIY reporter microphone need a battery?
A passive dynamic microphone does not need a battery. An electret or condenser capsule may need power, depending on its design.
Check the capsule data sheet before connecting it to a recorder.
Can I use a directional capsule?
Yes, but the microphone will behave differently. A directional capsule can reduce some sound from the rear or sides, but it may sound less consistent when the speaker moves.
An omnidirectional capsule is often easier for shared interviews because it does not need to point precisely at one person.
Why is my microphone quieter than a store-bought microphone?
Capsules vary in sensitivity and output. A quiet signal may also result from a damaged cable, poor solder joint, incorrect input setting, or a capsule that needs power.
Test the microphone with a known working cable and input. If the signal remains very low, check the capsule specification.
Can I turn this into a wireless microphone?
Not by changing the capsule alone. You would need a compatible wireless transmitter, power source, connector, and matching receiver. Wireless systems also involve frequency rules and setup requirements in the United States.
Treat wireless construction as a separate project, and follow the transmitter manufacturer’s instructions and applicable FCC requirements.
Is a homemade microphone safe to connect to a camera?
It can be, if the connector and wiring match the camera input. Start with the camera input gain low and phantom power off. Do not force a connector or use an adapter with unknown wiring.
Check the camera manual before connecting a DIY microphone.
Conclusion
To make a reporter microphone, mount a passive omnidirectional dynamic capsule in a sturdy handle, wire it to a balanced XLR connector, add strain relief and a windscreen, and test it with the equipment you will use in the field.
The electrical design is simple. The mechanical details matter just as much. A secure capsule mount, strong cable support, clean solder joints, and a good windscreen will usually improve real-world results more than adding complex parts.
Build the first version as a test unit. Record speech, listen with headphones, repair any noise or handling problems, and only then use it for an important interview.