

Introduction
If you are using a Windows PC, Mac, iPhone, Android phone, gaming console, or USB microphone in the United States, you can test your mic in two steps: check whether the device detects your voice, then listen to a short recording or use live monitoring. A recording is usually safer and more accurate than turning on live playback, which can create loud feedback.
You do not need special equipment for a basic test. You need the microphone, a quiet room, and an app that can record audio. For live monitoring, you may also need headphones or a microphone with a headphone jack.

What It Means to Hear Yourself Through a Microphone
Hearing yourself can mean two different things:
- Playback test: You record your voice, then play it back.
- Live monitoring: You hear your voice in real time while you speak.
A playback test shows whether the microphone captured your voice. It also helps you judge volume, background noise, buzzing, echo, and distortion.
Live monitoring is useful during podcasts, music recording, gaming, video calls, and live streams. It lets you hear what the microphone is picking up before another person does.
The small delay between your voice and the sound in your headphones is called latency. A short delay may be harmless. A longer delay can make speaking feel strange or cause you to repeat words.
Why headphones matter
Do not test live monitoring through open speakers if you can avoid it. The microphone may pick up the speaker sound and send it back through the speakers. This creates a loop called feedback.
Feedback can cause:
- A loud squeal
- Echo
- A repeating voice
- Distorted sound
- Sudden volume spikes
Use headphones at a low volume. Keep one hand near the mute button when you test a new setup.
The Fastest Way to Test a Microphone
The quickest method is to make a short recording and play it back.
- Connect the microphone.
- Place it near your normal speaking position.
- Open a voice recorder app.
- Record 10 to 15 seconds.
- Speak at your normal volume.
- Stop the recording.
- Play it back through headphones.
- Check the sound for clarity, volume, noise, and delay.
Say a fixed test line, such as:
“This is a microphone test. I am speaking at a normal volume from my usual position.”
This line helps you compare different microphones and settings later.
What a good test should sound like
A usable recording should have:
- Clear words
- A steady volume
- Little room noise
- No crackle or buzzing
- No harsh distortion when you speak loudly
- No large change in volume when you move slightly
Your voice does not need to sound exactly like it does inside your head. A microphone hears your voice from outside your body, so playback may sound thinner, deeper, or less familiar.
Test in the same position you will use later
A microphone can sound fine from 6 inches away but weak from 2 feet away. Test it at the same distance and angle you plan to use for calls, streaming, or recording.
Also test with the same accessories. A headset mic, USB mic, bluetooth headset, and built-in laptop mic may use different audio settings.

How to Test a Microphone on Windows 11 or Windows 10
Windows includes a microphone input test in Sound settings. The exact labels can vary by Windows version and device driver.
Check the microphone in Windows Settings
- Connect your microphone.
- Select Start.
- Open Settings.
- Select System.
- Select Sound.
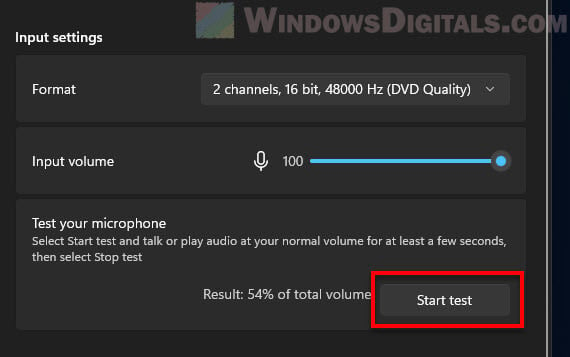
- Find the Input section.
- Choose the microphone you want to test.
- Speak normally.
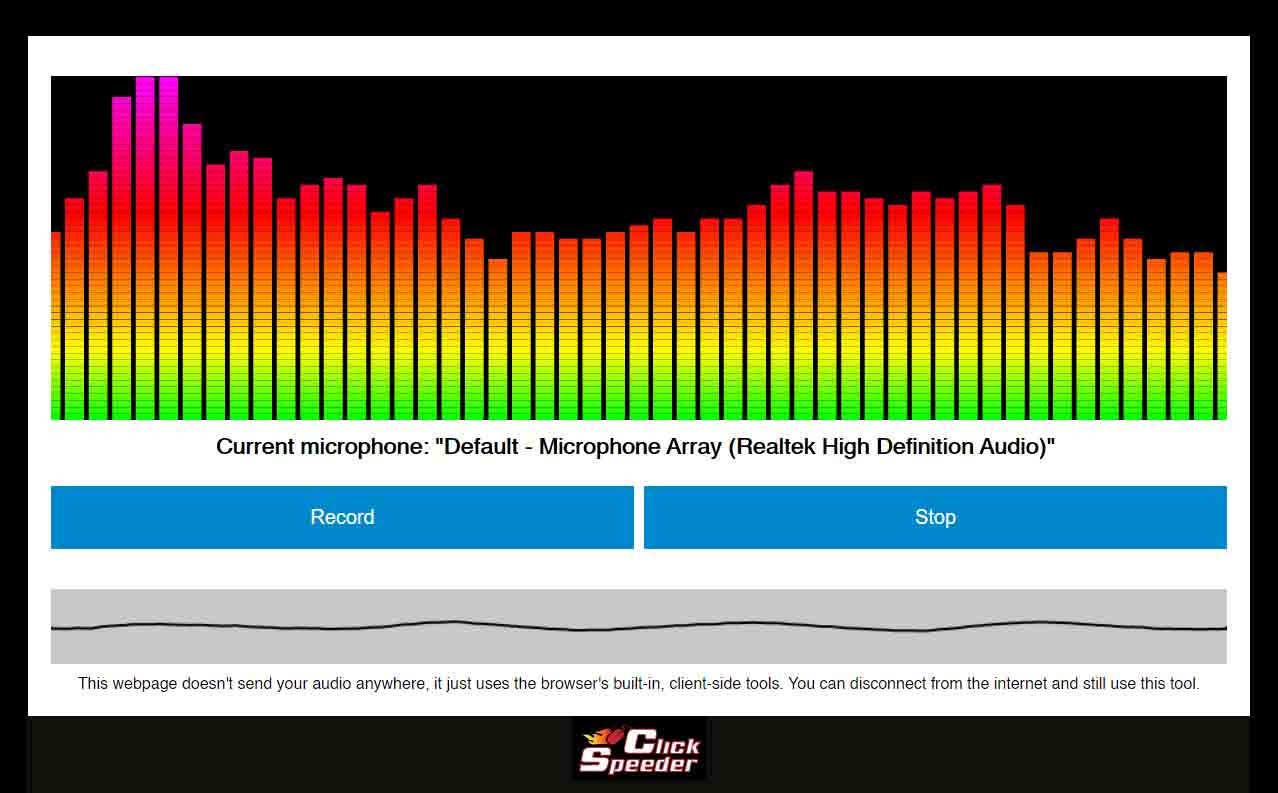
- Watch the input level or test meter.
If the meter moves when you speak, Windows is receiving sound.
This does not prove that your voice sounds good. It only shows that an audio signal is reaching Windows. Make a recording to check the actual sound.
Record and play your voice on Windows
Use Sound Recorder, which is included with current versions of Windows.
- Open Sound Recorder from the Start menu.
- Select the record button.
- Speak for 10 to 15 seconds.
- Stop the recording.
- Play it back with headphones.
If the recording is silent, return to Settings > System > Sound and check the selected input device. A headset may appear as a different microphone than the laptop or USB mic.
Hear yourself live with “Listen to this device”
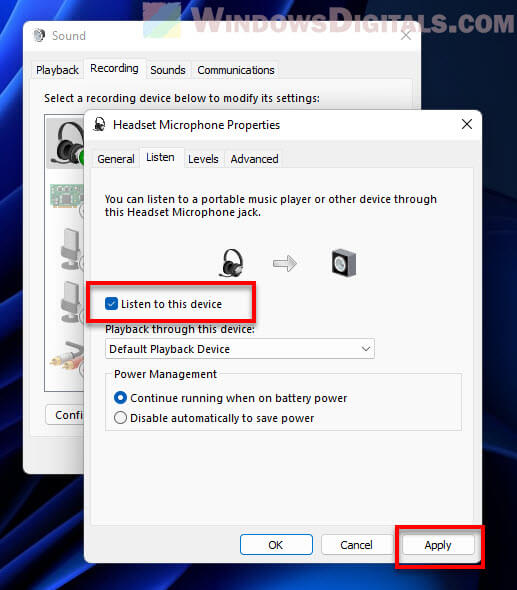
Some Windows systems let you route microphone audio to headphones through the classic sound control panel.
- Open Control Panel.
- Select Hardware and Sound.
- Select Sound.
- Open the Recording tab.
- Double-click your microphone.
- Open the Listen tab.
- Select Listen to this device.
- Choose your headphones as the playback device if Windows offers that option.
- Select Apply.
Speak softly at first. If you hear a loud echo or squeal, turn off the setting at once or mute the speakers.
This feature may add noticeable delay. If the delay is distracting, use a microphone or audio interface with direct monitoring instead.

How to Test a Microphone on a Mac
A Mac can show whether its microphone receives sound. For a clearer test, use Voice Memos, QuickTime Player, or another recording app.
Choose and check the microphone
- Open the Apple menu.
- Select System Settings.
- Select Sound.
- Open the Input section.
- Select the microphone.
- Speak at a normal level.
- Watch the input level meter.
If the meter responds, the Mac detects sound from that input.
Use the Input volume control to raise or lower the signal. Do not raise it so high that your voice becomes harsh or clipped.
Record yourself on a Mac
You can use Voice Memos for a quick test:
- Open Voice Memos.
- Select the record button.
- Speak for 10 to 15 seconds.
- Stop the recording.
- Play it back through headphones.
QuickTime Player can also record audio. Select File > New Audio Recording, choose the microphone from the input menu, and record a short sample.
Hear yourself while recording on a Mac
For live monitoring, an audio recording app may provide a monitoring control. GarageBand, for example, can monitor an audio track when the correct input and monitoring controls are enabled.
The name and location of the control can vary by app version. If you cannot find monitoring, record a short clip instead. Playback is often enough to find problems and creates less risk of feedback.

How to Test a Microphone in Zoom, Google Meet, Discord, and Other Apps
A microphone can work in Windows or macOS but fail inside a specific app. Each app may use its own input selection, permission, volume, and noise-control settings.
Zoom
In Zoom:
- Open Zoom settings.
- Select Audio.
- Choose the correct microphone.
- Use the microphone test option.
- Speak and listen to the sample playback.
Zoom may apply automatic gain control, noise suppression, or echo cancellation. These tools can change how your voice sounds. Test with the same settings you will use during a meeting.
Google Meet
In Google Meet:
- Join a meeting or open the pre-meeting screen.
- Open the microphone settings.
- Select the correct microphone.
- Speak and watch the input indicator.
- Ask another participant whether your voice is clear, if needed.
Use headphones if you hear an echo. The echo may come from another participant’s speakers, not from your microphone.
Discord
In Discord:
- Open User Settings.
- Select Voice & Video.
- Choose the input device.
- Use the mic test feature if available.
- Speak at a normal volume.
- Adjust input sensitivity or input volume only after confirming the correct device.
Discord may use automatic input sensitivity. A setting that is too strict can cut off quiet words. A setting that is too open can send keyboard noise and room sound.
Other apps
Look for settings named:
- Microphone
- Input device
- Audio
- Voice
- Test mic
- Mic check
- Input level
If an app does not offer a microphone test, record yourself with a system voice recorder. This separates a hardware problem from an app setting.

How to Hear Yourself in Real Time
Use live monitoring only when you need immediate feedback. A recording is better for a basic check.
Method 1: Use direct monitoring
Some USB microphones and audio interfaces have a headphone jack and a control called:
- Direct monitor
- Monitor mix
- Input/playback mix
- Hardware monitoring
Connect headphones to the microphone or interface. Turn the monitor control up slowly. Direct monitoring usually avoids computer delay because the sound goes from the microphone to the headphones inside the device.
This is often the best method for recording speech, singing, or instruments.
Method 2: Use software monitoring
Some recording and communication apps can send your microphone signal back to your headphones. This works without special hardware, but it may add latency.
Software monitoring is suitable when:
- The delay is very short
- You need to hear effects or processing
- Your app supports a stable audio setup
It may be unsuitable when:
- Your voice sounds doubled
- You hear a clear echo
- The delay makes speech uncomfortable
- Your computer is under heavy load
Method 3: Use a phone or tablet recording app
On an iPhone or Android device, the simplest test is to use the built-in voice recorder or camera app.
- Open the recorder or camera.
- Record a short clip.
- Speak at the distance you plan to use.
- Play the clip with headphones.
Most phones do not offer a simple, system-wide live microphone monitor. A compatible audio interface or a specific app may be needed for real-time monitoring.
A safe monitoring sequence
- Plug in headphones.
- Set headphone volume low.
- Enable monitoring.
- Speak quietly.
- Increase volume only until you can hear yourself.
- Stop if you hear feedback.
- Disable monitoring when the test ends.
Microphone Test Results: What They Mean
Use the symptom to guide the next check.
| What you hear or see | Likely cause | First check |
|---|---|---|
| No meter movement | Wrong input, muted mic, blocked permission, or bad connection | Select the correct input and check permissions |
| Meter moves, but recording is silent | App is using a different microphone | Choose the input inside the app |
| Very quiet voice | Mic is too far away or input level is low | Move closer and raise input level slightly |
| Loud, harsh voice | Input gain is too high | Lower the input level |
| Crackling or clicks | Cable, port, driver, wireless link, or overload issue | Try another port and lower the level |
| Constant hiss | Room noise, USB power noise, or a noisy input | Test in a quiet room and try another connection |
| Echo during a call | Speakers are feeding the microphone | Use headphones and lower speaker volume |
| Delayed voice | Software monitoring latency | Use direct monitoring or turn monitoring off |
| Voice cuts out | Noise suppression or input gate is too aggressive | Lower sensitivity or disable the filter for testing |
| One side is missing | Mono or stereo routing problem | Check channel and app input settings |
A moving level meter is only a first check. The playback recording is the better judge of sound quality.
Avoid clipping
Clipping happens when the input signal is too loud for the audio system. It may sound rough, cracked, or flattened. Lowering the volume after recording will not fully repair clipped audio.
To test for clipping, say a few quiet words and then speak slightly louder. The level should rise without turning harsh or reaching the top of the meter.

Microphone Permissions and Connection Checks
If the microphone does not work, check permissions before replacing it.
Windows permissions
Open Settings > Privacy & security > Microphone. Make sure microphone access is enabled for the device and the app you are using.
macOS permissions
Open System Settings > Privacy & Security > Microphone. Allow access for the recording or calling app. Close and reopen the app after changing permission settings.
Mobile permissions
On iPhone, check Settings > Privacy & Security > Microphone. On Android, open the app permissions area and allow microphone access for the relevant app.
Hardware checks
Try these steps in order:
- Confirm that the cable is fully inserted.
- Check the microphone mute switch.
- Try another USB port.
- Remove a USB hub temporarily.
- Select the microphone in system sound settings.
- Close other apps that may control the microphone.
- Restart the app.
- Restart the device.
- Test the microphone on another compatible device.
For a Bluetooth headset, confirm that it is connected as an input device, not only as an output device. Bluetooth headsets may also switch to a lower-quality call mode when the microphone is active.

How to Get a More Accurate Microphone Test
A good test copies real use. Speak at the same distance, volume, and angle that you will use later.
Test these conditions:
- Normal speech
- A slightly louder sentence
- Quiet pauses
- Words with “p” and “b” sounds
- Keyboard or room noise, if it matters
- Headphones or speakers, if you will use them
Keep the microphone near mouth level, but do not aim it directly at a strong burst of air. A small angle can reduce popping. A pop filter or foam windscreen may help, but it cannot fix a wrong input setting.
Do not judge a microphone from one meter reading. Compare the recording, room noise, distance, and app processing. A quiet room and steady mic position often improve voice quality more than a small volume adjustment.

Common Mistakes to Avoid
Testing the wrong microphone
Many computers have several inputs. You may be testing the laptop mic while speaking into a headset mic. Read the full device name in the input menu.
Using speakers during live monitoring
Speakers can create feedback. Use headphones, start at low volume, and keep monitoring off unless you need it.
Raising gain too far
More gain does not always mean better sound. It raises your voice and background noise together. Move the microphone closer before making a large gain increase.
Trusting the level meter alone
A meter can move even when the sound is noisy, distorted, or coming from the wrong source. Always listen to a recording.
Changing many settings at once
Change one setting, then test again. This makes it easier to find the real cause.
Ignoring app processing
Noise reduction, echo cancellation, automatic gain, and voice gates can alter your sound. Check the raw recording when possible, then test the final app settings.
Key Takeaways
- Record 10 to 15 seconds and play it back with headphones.
- A moving input meter shows signal, not sound quality.
- Use headphones for live monitoring to avoid feedback.
- Direct monitoring usually has less delay than software monitoring.
- Check the input device and microphone permissions when a test fails.
- Test at the same distance and volume you will use in real life.
- Lower the input level if your voice sounds harsh or clipped.
FAQs
How do I test my microphone without downloading software?
Use the built-in Sound Recorder on Windows, Voice Memos or QuickTime Player on Mac, or the voice recorder and camera apps on a phone. Record a short clip and play it back.
Why can I hear myself twice?
You may have two monitoring paths active. For example, the microphone may be monitored by both the operating system and a recording app. Turn off one monitoring option. Echo can also come from speakers or another person in a call.
Can I hear myself without headphones?
Yes, but speakers can create feedback. If you must use speakers, keep the volume low, place the microphone away from them, and turn off live monitoring if you hear a squeal or echo.
Why does my microphone work in one app but not another?
The apps may use different input devices or permissions. Select the microphone inside the problem app, confirm system permission, and close other apps that may be using the microphone.
How loud should my microphone be?
Your voice should be clear without sounding rough or crushed. Speak at your normal volume and leave room for louder words. If the recording sounds harsh, lower the input level and test again.
Why is there a delay when I hear myself?
Software monitoring sends the sound through the computer and app before playing it back. Use direct monitoring on a compatible microphone or audio interface, or turn off monitoring during normal calls.
Conclusion
The most reliable microphone test is simple: choose the correct input, record a short sample, and listen with headphones. Use live monitoring only when you need real-time feedback, and begin with low headphone volume to prevent feedback.
If the test fails, check the input device, mute switch, connection, permissions, and app settings in that order. Once the microphone works, test it from the same position and at the same volume you will use for calls, recordings, gaming, or streaming.
