

A boom mic captures clear speech from above or below the speaker while keeping the microphone out of the camera frame. To operate one well, place the mic close to the speaker, aim it at the mouth or upper chest, move with the person, and monitor the sound with headphones.
Introduction
On a U.S. film set, news shoot, podcast production, or video project, the boom operator helps record speech that sounds natural and present. Good boom work does not depend on expensive gear alone. It depends on distance, angle, movement, room sound, and careful listening.
This guide explains how to operate a boom mic from setup to troubleshooting. It applies to a shotgun microphone on a boom pole, a handheld boom mic, and many small production microphones used with cameras or portable recorders in the United States.
What Is a Boom Mic?
A boom mic is a microphone held on a pole or arm. The pole lets the operator place the microphone near a speaker without showing the mic in the video frame.
The microphone itself may be a shotgun mic, hypercardioid mic, cardioid mic, or another directional model. The boom pole is only the support. It does not determine the microphone’s pickup pattern.
Common boom mic parts
A basic boom setup may include:
- A directional microphone
- A boom pole or boom arm
- A shock mount
- A windscreen or blimp
- An XLR cable
- A camera, audio recorder, or mixer
- Closed-back headphones
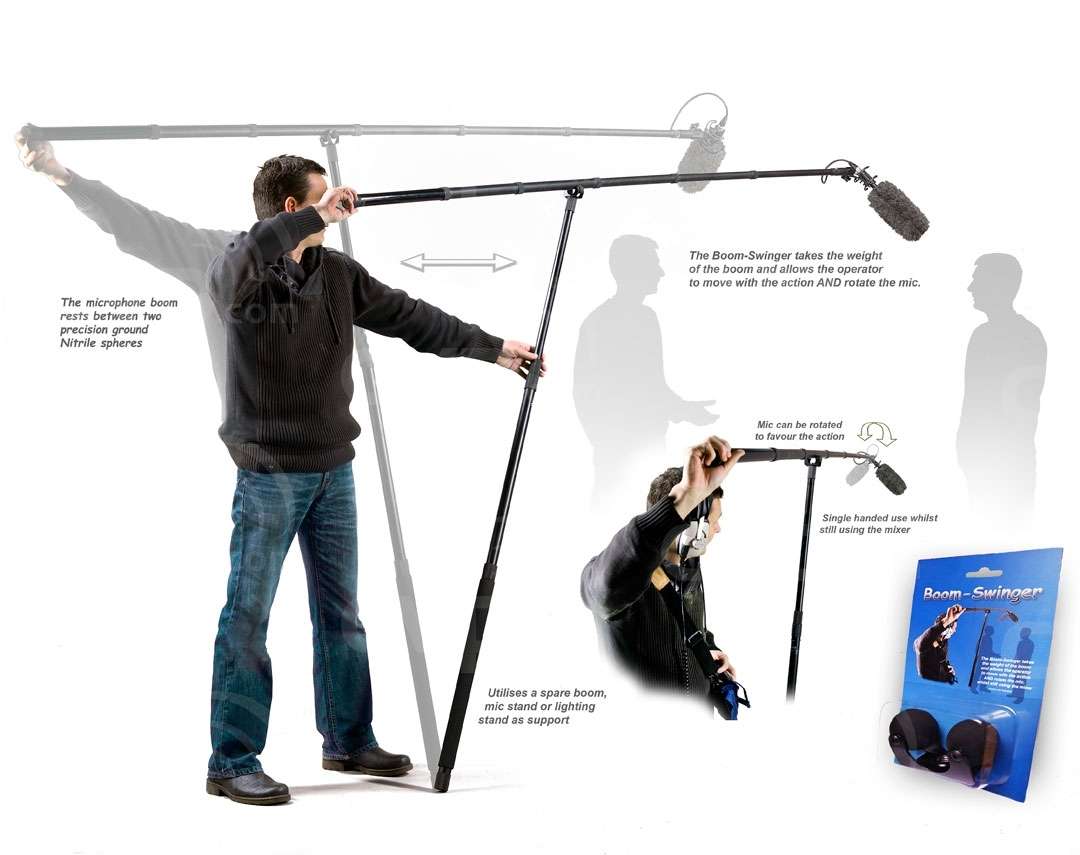
- A stand, harness, or boom holder for long takes
The shock mount reduces noise from handling and cable movement. The windscreen reduces air noise. The XLR cable carries a balanced audio signal from the microphone to the recording device.
Shotgun versus hypercardioid microphones
A shotgun microphone has a narrow pickup pattern that helps reject sound from the sides. It often works well outdoors or in controlled spaces.
A hypercardioid microphone has a tighter front pickup than a normal cardioid mic. It can sound more natural indoors than some shotgun microphones, especially in rooms with strong reflections.
Neither type works like a magic zoom lens. A boom mic does not make a distant speaker sound close. The main goal is still to place the microphone as near as possible to the speaker without entering the shot.

What You Need Before Operating a Boom Mic
Before recording, confirm that the microphone, recorder, cable, and power system are compatible. A short sound check can prevent a full take from being ruined by a dead battery or wrong input setting.
Basic equipment checklist
Use this checklist:
- Boom microphone
- Boom pole or boom arm
- Shock mount
- Wind protection
- Balanced XLR cable
- Recorder, mixer, or camera input
- Headphones
- Spare batteries if the mic needs them
- Gaffer tape or cable ties
- A stand or harness for longer work
For outdoor work, use more than a thin foam cover. Wind can overload a microphone capsule and create rumble that software cannot fully repair.
Check the microphone’s power needs
Many condenser boom microphones need 48-volt phantom power from the recorder, mixer, or camera. Some microphones use batteries instead. A few may support both.
Check the microphone manual before turning on phantom power. Vintage ribbon microphones and some unusual designs may require special care. Do not assume that every microphone uses the same power system.
Set up the recording device
Connect the microphone to a balanced input. Select the correct input source, then confirm that the channel is not muted.
Set the input to microphone level, not line level, unless the equipment manual says otherwise. A line-level setting can produce a very weak or distorted result.
Set a safe recording level
Ask the speaker to perform the loudest expected line. Adjust the gain while watching the meter and listening through headphones.
Leave headroom for sudden loud sounds. A peak near 0 dBFS can clip. Once digital audio clips, the lost detail usually cannot be restored. Many production teams keep normal speech well below the maximum level rather than recording as hot as possible.

How to Operate a Boom Mic Step by Step
The core method is simple: get close, aim carefully, keep the mic steady, and listen at all times.
1. Mount the microphone correctly
Place the microphone in a shock mount. Tighten the mount enough to hold the mic, but do not crush or twist its body.
Point the cable toward the rear of the microphone and secure it along the boom pole. Leave enough slack near the mount for movement. A loose cable can tap the pole or swing into the frame.
2. Add the right wind protection
Use a foam windscreen indoors when light air movement is the main concern. Use a furry cover, blimp, or full wind kit outdoors.
Do not rely on a foam cover in strong wind. Wind protection should surround the microphone without touching it. If the cover brushes the capsule or grille, it may create noise.
3. Position yourself before the take
Stand where you can see:
- The speaker
- The camera frame
- The boom pole
- Nearby lights and equipment
- The path the speaker may take
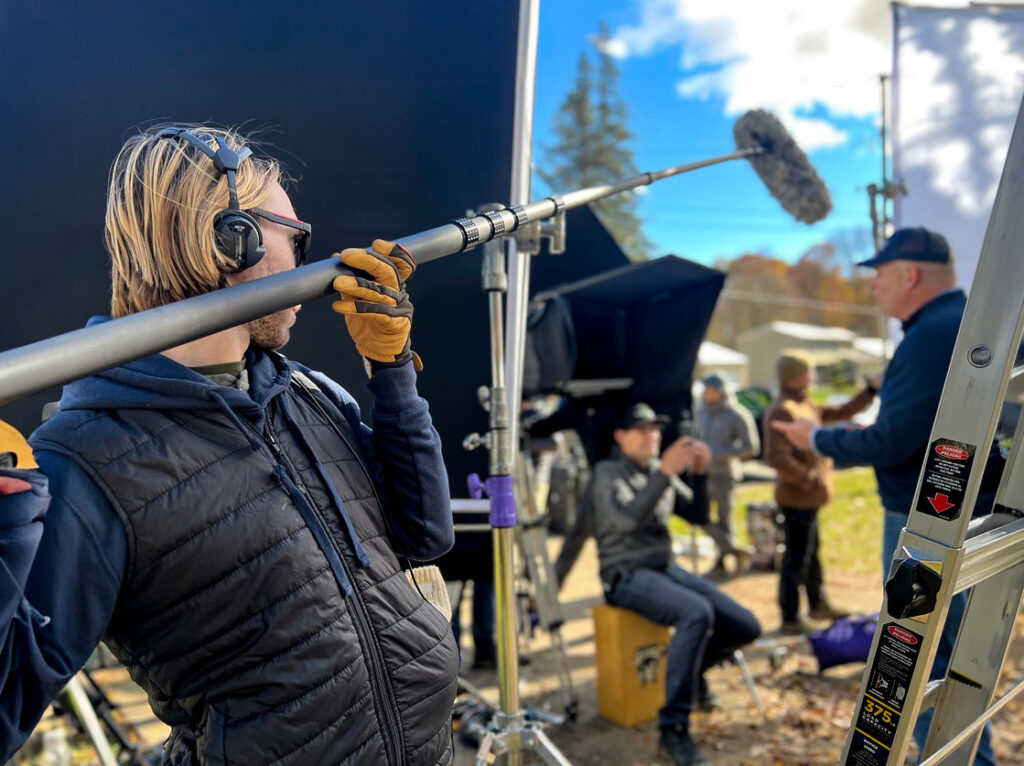
Keep your feet stable. Hold the pole with two hands when possible. A stable stance makes small adjustments smoother.
4. Place the microphone above the speaker
For most shots, hold the mic just above the top edge of the camera frame. Aim it down toward the speaker’s mouth or upper chest.
This position often gives a clear voice while keeping the microphone out of view. If the frame is tight, the mic may need to sit just outside the top edge. Ask the camera operator to confirm the safe area.
You can also boom from below. Aim the mic upward when the upper frame is crowded, when the light makes overhead work difficult, or when the scene calls for a lower microphone position.
5. Keep the microphone close
Distance has a major effect on speech clarity. Move the microphone closer instead of simply raising the gain.
A mic that is 12 inches from a speaker usually captures a stronger voice-to-room ratio than the same mic placed 36 inches away. This is a practical result of sound spreading through space: the farther the mic is from the speaker, the more room noise it tends to capture.
Do not push the mic so close that it enters the frame, causes shadows, or makes the speaker feel uncomfortable.
6. Aim at the sound source
Point the front of the microphone toward the speaker’s mouth. Directional microphones reject much of the sound from the sides and rear, but they work best when aimed correctly.
If the speaker turns their head, follow the movement with small, smooth changes. Do not swing the pole quickly. Fast movement can create handling noise and change the voice level.
7. Keep the microphone still
The best boom position is often boring. Keep the microphone in one steady place instead of making constant small movements.
Avoid:
- Tapping the pole
- Rubbing the cable
- Changing grip during speech
- Letting the cable hang loose
- Touching the microphone body
- Resting the pole against a wall or light stand
A shock mount reduces some handling noise, but it cannot hide rough movement.
8. Follow the speaker during movement
When the speaker walks, move with them while keeping the microphone at a similar distance and angle.
Plan the path before recording. Check for:
- Doorways
- Furniture
- Cables
- Steps
- Changes in ceiling height
- Other crew members
- Shadows cast by the microphone or pole
Move your feet rather than twisting your torso. This helps keep the microphone steady and reduces strain.
9. Monitor with headphones
Wear closed-back headphones for the entire take. Watch and listen for:
- Clothing rustle
- Traffic
- Air conditioners
- Wind
- Cable noise
- Electrical hum
- Distortion
- Sudden changes in distance
- The microphone entering the frame
The meter shows level, but headphones reveal problems that a meter cannot show. A clean-looking waveform can still contain handling noise or room echo.
10. Communicate with the camera operator
Before the take, agree on:
- The top and bottom frame limits
- Whether the boom will come from above or below
- The speaker’s movement
- Any planned camera movement
- The call for a retake
- Where the boom operator can stand
During a take, do not step into the camera path or touch the camera unless the crew has agreed on the move.

How to Hold a Boom Pole Without Noise or Strain
Hold the boom pole with both hands when the pole length and weight allow it. Keep one hand near the rear and one hand closer to the middle. Your front hand guides the position while the rear hand supports the weight.
Keep your elbows close to your body. Use your shoulders and legs to make large changes. Use your wrists only for small aim changes.
For a long interview, use a boom stand, C-stand with proper safety practice, or a support harness when suitable. Never place a heavy boom over people without securing the stand and checking its balance.
Keep the cable quiet
Run the cable along the boom pole. Secure it with purpose-made wraps or soft tape. Avoid tight, hard bends near the microphone connector.
A cable that hangs from the microphone can:
- Pull on the shock mount
- Create bumps
- Swing into the frame
- Transfer movement to the microphone
- Make the pole harder to control
Protect people below the boom
A boom pole can strike a person, light, camera, or set piece. Keep awareness of the full pole length, not just the microphone end.
Use extra care in low rooms, crowded spaces, and scenes with children. If you must hold the pole over people for a long time, change position safely or use a properly secured support system.

Boom Mic Placement for Common Scenes
The best position changes with the shot, room, speaker, and camera movement.
| Scene type | Starting position | Main adjustment |
|---|---|---|
| Seated interview | Above the frame, aimed down | Keep the mic close without entering the shot |
| Standing interview | Above the speaker’s mouth | Raise or lower the pole as the speaker moves |
| Walking shot | In front of or beside the speaker’s path | Keep distance and angle steady |
| Two-person scene | Centered between speakers or operated with planned turns | Watch who is speaking |
| Group scene | Above the group or near the active speaker | Use more than one mic if coverage is difficult |
| Outdoor scene | Close with full wind protection | Monitor wind and traffic |
| Small room | Boom from above with a suitable indoor mic | Listen for wall reflections |
Seated interviews
Place the microphone above the frame and aim it toward the speaker’s mouth. If the speaker leans forward, follow that movement slightly.
Do not point the microphone at the chest from a great distance. A closer position aimed toward the mouth usually gives clearer speech.
Two-person conversations
A single boom can cover two people if they sit close together and face a similar direction. The operator may need to turn the microphone between speakers.
For fast dialogue, two microphones may be more reliable. The choice depends on the frame, crew size, recording channels, and editing plan.
Walking scenes
Keep the mic at a steady distance from the speaker. If the camera moves backward, the boom operator may need to walk backward too. Only do this if the path has been checked and another crew member can help watch for hazards.
Group scenes
One boom may not cover every person well. People at the edge of a group may sound distant, while the center speaker sounds clear.
If the frame permits, use more than one boom or add hidden microphones. Record each source on a separate channel when possible.
Audio Settings That Help a Boom Mic Work
Good settings support good placement. They cannot replace it.
Gain
Set gain so normal speech is strong but not close to clipping. Have the speaker perform the loudest line before the take.
If the signal is too low, raising it later may also raise room noise. If the signal clips, lowering it later will not restore the original detail.
High-pass filter
A high-pass filter reduces low-frequency sound below a selected point. It can help reduce:
- Air-conditioning rumble
- Footsteps
- Road vibration
- Handling noise
- Wind rumble
Use it with care. A setting that is too high can thin the voice. Choose the filter on the recorder or mixer only after listening to the actual room.
Phantom power
Turn on 48-volt phantom power only when the microphone and audio device support it. Some condenser microphones need it. Battery-powered microphones may not.
If the microphone does not work, check power first, then the cable and input. Do not repeatedly switch power on and off while troubleshooting a loose or damaged connection.
Recording format
For production work, record a format that fits the camera and post-production workflow. Uncompressed PCM audio is common for video production.
Use the sample rate and bit depth required by the project. The most important setting is one that matches the rest of the recording chain.
One channel or two
A single boom mic may feed one channel. If a second microphone is connected, record each microphone to a separate channel when possible.
Separate channels give the editor more control. They allow one voice to be adjusted without changing the other.

Troubleshooting Boom Mic Problems
Start with the safest and simplest checks. Do not replace equipment before checking the signal path.
No sound
Check these items in order:
- Confirm that the microphone is connected at both ends.
- Confirm that the correct input is selected.
- Check whether the channel is muted.
- Turn on phantom power if the microphone needs it.
- Replace the battery if the microphone uses one.
- Test with a known-good cable.
- Test the microphone on another compatible input.
If another microphone works on the same cable and input, the first microphone may need service.
Low or distant sound
The microphone may be too far away or pointed away from the speaker. Move it closer and aim the front of the microphone toward the mouth.
Do not solve a distant mic by raising gain alone. That can increase room noise and make the recording sound hollow.
Distorted sound
Distortion may come from excessive gain, a loud source, a damaged cable, or a faulty microphone. Lower the input gain and repeat the loudest part of the performance.
If distortion remains at low gain, test the microphone, cable, and recorder separately.
Handling noise
Handling noise often comes from the pole, cable, mount, or operator’s grip. Secure the cable and avoid touching the microphone body.
Check the shock mount for damage. If the mount is hard, loose, or broken, it may not isolate the microphone well.
Wind noise
Use stronger wind protection and move the microphone out of direct wind when possible. A foam cover alone may not be enough outdoors.
Do not aim the mic into a breeze if you can change the position. Wind noise can remain even when the speech level looks normal.
Echo or hollow speech
The microphone may be too far from the speaker, or the room may have hard surfaces. Move closer, choose a more suitable indoor microphone, or reduce reflections with soft furnishings or acoustic treatment.
A shotgun microphone is not always the best choice in a small, reflective room. Its interference tube can respond poorly to strong side reflections.
Electrical hum
Hum may come from a cable, power supply, light, dimmer, or grounding issue. Move the audio cable away from power cables and test another cable.
Do not remove safety grounds or use unsafe electrical adapters. If the hum comes from production power, ask a qualified technician or the location’s electrical professional to inspect the setup.

Common Boom Mic Mistakes to Avoid
The most common mistake is holding the microphone too far away. A costly microphone placed several feet from the speaker may sound worse than a modest microphone held close.
Other mistakes include:
- Pointing the rear of the mic toward the speaker
- Ignoring the camera frame
- Letting the pole or cable create shadows
- Recording without headphones
- Holding the pole with one hand for a long take
- Forgetting wind protection
- Setting gain after the take starts
- Using a shotgun mic in a very reflective room without testing it
- Standing where the boom creates a shadow
- Moving the mic too much
- Failing to tell the crew when the mic enters the frame
- Placing an unsecured heavy boom over people
The “closer is better” rule has limits
Closer usually improves speech clarity, but it is not always better. A mic that is too close can enter the frame, capture strong mouth sounds, create a shadow, or make the speaker uncomfortable.
The best position is the closest safe, quiet, and out-of-frame position.
Do not trust the meter alone
A meter can show a healthy level while the headphones reveal clothing noise, traffic, echo, or a loose connector.
Use both tools. The meter helps prevent clipping. Your ears help judge whether the recording is usable.

A Simple Boom Mic Pre-Take Checklist
Use this short checklist before each scene:
- Is the microphone compatible with the recorder?
- Is the battery fresh or is phantom power set correctly?
- Is the XLR cable fully connected?
- Is the shock mount secure?
- Is the wind protection correct for the location?
- Is the microphone outside the camera frame?
- Is it aimed at the speaker’s mouth?
- Is it close enough?
- Is the gain set for the loudest expected sound?
- Are the headphones working?
- Is the cable secured?
- Is the boom path clear?
- Does the camera operator know where the boom will be?
Record a short test if time allows. Play it back through headphones before the real take.

Frequently Asked Questions
Should a boom mic be above or below the speaker?
Above is the usual starting position because it keeps the microphone out of the frame and away from clothing. Below can work when the upper frame is crowded or the lighting makes overhead placement difficult. In either position, aim the microphone toward the mouth.
How close should a boom mic be?
Place it as close as possible without entering the frame, creating a shadow, or causing a safety problem. The exact distance depends on the lens, frame size, microphone, room, and speaker movement.
Can one boom mic record two people?
Yes, if the people are close and the microphone can cover both voices. For fast dialogue or wide spacing, two microphones may provide more consistent coverage.
Do all boom microphones need phantom power?
No. Many condenser microphones need 48-volt phantom power, while some models use batteries or another power method. Check the microphone manual before connecting or powering it.
Is a shotgun mic always best for a boom?
No. Shotgun microphones can work very well outdoors and in controlled spaces. In small rooms with strong reflections, a hypercardioid microphone may sound more natural. Test the microphone in the actual location.
Why does my boom mic sound far away?
The microphone is often too far from the speaker, aimed incorrectly, or picking up too much room sound. Move it closer, aim it at the mouth, and listen for reflections or background noise.
Can I hold a boom mic with one hand?
You can for a very short take with a light setup, but two hands usually give better control and less handling noise. For long takes, use a suitable support system when safe.
Final Recommendation
To operate a boom mic well, focus on four habits: place it close, aim it correctly, keep it steady, and monitor with headphones. Check power, cables, wind protection, frame lines, and recording levels before the take.
Start with a short practice scene. Ask another person to watch the frame while you follow the speaker. With practice, you will learn to keep the mic close enough for clear speech without appearing on camera.
