

A proper electric guitar setup improves tuning, playability, tone, comfort, and fretboard performance.
Learning how to setup a electric guitar is easier than it first seems. With a tuner, screwdriver, ruler, and patience, you can adjust the neck, action, intonation, pickups, and hardware with care. This guide explains the full process in a safe order, using practical measurements and workshop tips to help your guitar feel better without risking costly damage.
What an Electric Guitar Setup Includes
An electric guitar setup is a series of small adjustments that help the instrument play cleanly and stay in tune. These adjustments work together. A change to the neck can affect string height, while a change to string height can affect intonation.
A complete setup usually includes:
• Inspecting the guitar for damage or loose parts
• Installing the correct strings
• Tuning the guitar to pitch
• Checking neck relief
• Adjusting the truss rod if needed
• Setting string action
• Adjusting pickup height
• Setting intonation
• Checking tuning stability and fret buzz
• Cleaning and lubricating key contact points
When learning how to setup a electric guitar, remember that every instrument is different. A Fender-style guitar, Gibson-style guitar, and modern locking-tremolo guitar may use different bridges, truss rods, and adjustment methods.

Tools You Need for a Guitar Setup
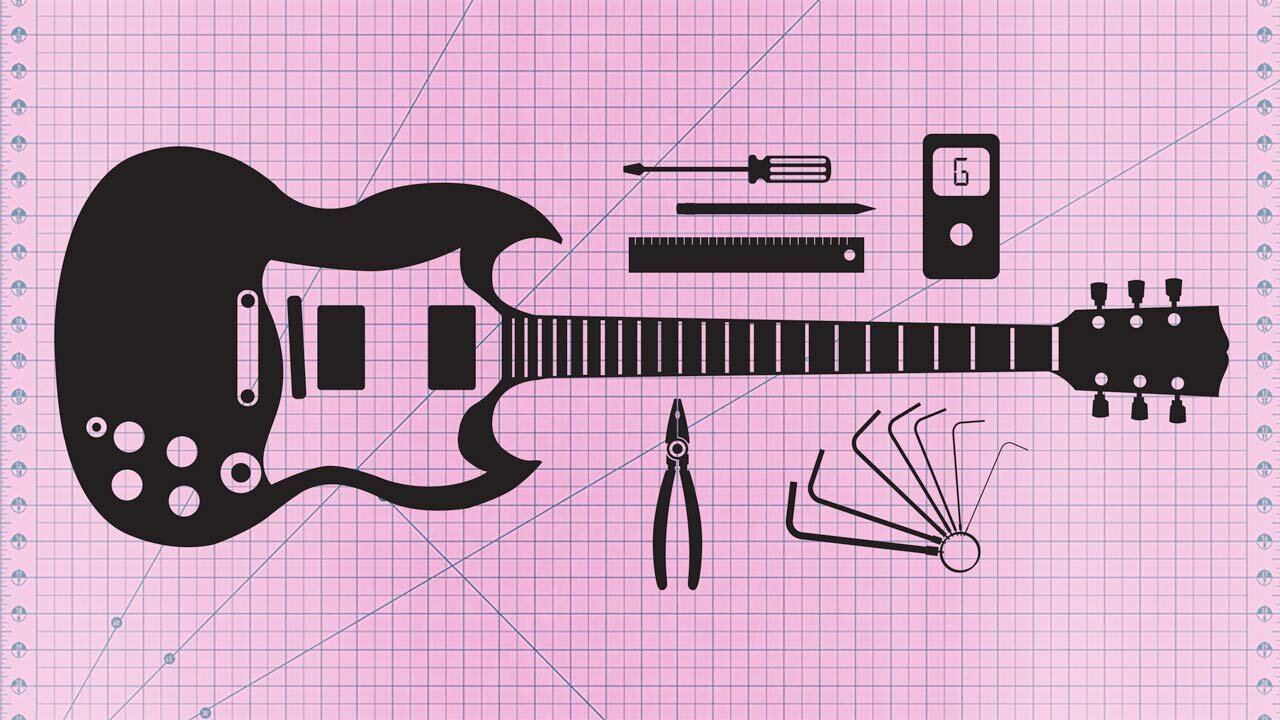
The right tools make the job safer and more accurate. You do not need a full repair-shop bench, but poor tools can damage screw heads, bridges, or the truss rod.
Keep these items nearby:
• Digital guitar tuner
• Fresh set of strings
• Phillips and flat-head screwdrivers
• Hex keys that fit your bridge and truss rod
• String action ruler with 64ths-of-an-inch or millimeter markings
• Capo
• Small feeler gauges
• Electronic contact cleaner
• Guitar polish and a clean microfiber cloth
• String winder and wire cutters
• Neck support or folded towel
• Small flashlight
A string action gauge is helpful because it gives you a direct measurement. Guessing by eye can work for a quick check, but it is not reliable when you want accurate results.
Never force a truss rod wrench. If the wrench does not fit fully, stop and find the correct size. A stripped truss rod nut can turn a simple setup into an expensive repair.
Prepare the Guitar Before Adjusting It
Place the guitar on a stable, padded surface. Support the neck so it does not hang over the edge of a table. Remove jewelry, keep drinks away, and make sure you have good light.
Start with a basic inspection:
• Look for cracks, loose bridge screws, and lifted frets.
• Check whether the neck is twisted or visibly bowed.
• Test each tuning machine for excessive movement.
• Inspect the nut for deep grooves or sharp edges.
• Check that the output jack and control knobs feel secure.
• Plug into an amplifier and test every pickup and control.
Write down any issue you find. This prevents you from confusing an existing problem with a setup problem. For example, a high fret can cause buzzing even when the neck and action are correctly adjusted.
If the guitar has serious structural damage, stop here. A setup cannot repair a broken headstock, loose bridge, badly worn frets, or a neck that needs specialized leveling.

Install the Right Strings
String choice affects tension, tone, action, and neck relief. A set of .010 to .046 strings is common for many electric guitars, but players often use lighter or heavier gauges for different styles.
Use the gauge recommended by the guitar maker when possible. If you change from .009s to .011s, the added tension may pull the neck forward. If you move to lighter strings, the neck may become too straight or even back-bowed.
Replace strings one at a time if the guitar has a floating tremolo. Removing every string at once can change the bridge angle and make the instrument harder to reset. On a fixed bridge, removing all strings is usually fine and gives you a chance to clean the fretboard.
Stretch new strings gently after installing them. Pull each string upward with light pressure along the fretboard, then retune it. Repeat this several times. Avoid aggressive stretching, which can damage the string or pull it sharply against the nut.
Tune the Guitar to Pitch
Tune the guitar before every major measurement. Standard tuning is E, A, D, G, B, E from the lowest string to the highest, but use the tuning you normally play.
The neck responds to string tension. Measuring relief with loose strings gives you information that does not apply when you play. This is one of the most important details in how to setup a electric guitar correctly.
Use a reliable tuner and tune upward to the note when possible. If you tune past the note, loosen the string below pitch and tune upward again. This helps reduce slack around the tuning post.
After tuning, play each string open and at the 12th fret. Listen for rattles, weak notes, dead spots, and unusual pitch changes. These observations will guide the next adjustments.

Check and Adjust Neck Relief
Neck relief is the small amount of forward curve in the neck. The neck should not be perfectly flat under normal string tension. A small amount of relief gives the strings room to vibrate without hitting the middle frets.
To check relief:
- Tune the guitar to pitch.
- Place a capo at the first fret.
- Hold the lowest string at the fret where the neck meets the body. This is often the 16th or 17th fret.
- Measure the gap between the bottom of the string and the top of the 7th or 8th fret.
Many guitars work well with roughly .006 to .012 inches of relief, or about .15 to .30 millimeters. Your playing style matters. A light player may prefer less relief, while a hard picker may need slightly more.
The truss rod controls this curve. Turning the adjustment nut clockwise usually reduces forward bow. Turning it counterclockwise usually adds relief. However, the exact effect can vary by design, so make small changes and recheck.
Use these safety rules:
• Turn the truss rod no more than one-eighth to one-quarter turn at a time.
• Retune the guitar after each adjustment.
• Wait briefly for the neck to respond.
• Never force a tight adjustment.
• Stop if the nut feels damaged, stuck, or unusually loose.
A common mistake I’ve seen is trying to remove all fret buzz with the truss rod. That can create a back-bowed neck and make the guitar play worse. Adjust the rod only for neck relief, not for every playing problem.
Set the String Action
String action is the distance between the strings and the frets. Low action can feel fast and comfortable, but it may create buzzing. High action can provide a strong, clean note but may make the guitar tiring to play.
Measure action at the 12th fret. Place the ruler on top of the fret and measure to the bottom of the string. Common starting points are:
• Low E string: about 1.75 to 2.25 millimeters
• High E string: about 1.25 to 1.75 millimeters
These are starting ranges, not strict laws. Blues players, rock players, jazz players, and metal players may choose different heights. The best setting is the lowest action that works cleanly with your attack and tuning.
Adjust the bridge after setting neck relief. On a six-saddle bridge, raise or lower each saddle with its height screws. On a Tune-o-matic bridge, adjust the bridge posts. On a two-point tremolo, change the overall bridge height carefully and keep the bridge balanced.
After each small adjustment:
- Tune the guitar.
- Play every fret on every string.
- Listen for buzz and dead notes.
- Test both soft and hard picking.
- Raise the action slightly if the buzz is too strong.
Some fret buzz is normal when playing unplugged. The amplifier may hide mild mechanical noise. What matters is whether the buzzing affects sustain, volume, tone, or your normal playing experience.
Adjust Pickup Height
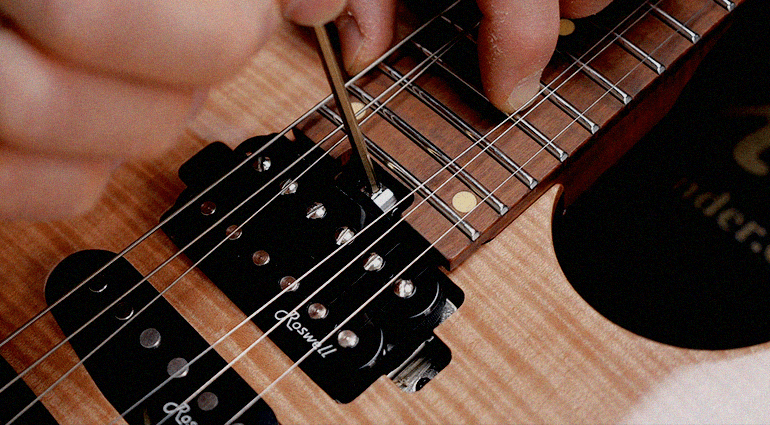
Pickup height affects output level, volume balance, clarity, and magnetic pull. Pickups that sit too close to the strings can cause warbling notes, poor sustain, or strange pitch movement. Pickups that sit too far away may sound weak.
Begin with the pickup manufacturer’s recommended measurement. If no specification is available, fret the last fret and measure from the top of the pole piece to the bottom of the string. A common starting point is around 1.5 to 2.5 millimeters on the treble side and 2 to 3 millimeters on the bass side, but pickup designs vary.
Use your ears as well as a ruler:
• Raise a weak pickup slightly.
• Lower a pickup that sounds harsh or compressed.
• Balance the neck and bridge pickup volumes.
• Check that the bass side is not overpowering the treble side.
• Test clean and overdriven amplifier settings.
Single-coil pickups often need more attention to magnetic pull than humbuckers. If a fretted note sounds unstable or has a strange pulsing quality, lower the pickup and test again.
Pickup adjustment is one of the easiest parts of how to setup a electric guitar, but it can make a major difference. Make small changes, because a quarter turn can be clearly audible.

Set the Guitar’s Intonation
Intonation helps the guitar play in tune across the fretboard. If the open string is tuned correctly but the note at the 12th fret is sharp or flat, the saddle needs adjustment.
Follow this process for each string:
- Install fresh strings and tune accurately.
- Play the open string and confirm its pitch.
- Play the note at the 12th fret using normal pressure.
- Compare the fretted note with the 12th-fret harmonic.
- If the fretted note is sharp, move the saddle away from the neck.
- If the fretted note is flat, move the saddle toward the neck.
- Retune and repeat the test.
The 12th-fret harmonic gives you a useful reference because it represents the octave point of the string. Pressing too hard can make the fretted note sharp, so use your normal playing pressure.
Adjust one string at a time. Each saddle movement changes the string’s speaking length, so retuning is required after every change. A few small turns can make a noticeable difference.
Some guitars cannot achieve perfect intonation because of worn frets, incorrect neck geometry, poor string installation, or a badly cut nut. Aim for a practical result rather than mathematical perfection. Your tuner may show tiny changes that your ears cannot hear in real playing.

Check the Nut and Tuning Stability
The nut guides the strings from the fretboard to the tuning machines. If the slots are too high, first-position chords feel sharp and difficult. If the slots are too low, open strings may buzz.
A basic nut-slot test is simple. Fret a string between the second and third frets, then tap it lightly over the first fret. You should see a very small movement. No movement may indicate a slot that is too low. A large gap may mean the slot is too high.
Nut filing requires special files and careful control. Do not deepen slots with household tools. Removing too much material can ruin the nut and create permanent open-string buzz.
For tuning stability, apply a small amount of suitable lubricant to the nut slots and string contact points. Graphite can help in some cases, but it is not a cure for poorly cut slots. Locking tuners, a well-cut nut, correct winding, and stable hardware matter more.
If you use a tremolo system, stretch the strings fully and check the bridge balance. A floating bridge should return to its resting position after moderate tremolo use. If it does not, inspect the springs, knife edges, posts, and locking nut.
Inspect Frets and Fret Buzz
Fret buzz has many possible causes. It may come from low action, insufficient relief, a high fret, uneven frets, loose hardware, or an incorrectly cut nut.
Play every note on every string. Mark problem areas with removable tape. Pay attention to whether the buzz happens only on one fret or across a wide section of the neck.
These patterns can help:
• Buzz near the first few frets may point to low nut slots or back bow.
• Buzz around the middle frets may point to insufficient relief.
• Buzz in one small area may point to a high or uneven fret.
• Buzz above the 12th fret may relate to action, fret wear, or bridge height.
• Rattling that changes when you touch a control may come from loose hardware.
Do not file frets unless you understand fret leveling and crowning. A setup can address many playing issues, but fretwork is a separate repair skill. When in doubt, ask a qualified guitar technician for an inspection.
Test the Guitar After the Setup
A setup is not finished when the measurements look correct. You must test the instrument as a player would use it.
Plug into your normal amplifier and try:
• Clean chords
• Single-note lines
• Bends above the 12th fret
• Power chords
• Open chords
• Palm-muted notes
• Soft picking and hard picking
• Neck, middle, and bridge pickups
• Volume and tone controls
Test the guitar while seated and standing. A strap can change your playing angle, and some neck issues become easier to notice in one position.
Play along with a tuner, backing track, or familiar song. Technical measurements help, but your hands and ears make the final decision. When learning how to setup a electric guitar, the goal is not to copy someone else’s numbers. The goal is a guitar that responds well to your style.
Common Guitar Setup Mistakes to Avoid
Many setup problems come from changing too much at once. Make one adjustment, measure the result, and write down what you did.
Avoid these mistakes:
• Adjusting the truss rod without tuning the guitar first
• Turning the truss rod too far in one movement
• Setting action before checking neck relief
• Setting intonation with old or stretched-out strings
• Using the wrong screwdriver or hex key
• Filing the nut without proper nut files
• Raising pickups to fix a weak amplifier signal
• Ignoring a high fret or loose hardware
• Removing all strings from a floating tremolo without preparation
• Trusting measurements while ignoring how the guitar feels
One useful habit is to photograph the original setup before making changes. You can also measure the action and relief first. If the result is worse, you have a reference point for returning to the earlier settings.
Patience matters. A setup is more like tuning a recipe than flipping a switch. Small changes add up.
When to Hire a Guitar Technician
A home setup is suitable for routine adjustments, but some jobs need professional tools and experience. Seek help when the guitar has a serious structural or fret problem.
Contact a qualified technician if:
• The truss rod will not turn safely.
• The neck has a severe twist or back bow.
• The bridge is lifting from the body.
• Frets are badly worn, loose, or uneven.
• The headstock is cracked.
• The nut needs replacement or precise filing.
• A floating tremolo will not balance.
• Intonation remains far off after correct adjustments.
• The guitar has electrical faults beyond basic cleaning.
A professional setup can save money when the alternative is damaging the instrument. It also gives you a useful baseline. After watching the process, you can often handle basic maintenance at home.
The limitation of any online guide is that it cannot feel the neck, inspect every fret, or hear the guitar in person. Use these steps for careful maintenance, not as a substitute for expert repair when the instrument shows serious problems.
How Often Should You Setup an Electric Guitar?
Most players benefit from checking their guitar every few months or whenever the seasons change. Wood responds to temperature and humidity, so action and relief can shift over time.
You may need a setup sooner when:
• You change string gauge.
• You change tuning often.
• You move to a different climate.
• Fret buzz suddenly appears.
• The guitar feels harder to play.
• Notes sound out of tune higher up the neck.
• The bridge or neck has been adjusted.
Store the guitar away from direct heat, air vents, and damp areas. A stable room environment helps reduce movement in the neck and body. Many guitar makers recommend moderate indoor humidity, often near 45 to 55 percent, though the ideal range depends on the instrument and local conditions.
Regular cleaning also helps. Wipe strings and the bridge after playing, and use products made for the guitar’s finish and fretboard material. Do not use household furniture polish on a guitar unless the manufacturer specifically approves it.
A Simple Setup Order to Remember
The correct order prevents one adjustment from undoing another. Use this sequence each time:
- Inspect the guitar.
- Install the correct strings.
- Tune to your playing pitch.
- Check and adjust neck relief.
- Set string action.
- Adjust pickup height.
- Set intonation.
- Check the nut and tuning stability.
- Test every fret and control.
- Record the final measurements.
This order is the heart of how to setup a electric guitar. Relief affects action, action affects intonation, and string tension affects nearly every measurement. Skipping steps often leads to repeated work.
Keep a setup record in a notebook or phone. Note the string gauge, tuning, relief, action, pickup height, and date. Over time, you will learn what settings suit your hands and your guitar.
Frequently Asked Questions About How to Setup a Electric Guitar
How often should I set up an electric guitar?
Check your guitar every few months, after changing string gauge, or when the weather changes sharply. A setup is also useful when you notice fret buzz, poor tuning, high action, or weak intonation.
What tools do I need to setup an electric guitar?
You need a tuner, fresh strings, screwdrivers, correctly sized hex keys, an action ruler, a capo, and a clean cloth. Feeler gauges, lubricant, and a neck support make the work more accurate and safer.
Should I adjust the truss rod or bridge first?
Adjust neck relief before setting bridge height. The neck curve affects string action, so setting the bridge first may force you to repeat the work.
How do I know if my guitar action is too high?
Measure from the top of the 12th fret to the bottom of the string. If the guitar feels difficult to fret or bends feel uncomfortable, the action may be too high, but fret wear and neck relief should also be checked.
Why does my electric guitar buzz after a setup?
Buzz can result from low action, insufficient neck relief, a high fret, a low nut slot, or loose hardware. If the buzz occurs in one small area, the frets may need professional inspection.
Can I setup a guitar without removing the strings?
You can make some adjustments with the strings installed, and you should keep them at playing tension when checking relief and intonation. However, changing strings or cleaning the fretboard may require removing them.
How do I set guitar intonation?
Tune the open string, then compare the fretted 12th-fret note with the 12th-fret harmonic. Move the saddle away from the neck if the fretted note is sharp, or toward the neck if it is flat.
Conclusion
A good electric guitar setup brings the instrument into balance. Start with fresh strings and correct tuning, then check neck relief, set action, adjust pickups, and finish with intonation. Make small changes, use the right tools, and stop when an adjustment feels unsafe.
You do not need to chase perfect numbers. The best setup is one that stays in tune, feels comfortable, sounds clear, and matches your playing style. Start with careful measurements today, and share your setup results or questions with other guitar players.