

Connect a wireless mic by pairing its transmitter with the receiver, then plugging the receiver into your camera, speaker, or phone.
Learning how to connect wireless mic systems is easier when you understand the signal path. The microphone sends audio to a receiver, and the receiver sends that audio to your device. This guide explains each step, common connection types, setup mistakes, sound checks, and practical fixes for clean, reliable audio.
How a Wireless Microphone Works
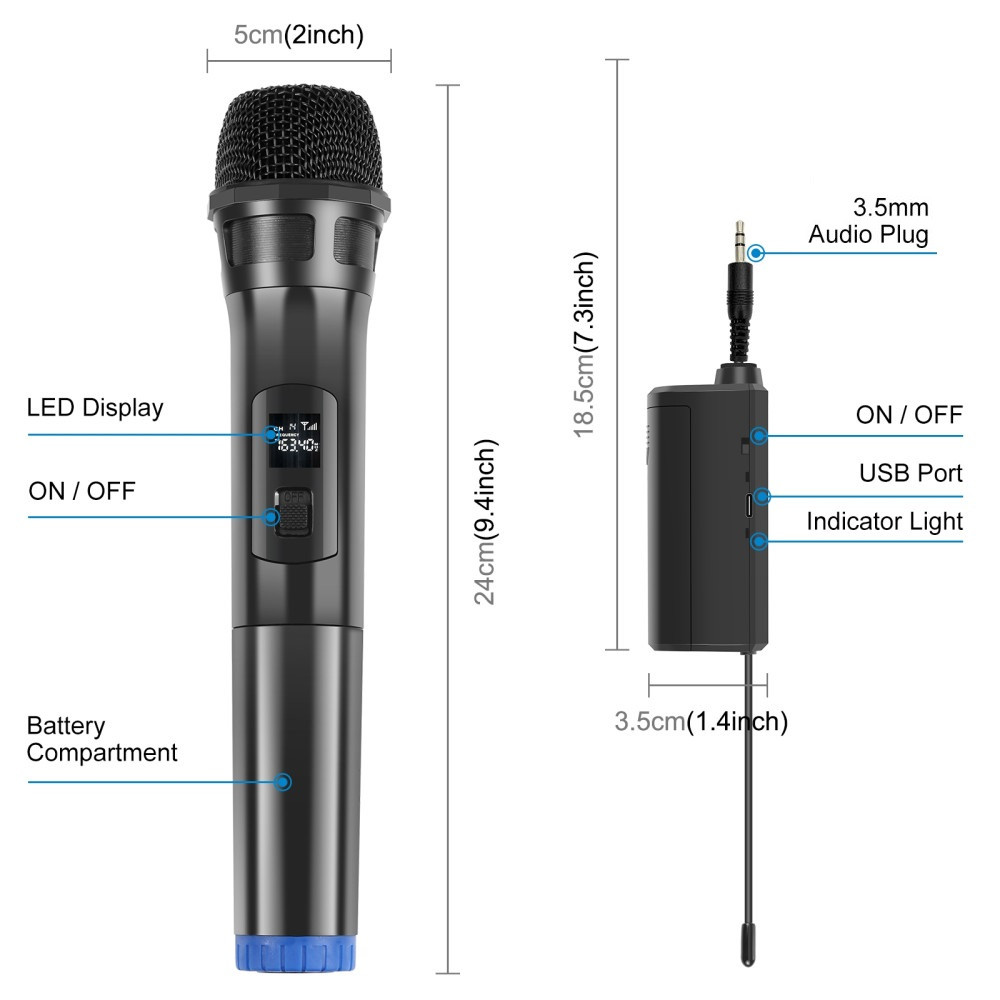
A wireless microphone system has three main parts:
• Microphone: Captures your voice or sound. It may be a handheld mic, lavalier mic, headset mic, or built-in transmitter.
• Transmitter: Sends the microphone signal through radio frequency or Bluetooth. Some transmitters attach to a lavalier microphone.
• Receiver: Picks up the wireless signal and sends it to a camera, mixer, speaker, computer, or phone.
Think of the system like a short bridge. Your voice travels across the bridge from the transmitter to the receiver. If either side is off, unpaired, out of range, or connected to the wrong input, you will not hear clear audio.
Most professional wireless microphone systems use a dedicated transmitter and receiver. Some consumer microphones use Bluetooth, but Bluetooth mics do not always work well with cameras, mixers, or public address systems. Always check the connection type before buying or setting up a mic.

What You Need Before Connecting a Wireless Mic
Before you connect a wireless mic, gather the correct parts and cables. A few minutes of preparation can prevent most setup problems.
You may need:
• A charged wireless microphone transmitter
• A charged or powered receiver
• The correct audio cable
• A camera, phone, computer, speaker, mixer, or audio recorder
• A compatible adapter for your device
• Headphones for monitoring
• Fresh batteries, if the system uses replaceable batteries
Check the connectors on both the receiver and the device. Common outputs include:
• 3.5 mm TRS: Often used with cameras and some audio recorders
• 3.5 mm TRRS: Common on smartphones and headsets
• XLR: Used with mixers, cameras, and professional audio equipment
• USB-C or USB-A: Used with computers and many modern phones
• 1/4-inch output: Common on speakers, amplifiers, and some mixers
A major mistake is assuming that every 3.5 mm cable is the same. A camera often expects a TRS connection, while a smartphone may require a TRRS connection or a USB audio adapter.
How to Connect Wireless Mic to a Camera
Connecting a wireless mic to a camera is common for interviews, weddings, news videos, and online content. Follow these steps in order.
Turn off or lower the camera audio input if needed.
Insert a fully charged battery into the transmitter and receiver.
Turn on the receiver.
Connect the receiver output to the camera microphone input.
Turn on the transmitter.
Pair the transmitter and receiver if they do not connect automatically.
Clip the microphone near the speaker’s upper chest, usually about 6 to 8 inches below the mouth.
Select an external microphone option in the camera menu.
Speak while watching the camera’s audio meters.
Adjust the receiver or camera input level until the voice is strong but does not reach the red or peak zone.
The receiver should sit where it has a clear path to the transmitter. Avoid placing it inside a closed camera bag or behind a large metal object. For the best result, keep the transmitter antenna away from phones, metal clips, and other wireless devices.
When learning how to connect wireless mic to a camera, the audio cable matters just as much as the wireless signal. Use a short, shielded cable with the correct plug type. A cable made for headphones may not carry the same signal correctly as a camera microphone cable.
Camera audio tips
• Use headphones while testing if your camera has a headphone output.
• Set the camera audio level manually when possible.
• Keep the voice peaks below 0 dB to avoid clipping.
• Record a short test clip before filming the full interview.
• Place the transmitter on the same side of the body as the receiver when possible.
• Keep clothing from rubbing against a lavalier microphone.

How to Connect Wireless Mic to a Phone
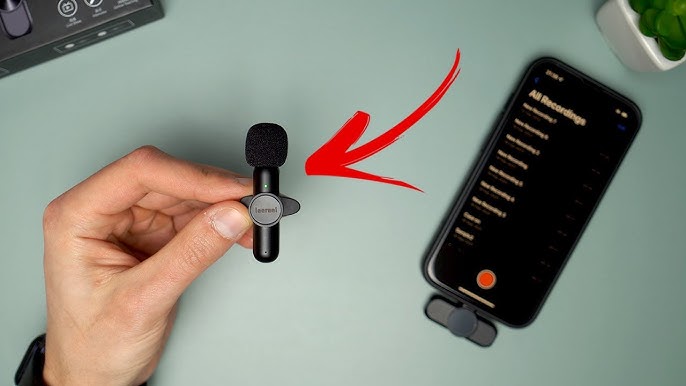
Many phones do not accept a standard microphone signal through their charging port without an adapter. This is why a wireless mic may appear connected but still record audio from the phone’s built-in microphone.
To connect a wireless mic to a phone:
Charge the transmitter and receiver.
Plug the receiver into the phone’s USB-C or Lightning port.
Use the adapter supplied by the microphone manufacturer.
Unlock the phone and open your camera or recording app.
Turn on the transmitter and receiver.
Pair the units if required.
Record a short test.
Play the clip back and confirm that the wireless mic recorded the sound.
Some wireless microphone kits use a receiver with a USB-C plug. Others use a 3.5 mm output. If your phone has no headphone jack, you may need a 3.5 mm to USB-C or Lightning audio adapter.
Avoid very cheap passive adapters. Some only support headphone output and do not support microphone input. A proper audio interface or manufacturer-approved adapter is safer.
If your phone displays a headset icon but records no sound, the adapter may have the wrong wiring standard. Try the receiver’s digital USB connection instead, or use an adapter that clearly supports microphone input.
How to Connect Wireless Mic to a Computer
You can connect a wireless mic to a computer for video calls, podcasts, livestreams, presentations, and voice recordings.
A USB receiver is the simplest option. Plug it into the computer, wait for the operating system to recognize it, and select it as the input device in your recording or meeting app.
For a receiver with a 3.5 mm or XLR output, use a USB audio interface. Connect the receiver to the interface, then connect the interface to the computer.
Follow these steps:
Connect the wireless receiver to the computer or audio interface.
Turn on the transmitter and receiver.
Open the computer’s sound settings.
Select the receiver or USB audio interface as the input.
Open the microphone settings in your recording app.
Speak into the mic and watch the input meter.
Set the input level so your voice is clear without distortion.
Applications such as Zoom, Microsoft Teams, OBS Studio, Audacity, and GarageBand may use their own audio input settings. Choosing the wireless mic in the computer settings does not always select it inside the app. Check both places.
For online meetings, use headphones when possible. They reduce feedback and help you notice problems before the other people on the call do.

How to Connect Wireless Mic to a Speaker or Mixer
A wireless microphone can connect directly to a powered speaker, PA system, audio mixer, or amplifier. The correct method depends on the receiver output.
For a mixer:
Connect the receiver’s XLR output to a mixer channel.
Turn down the channel gain and master volume.
Turn on the receiver and transmitter.
Speak into the microphone.
Raise the channel gain until the meter shows a healthy signal.
Raise the channel fader and master volume slowly.
Listen for feedback, noise, or distortion.
For a powered speaker, connect the receiver to a microphone input if the receiver has a suitable output. Do not connect a microphone-level output to an input that expects a very different signal without checking the speaker manual.
Some wireless receivers offer both microphone-level and line-level outputs. Use the output that matches the input. A level mismatch can make the sound too quiet, too loud, or distorted.
Keep the microphone behind the speaker whenever possible. If the microphone is in front of the speaker, the sound can loop back into the mic and create a loud squeal called feedback.

How to Pair a Wireless Mic and Receiver
Pairing allows the transmitter and receiver to communicate on the same channel. Many systems pair automatically, while others use a pairing button, infrared sync, or a menu.
A general pairing process looks like this:
Turn on the receiver.
Turn on the transmitter.
Press the pairing or sync button on the receiver.
Press the pairing button on the transmitter.
Wait for a connected icon, steady light, or matching channel number.
Speak into the microphone and check for signal activity.
The exact process varies by brand. Read the quick-start guide for your model because the button sequence may differ.
If the system uses manual channels, choose the same channel on both units. When using more than one wireless mic, each transmitter usually needs its own channel. Avoid selecting channels that overlap with another nearby system.
Digital wireless systems often show a link symbol or battery status. Analog systems may show an RF light and an audio light. The RF indicator means the receiver detects the transmitter. The audio indicator means it detects sound. If RF is present but audio is not, check the microphone, mute button, gain, and cable.

How to Connect Wireless Mic Without Interference
Wireless interference can cause crackling, dropouts, buzzing, or a complete loss of sound. The problem may come from nearby wireless systems, Wi-Fi equipment, metal barriers, low batteries, or excessive distance.
Use these practical steps:
• Keep the transmitter and receiver within the recommended range.
• Maintain a clear line of sight when possible.
• Avoid placing the receiver beside a Wi-Fi router.
• Keep the receiver away from large metal surfaces.
• Use fresh batteries or charge the system fully.
• Choose a clean channel before a live event.
• Keep antennas vertical when the manufacturer recommends it.
• Do not hide the transmitter under thick clothing.
• Turn off unused wireless devices near the audio setup.
Frequency coordination matters when using several wireless microphones. Two systems operating on poorly chosen frequencies can interfere with each other. For large events, use the manufacturer’s frequency planning tool or ask an audio technician to coordinate the channels.
A common lesson from hands-on audio setups is to test from the real performance position. A mic may work perfectly beside the receiver but fail when the speaker walks across a room. Always test movement, distance, and body blocking before the audience arrives.

How to Get Clear Sound From a Wireless Mic
Correct connection is only half the job. Mic placement and gain control have a major effect on sound quality.
For a lavalier microphone:
• Place it near the center of the chest.
• Keep it away from necklaces, zippers, and loose fabric.
• Hide the cable with a gentle loop, not a tight bend.
• Use a small windscreen outdoors.
• Point the mic toward the speaker’s mouth.
For a handheld microphone, hold it a few inches from the mouth. Do not cover the grille or antenna area. Moving the mic too far away makes the voice thin and causes room noise to become more noticeable.
Set gain in stages. Start with the transmitter gain, then adjust the receiver output, and finally set the camera, mixer, or computer input. If every stage is set too high, the audio will clip. If every stage is too low, you will hear hiss when increasing the volume later.
Record a test and listen with headphones. Audio meters can show a safe level, but they cannot reveal clothing noise, echo, hum, or a loose cable.
Common Wireless Mic Problems and Fixes
The receiver has no signal
Check that both units are powered on and paired. Confirm that the transmitter is not muted and that both devices use the same channel.
The mic works but the recording is silent
Check the cable and input selection. On a phone, make sure the adapter supports microphone input. On a camera or computer, select the external receiver as the audio source.
The voice sounds distorted
Lower the transmitter gain or the input level on the camera, mixer, or computer. Distortion caused by clipping cannot usually be fixed well after recording.
The audio cuts out
Move the receiver closer, improve line of sight, replace the batteries, and look for interference. Body blocking can also weaken a radio signal because the human body contains a large amount of water.
The sound is noisy
Check for clothing rub, electrical interference, a poor cable, or a low-quality adapter. Test the receiver with another cable and record in a quieter space.
There is a delay
Digital wireless systems may add a small amount of processing delay. A slight delay is normal, but a large delay may indicate a monitoring setting, app issue, or mismatch between separate audio and video devices.
Wireless Mic Safety and Legal Considerations
Wireless microphones transmit radio signals, so local rules may apply to the frequencies they use. In the United States, certain frequency ranges are regulated, and some frequencies may be shared with television, public safety, or other licensed users.
Use equipment approved for your region and follow the manufacturer’s frequency guidance. Do not change a transmitter’s frequency beyond its legal operating range without understanding the rules.
Also protect your hearing and your equipment:
• Start with low speaker volume.
• Keep batteries away from heat and moisture.
• Use a windscreen outdoors.
• Store the microphone in a dry case.
• Remove disposable batteries during long-term storage.
• Do not expose the receiver to rain unless it is designed for outdoor use.
Wireless systems have limits. Range claims are often measured in open conditions with little interference. Walls, crowds, metal structures, and other radio devices can reduce the real range.
A Simple Wireless Mic Setup Checklist
Use this checklist before recording or going live:
• Charge the transmitter and receiver.
• Confirm that the microphone is compatible with your device.
• Select the correct cable or adapter.
• Pair the transmitter and receiver.
• Choose the correct input on the camera, phone, computer, or mixer.
• Set a safe input level.
• Check the microphone position.
• Monitor with headphones.
• Walk through the expected recording area.
• Record and review a short test clip.
• Carry spare batteries and a backup cable.
This routine may seem basic, but it prevents stressful failures. In real events, the most damaging mistakes often happen before the speaker begins: a muted transmitter, an unselected input, or a dead battery.
Frequently Asked Questions About How to Connect Wireless Mic
Can I connect any wireless mic to any camera?
No. The microphone receiver must have an output that matches the camera input, and you may need a compatible cable or adapter. Check whether the camera accepts 3.5 mm, XLR, USB, or another connection.
Why is my wireless mic connected but not recording?
The receiver may be connected physically but not selected as the recording input. Check the device settings, app settings, mute controls, cable type, and input level.
Do wireless microphones need Wi-Fi?
Most dedicated wireless microphone systems do not need Wi-Fi. They use radio frequencies or a manufacturer-specific digital connection, while Bluetooth microphones use Bluetooth instead.
How far can a wireless microphone work?
The usable range depends on the model, frequency, obstructions, battery level, and interference. Open-space range is usually greater than indoor range, so test the mic at the distance you plan to use.
Should I use a wireless mic or Bluetooth mic?
A dedicated wireless microphone system is usually better for cameras, live sound, and professional video. Bluetooth can be convenient for phones and computers, but compatibility and audio delay may limit its use.
How do I stop feedback from a wireless microphone?
Keep the microphone behind the speakers and reduce the volume or equalization that causes the feedback. Also avoid pointing the microphone toward a speaker.
Conclusion
Knowing how to connect wireless mic equipment comes down to following the signal path: power the transmitter, power and pair the receiver, connect the receiver to the right input, and test the audio before recording. The correct cable, channel, mic position, and gain level can make the difference between clean speech and a ruined take.
Start with a short test in the real location. Check the sound with headphones, walk around, and keep a spare battery and cable nearby. If this guide helped, explore more audio setup tips or share your wireless mic questions in the comments.