

Increase microphone sensitivity by improving input gain, microphone placement, power, and room acoustics without causing clipping or hiss.
Learning how to increase microphone sensitivity is mostly about getting more usable signal, not simply turning one control higher. The right method depends on your microphone type, audio interface, operating system, distance from the mic, and background noise. This guide explains the safest settings, common mistakes, practical fixes, and ways to get a louder, cleaner recording.

What microphone sensitivity really means
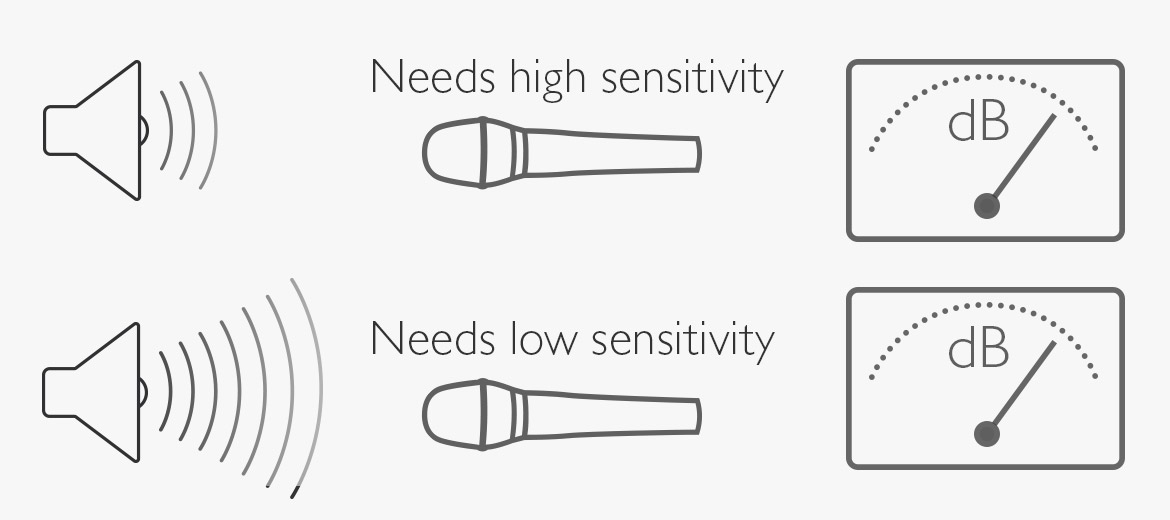
Microphone sensitivity describes how much electrical signal a microphone produces when it hears a specific sound level. A microphone with higher sensitivity creates a stronger output signal from the same sound source.
Sensitivity is not the same as volume. Volume is what you hear from speakers or headphones. Gain is the amount your interface or software boosts the microphone signal. These terms often get mixed up, but knowing the difference makes troubleshooting much easier.
For example, a quiet dynamic microphone may need a lot of preamp gain. A condenser microphone usually produces a stronger signal and needs less gain. A USB microphone may have a built-in preamp that you control with a knob or software slider.
There are three common ways to get more microphone output:
• Increase preamp gain on an audio interface or mixer.
• Move closer to the microphone and speak toward its active side.
• Use a clean inline booster or a more sensitive microphone.
A higher output is useful only when it remains clean. If the signal becomes harsh, distorted, or full of hiss, the system is too aggressive.

How to increase microphone sensitivity with input gain
The first step in learning how to increase microphone sensitivity is setting the correct input gain. Input gain controls how strongly the interface amplifies the microphone signal before it reaches your computer or recording software.
Follow these steps:
Connect the microphone to the correct input on your interface, mixer, or computer.
Open your recording software or the input control panel.
Set the input gain low before speaking.
Speak at your normal recording distance and volume.
Raise the gain slowly until your normal voice reaches a healthy level.
Watch the meter while speaking at your loudest expected volume.
For voice recording, speech peaks often work well around −12 dBFS to −6 dBFS in digital software. This leaves headroom for louder words, laughs, or sudden sounds. Avoid letting the meter reach 0 dBFS because digital clipping cannot be repaired easily.
If your voice remains quiet after raising the gain, check whether the correct microphone input is selected. Many computers have several input choices, and the wrong one may use a weak built-in microphone.
A useful rule is simple: raise gain until the signal is strong, then lower it slightly if loud sounds clip. Do not judge the level only through headphones. Always check the recording meter and listen to the recorded file.

Use microphone placement to create a stronger signal
Distance has a major effect on microphone level. Moving closer can increase the sound reaching the microphone without adding electronic noise.
For most spoken-word microphones, start with your mouth about 4 to 8 inches away. The exact distance depends on the microphone design, room noise, and the sound you want.
Try these placement tips:
• Aim the microphone toward your mouth, not toward your chest.
• Speak into the correct side of the microphone. Some models are side-address, while others are end-address.
• Keep the microphone slightly off-center to reduce sharp “p” and “b” sounds.
• Use a pop filter between your mouth and the microphone.
• Keep the microphone stand stable to prevent bumps and handling noise.
Getting closer can also make your voice sound warmer because of the proximity effect. This effect is common with directional microphones, especially cardioid models. However, standing too close may create boomy bass, plosive sounds, and uneven volume.
In my practical recording tests, moving a speaker from roughly 12 inches to 6 inches away often produced a bigger improvement than adding software gain. The sound became louder before the noise floor became noticeable. That is why placement should come before extreme gain adjustments.

Check the microphone type and required power
Different microphones need different levels of support. Understanding the microphone type can help you choose the best way to increase microphone sensitivity.
Dynamic microphones
Dynamic microphones are strong, reliable, and popular for podcasts, live vocals, and untreated rooms. Many have lower output levels, so they may require more interface gain.
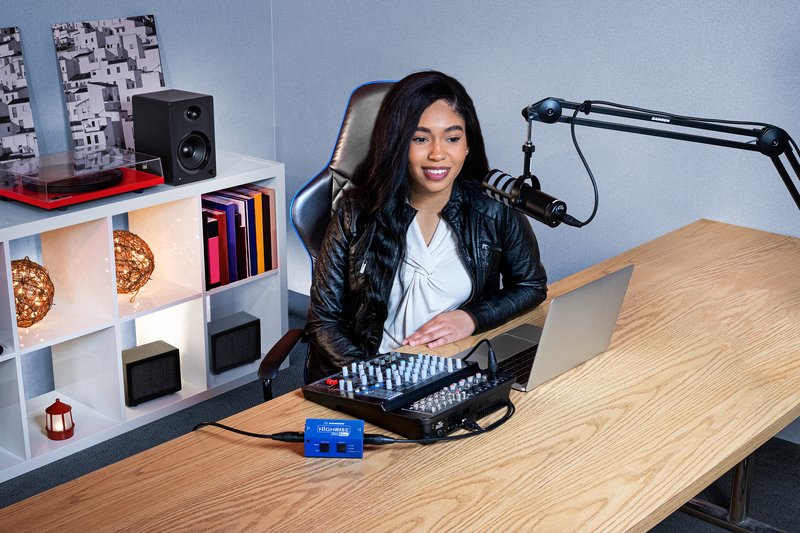
If your interface struggles to produce enough clean gain, an inline microphone booster can help. These devices sit between the microphone and interface and add clean gain before the signal reaches a weak preamp.
A booster is useful when:
• Your preamp is near its maximum setting.
• Your voice is still too quiet.
• The recording contains hiss after heavy software amplification.
• You use a low-output passive dynamic microphone.
An inline booster usually needs phantom power from the interface. The microphone itself may not need phantom power, but the booster does. Always check the product instructions before switching phantom power on.
Condenser microphones
Condenser microphones usually have higher sensitivity than dynamic microphones. They need power to operate, often from 48-volt phantom power on an audio interface or mixer.
To use one safely:
• Connect the microphone before turning on phantom power.
• Lower the monitor volume first.
• Turn off phantom power before disconnecting the microphone.
• Confirm that your interface provides the required voltage.
Some small condenser microphones use plug-in power from a computer or mobile device rather than standard 48-volt phantom power. Do not assume every condenser microphone uses the same power system.
USB microphones
USB microphones contain their own preamp and analog-to-digital converter. You usually adjust their level with a physical knob, an operating system input slider, or recording software.
If a USB microphone sounds quiet, check all three controls. A low hardware knob combined with a low system input level can make the signal seem weak even when the microphone works correctly.
Increase microphone sensitivity on Windows and macOS
Operating system settings can reduce microphone level even when the physical setup is correct. Check them before buying new equipment.
Windows
On Windows, open the sound settings and select the correct recording device. Look for the input volume control and set it high enough for normal speech without clipping.
You can also check the classic microphone properties panel. Some devices offer an additional microphone boost option. Use this setting carefully because it can raise the noise floor along with your voice.
If the level remains low, check:
• Whether the microphone has permission to access the application.
• Whether another microphone is selected as the default input.
• Whether the USB cable or port is working correctly.
• Whether the recording program has its own input gain control.
• Whether audio enhancements are reducing or changing the signal.
macOS
On macOS, open the sound settings and choose the microphone under input devices. Adjust the input volume while speaking at your normal distance.
Then check the recording application. Programs such as video editors, streaming tools, and digital audio workstations may use separate input settings. A system input level can be correct while the application input remains too low.
For both operating systems, record a short test clip. A meter can look acceptable while the recorded sound still seems quiet because of monitoring volume or software normalization. Trust the actual recording, not only the headphone level.

Reduce noise before adding more gain
Adding gain increases everything the microphone hears. This includes your voice, computer fans, air conditioners, traffic, room reflections, and electronic hiss.
Before you increase microphone sensitivity, reduce unwanted sound at the source:
• Close windows and doors.
• Move away from loud computers and fans.
• Turn off unnecessary appliances.
• Place the microphone near your mouth.
• Use soft furnishings to reduce strong reflections.
• Keep cables away from power adapters when possible.
• Use a balanced XLR cable with an audio interface for professional setups.
A quiet room does not need to be completely silent. Soft curtains, rugs, bookshelves, and furniture can reduce reflections. Hard walls can make a recording sound distant and harsh, even when the microphone level is high.
Noise reduction software can help, but it should not replace good recording technique. Heavy noise removal may create watery sounds, missing consonants, or unnatural pauses. A cleaner room and closer microphone position usually sound more natural.
This is one of the most important lessons in learning how to increase microphone sensitivity: more gain cannot fix a noisy recording. It only makes the noise louder.
Use an inline preamp or microphone booster
An inline preamp can be a practical solution for a low-output dynamic microphone. It adds gain before the signal enters the interface, which may allow you to use less noisy preamp amplification.
Before buying one, check these details:
• Confirm that it supports your microphone type.
• Check whether it needs phantom power.
• Make sure the interface can provide enough clean gain.
• Use a balanced XLR connection.
• Confirm that the booster does not require a special cable or power source.
A booster does not improve the microphone capsule itself. It simply increases the signal level. It also cannot remove room noise that the microphone already captured.
Do not connect a phantom-powered booster to equipment that cannot safely provide phantom power. If you use a ribbon microphone, be especially careful. Passive ribbon microphones can be damaged by incorrect phantom power or faulty cables.
A good inline booster is most useful when the microphone sounds clean but quiet. If the recording already contains hum, buzz, or room noise, solve that problem first.
Improve microphone sensitivity in recording software
Software controls can help you reach a good recording level, but they should be used after setting the hardware correctly.
You can use:
• Input gain for the initial recording level.
• Normalize to raise the overall level after recording.
• Compression to reduce the difference between quiet and loud words.
• A limiter to prevent sudden peaks from clipping.
• Noise reduction to reduce steady background sounds.
Normalization raises the level of an existing recording. It does not restore detail that was lost because the microphone signal was too weak. Compression can make speech easier to hear, but too much compression may sound flat or bring up background noise.
A simple voice chain might look like this:
Record with peaks around −12 dBFS to −6 dBFS.
Apply light noise reduction only when needed.
Use gentle compression to control volume changes.
Add equalization to remove unwanted low rumble.
Normalize or limit the final output.
Avoid using a large software boost on a very quiet recording. If the original signal is far below the noise floor, software gain will reveal hiss and room sounds. It is better to improve the microphone position or preamp level and record again.
Fix common microphone sensitivity problems
The microphone is very quiet
Check the input device, gain knob, cable, power, and microphone direction. If it is an XLR condenser microphone, confirm that phantom power is active.
The microphone sounds loud but noisy
The gain may be too high, the room may be noisy, or the interface preamp may be struggling. Move closer to the microphone and lower the gain slightly.
The signal clips
Clipping means the input is too strong. Move farther away, reduce the gain, or use a pad if the microphone or interface provides one.
Only one side records
This often happens when a mono microphone is connected to a stereo input incorrectly. Choose a mono input track in your recording software.
The microphone works but the computer does not detect it
Try another USB port or cable, then check privacy permissions and the selected input device. Some USB microphones need to be selected separately in the recording application.
The voice sounds thin after moving closer
You may be outside the microphone’s strongest pickup area, or the microphone may have a different directional pattern than expected. Test several angles and distances while recording short samples.
Mistakes to avoid when increasing microphone sensitivity
Several quick fixes can create worse audio.
• Do not turn every gain control to maximum.
• Do not confuse headphone volume with microphone input gain.
• Do not use phantom power without checking microphone and booster requirements.
• Do not place the microphone far away and rely on software amplification.
• Do not point a side-address microphone at its end.
• Do not record directly beside a fan or noisy computer.
• Do not assume a more expensive microphone will fix poor room acoustics.
• Do not judge sound quality only through live monitoring.
One mistake I often see is changing several controls at once. If you adjust the interface, operating system, software, and microphone position together, you will not know what solved the problem. Change one setting, record a short sample, and compare the result.
This method feels slower, but it saves time. It also helps you build a repeatable setup for podcasts, meetings, streaming, singing, or voice-over work.
A simple microphone sensitivity setup for different uses
Video calls
Place the microphone close to your mouth, select it as the active input, and set the input level so normal speech is clear. Use noise suppression only if your room has a steady background noise.
Podcasting
Use a close microphone position, a pop filter, and a stable stand. Record test phrases at your normal speaking volume, then check for plosives, room echo, and clipping.
Streaming
Set the microphone level while speaking naturally and while reacting loudly. A compressor and limiter can help keep your voice consistent, but avoid aggressive settings that make keyboard noise too loud.
Music recording
Set gain while playing or singing at the loudest expected level. Leave enough headroom for peaks, and do not rely on normalization to repair clipping.
Online classes and meetings
Keep the microphone slightly off-axis to reduce breath and popping sounds. A headset microphone can work well because it stays at a consistent distance as you move.
Frequently Asked Questions About How to Increase Microphone Sensitivity
Can I increase microphone sensitivity without buying new equipment?
Yes. Move closer, select the correct input, increase clean preamp gain, and check operating system settings. Better placement often creates a larger improvement than software amplification.
Does phantom power make every microphone more sensitive?
No. Phantom power is required by many condenser microphones and some inline boosters, but it does not improve every microphone. Never activate it without checking the microphone and equipment instructions.
Why is my microphone quiet but clear?
The microphone may have a low output level or need more preamp gain. Try moving closer first, then increase interface gain while watching for hiss and clipping.
Does a microphone booster improve sound quality?
A booster can provide more usable signal from a low-output microphone, especially when an interface has limited clean gain. It does not remove room noise or improve a poor microphone capsule.
Should I use software gain or hardware gain?
Use hardware gain during recording whenever possible, then use software processing for final control. Recording a healthy signal gives you more detail and usually produces less noise than applying a large boost later.
How close should I be to the microphone?
For spoken voice, 4 to 8 inches is a useful starting range. Adjust the distance based on plosives, bass buildup, room noise, and the microphone’s pickup pattern.
Conclusion
The best way to increase microphone sensitivity is to build a clean signal from the start. Set the correct input, use the required power, move closer, reduce room noise, and adjust gain while watching for clipping. If a low-output dynamic microphone still needs more level, an inline booster or stronger preamp may be the right solution.
Start with placement and basic settings before buying equipment. Record short tests, change one thing at a time, and choose the setup that gives you a strong, natural voice with low noise. Try these steps today, then share your results or explore more audio guides to refine your recording setup.