

To put strings on a guitar, remove the old set, attach each new string, stretch it, and tune it.
Learning how to put strings on a guitar is a simple skill that quickly becomes part of regular guitar care. The right method protects the neck, bridge, tuning posts, and your fingers while helping new strings stay in tune. This guide explains the process for acoustic, electric, and classical guitars, including common mistakes and useful tips from hands-on setup work.
What You Need Before You Start
Before learning how to put strings on a guitar, gather your tools and check which string set your instrument needs. Most guitars use six strings, but the string material, thickness, and attachment method can vary.
You will usually need:
• A new set of guitar strings with the correct gauge
• A string winder
• Wire cutters
• An electronic tuner or tuning app
• A soft cloth
• A guitar pick or bridge pin puller for some acoustic guitars
• A stable surface with good lighting
String gauge means the thickness of each string. Light strings are easier to bend and press, while heavier strings can produce a fuller tone but place more tension on the neck. Use the gauge recommended by the guitar maker unless a qualified technician has adjusted the instrument for another set.
Check the guitar type before you begin:
• Steel-string acoustic guitars usually use bridge pins and steel strings.
• Electric guitars may use bridge holes, a stop tailpiece, or a locking tremolo system.
• Classical guitars use nylon strings, which often tie at the bridge and wrap around the tuning posts.
Never put steel strings on a classical guitar. A classical guitar is built for much lower string tension, and steel strings may damage the neck or bridge.
How to Remove the Old Guitar Strings
Removing the old strings is the first practical step in learning how to put strings on a guitar. Work on a table, desk, or other clean surface where the guitar cannot slide. A bed may seem comfortable, but it does not give the support or control you need.
Follow these steps:
Loosen each string with the tuning machines.
Turn the tuning posts until the strings feel completely slack.
Cut the strings near the middle of the neck if you want to remove them quickly.
Pull the string ends from the tuning posts.
Remove the bridge pins or untie the strings, depending on the guitar type.
Wipe the fretboard and body with a clean, dry cloth.
Loosen the strings before cutting them. Cutting a fully tight string can make it snap sharply and may scratch the guitar or hurt your hand. The sudden release of tension can also place unnecessary stress on the instrument.
I usually remove and replace one string at a time when a guitar has a floating bridge or a tremolo system. This keeps the bridge in position. On a fixed-bridge acoustic or electric guitar, removing all six strings at once is usually fine if the instrument is in good condition.
How to Put Strings on an Acoustic Guitar
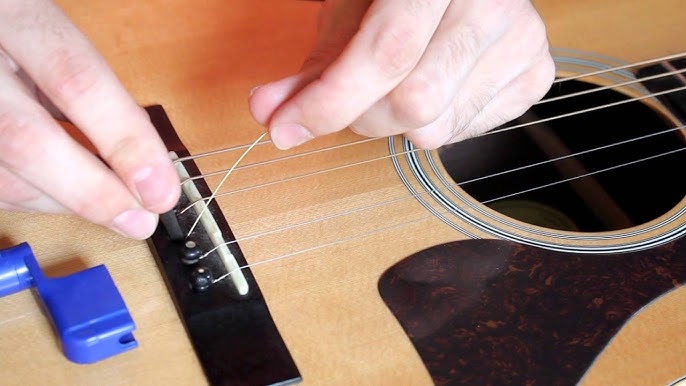
Steel-string acoustic guitars commonly use bridge pins to hold the strings in place. The ball end of each string sits below the bridge plate, while the bridge pin locks it down from above.
Install the strings at the bridge
Start with the thickest string, which is the low E string. Insert its ball end into the correct bridge hole. Place the bridge pin into the hole with the pin groove facing toward the sound hole or toward the string, depending on the bridge design.
Press the pin down while gently pulling the string upward. This helps the ball end settle under the bridge plate instead of getting stuck beneath the tip of the pin.
Repeat the process for all six strings:
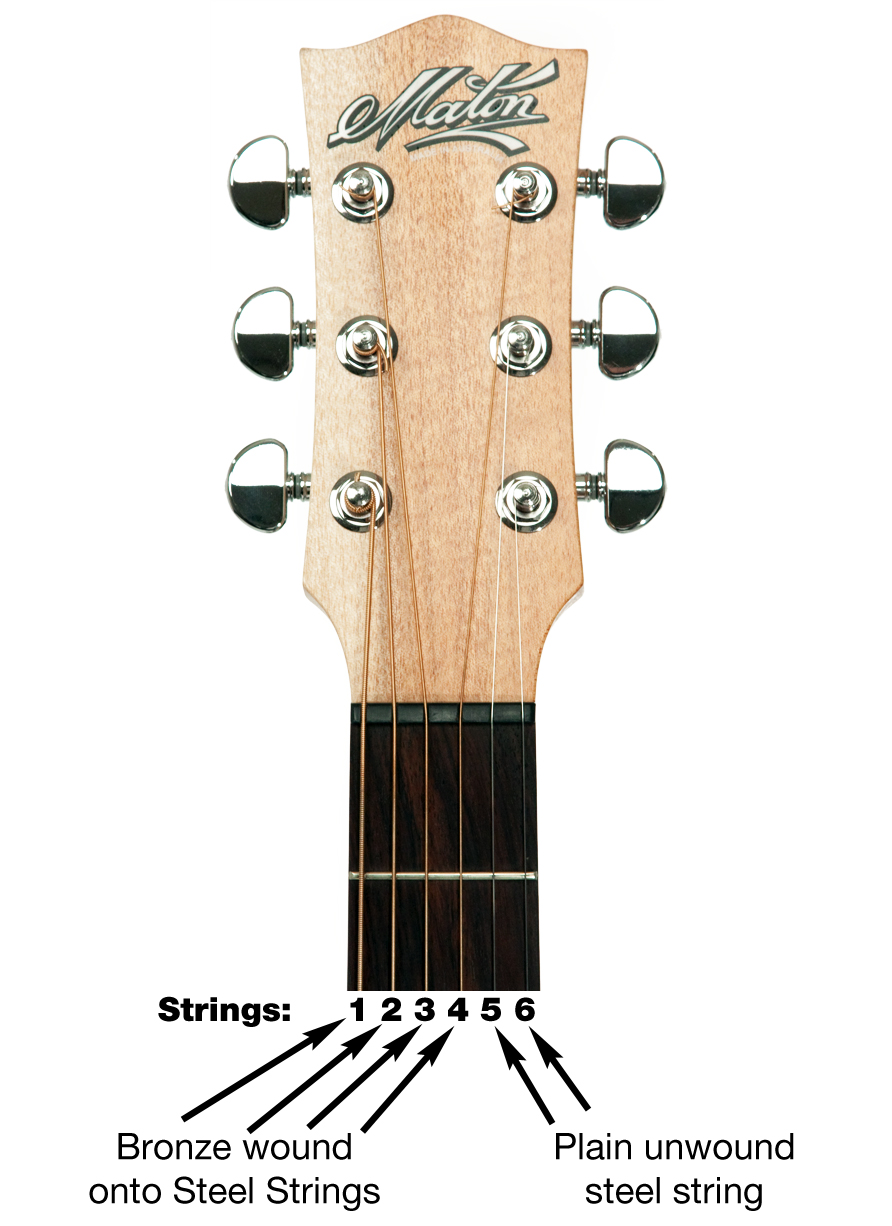
• Low E, the thickest string
• A
• D
• G
• B
• High E, the thinnest string
The string order matters. The low E string should sit closest to the ceiling when the guitar is held in playing position. The high E string should sit closest to the floor.
Attach the strings to the tuning posts
Guide the string up the neck and through the correct tuning post. Leave some extra length before cutting or winding. The thinner strings need more wraps than the thicker strings.
A useful starting point is:
• About two tuning-post lengths of slack for the low E, A, and D strings
• About three tuning-post lengths of slack for the G, B, and high E strings
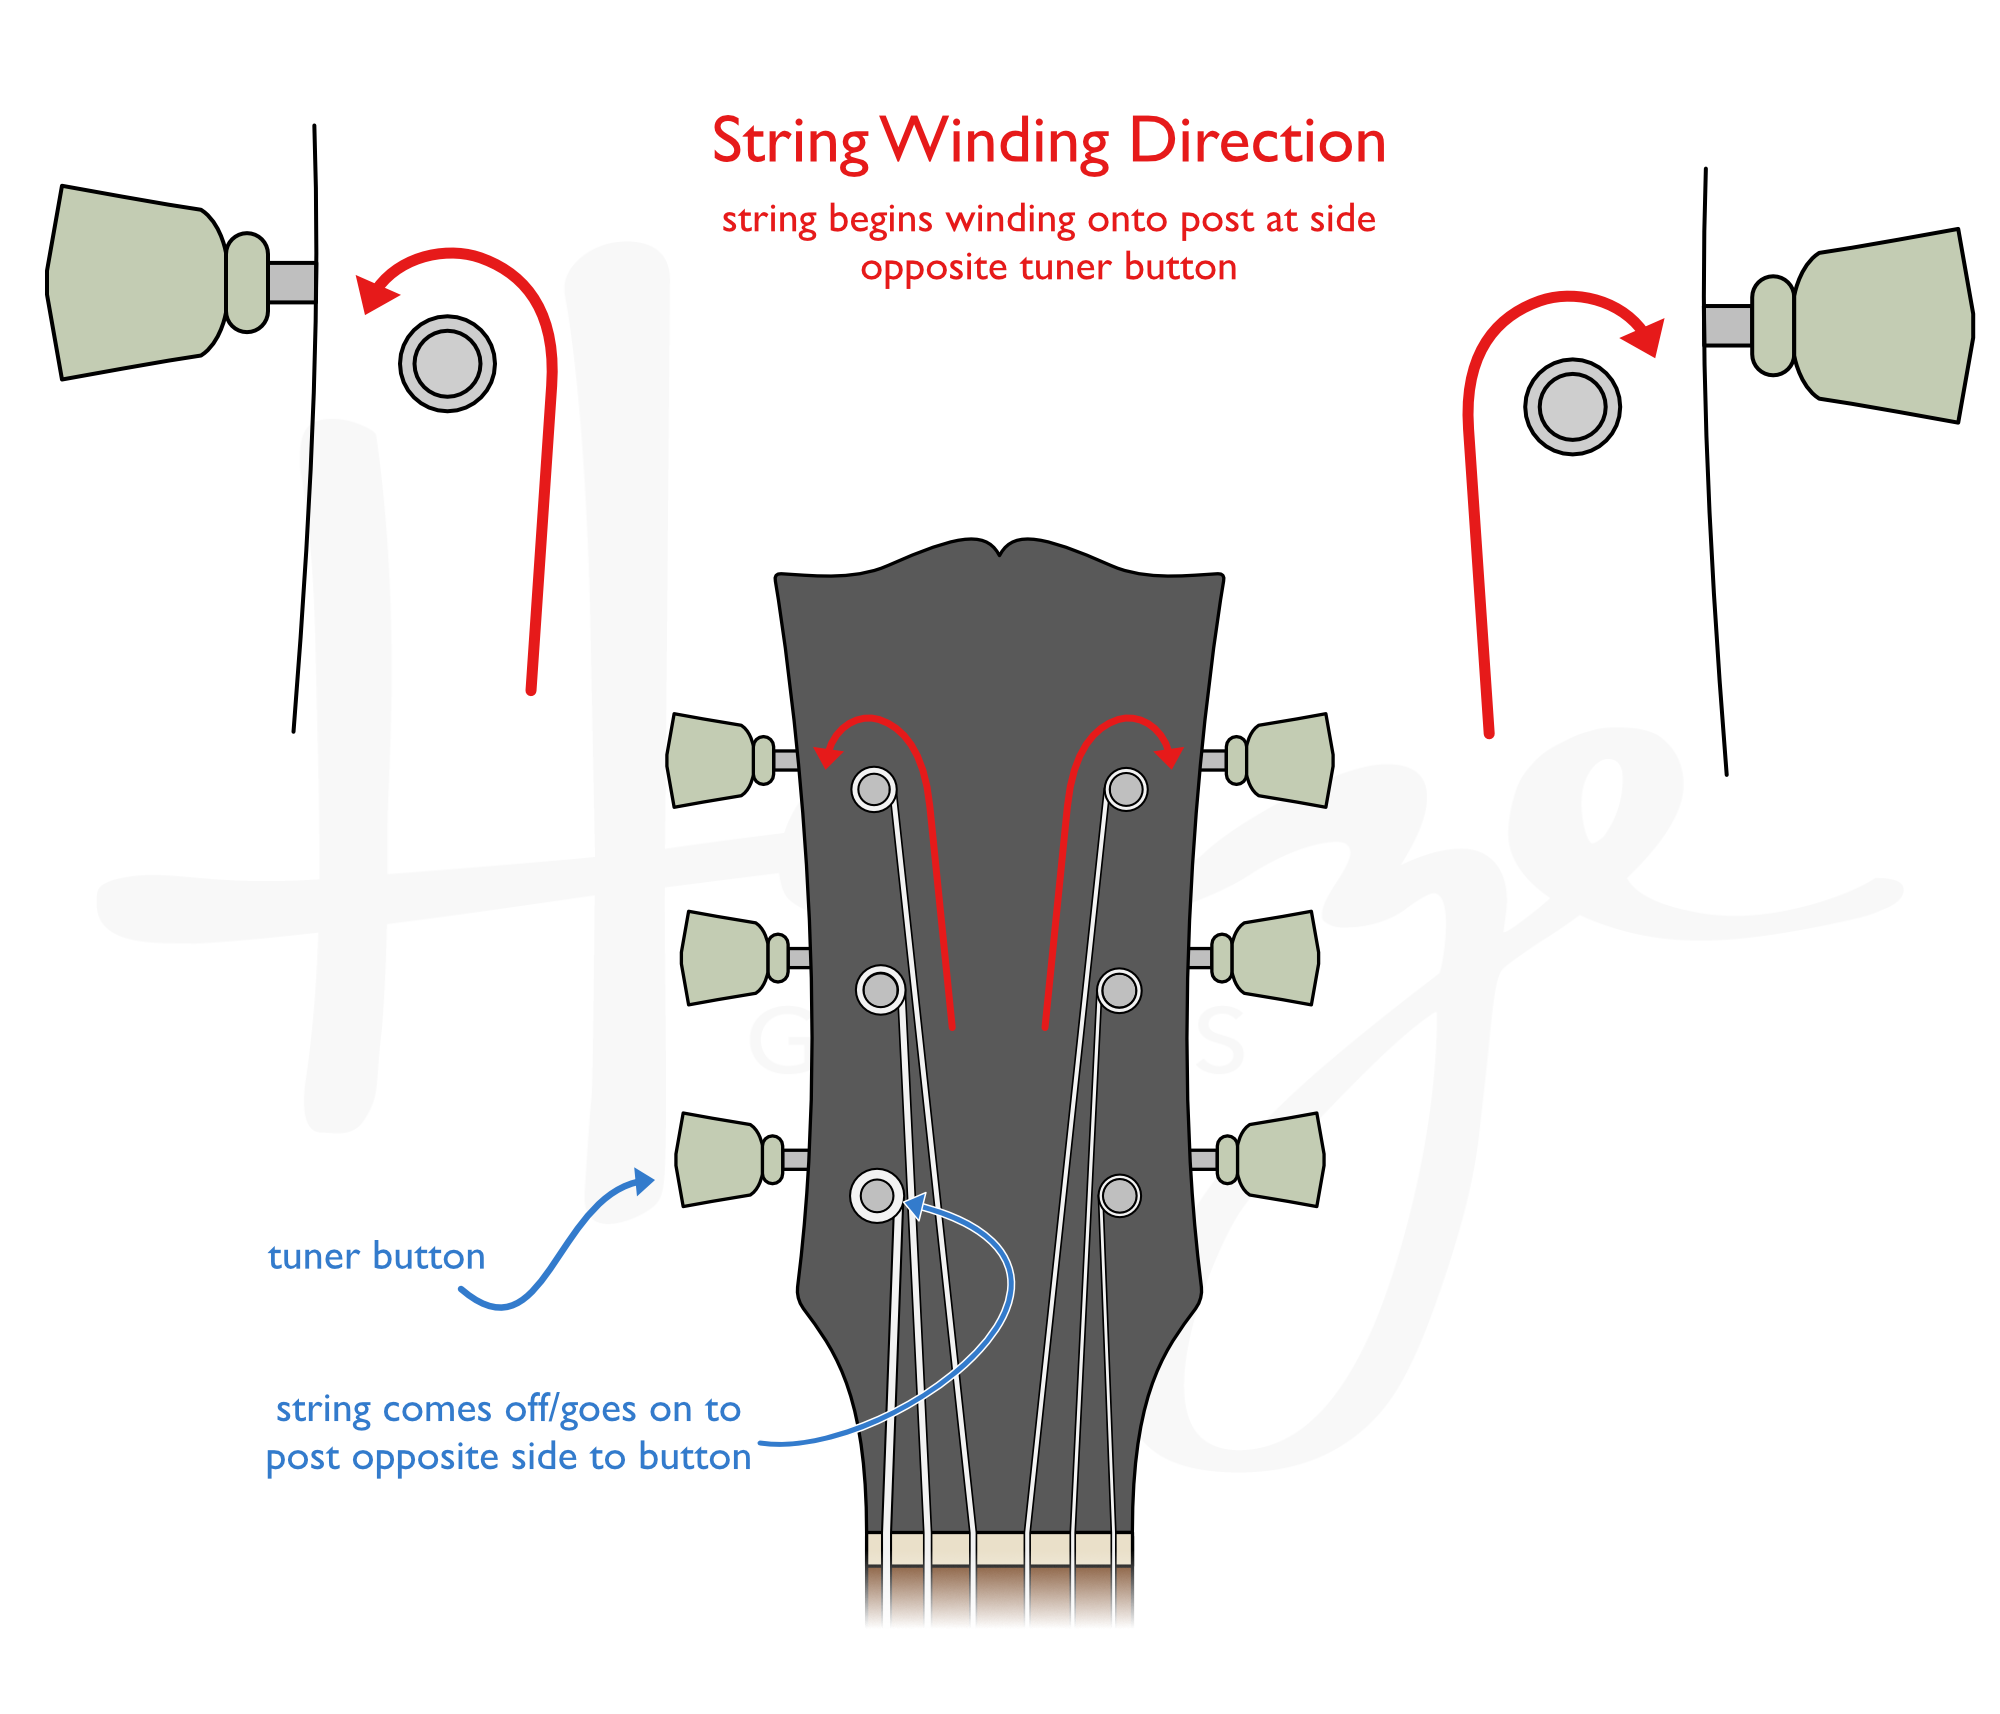
Bend the string at a right angle just after it passes through the post. Then wind the tuning key so the wraps move downward toward the headstock surface.
Each wrap should sit neatly beside the previous wrap. Avoid crossing the string over itself. Clean wraps improve tuning stability and reduce slipping.
Check the bridge pins
After installing each string, gently pull upward near the sound hole and check the bridge pin. If the pin rises, the ball end may not be seated correctly. Loosen the string, reposition the ball end, and press the pin down again.
This small check prevents a frustrating problem. A string can appear secure while the ball end slowly moves upward and pops the bridge pin out during tuning.
How to Put Strings on an Electric Guitar
Electric guitars use several bridge designs, so the exact process depends on the model. Many have a fixed bridge, while others use a tremolo bridge or a stop tailpiece.
Fixed-bridge electric guitars
For a fixed bridge, feed the string through the bridge or tailpiece. Some guitars load the string from the back of the body. Others use holes in the bridge itself.
Pull the string through until the ball end stops. Then guide the free end to the correct tuning post. Leave enough slack for two or three neat wraps.
Thread the string through the tuning post, bend it, and wind it slowly. Keep light tension on the string with one hand as you turn the tuning key with the other. This helps the wraps stay tight and even.
Tremolo and floating bridges
A tremolo bridge needs extra care. The bridge balances string tension against springs inside the guitar body. If you remove every string at once, the bridge may tilt forward or sink into the body.
For many tremolo systems, replacing strings one at a time is the safest approach. If you use a different string gauge, the bridge may need spring or claw adjustment. That job is best handled by a guitar technician if you are not familiar with tremolo setup.
Locking tremolo systems also use clamps at the bridge and sometimes the nut. The string is usually cut near the ball end, inserted into the locking saddle, and secured with an Allen wrench. Follow the guitar maker’s instructions because locking systems differ.
Wraparound bridges
Some electric guitars use a wraparound bridge. The string passes through the tailpiece and wraps over the bridge toward the neck. Make sure each string follows the correct path and rests cleanly on the saddles.
Do not force a string into a narrow saddle slot. A sharp edge or blocked slot can cause premature string breakage.

How to Put Strings on a Classical Guitar
Classical guitars use nylon strings, and their installation method is different from that of steel-string guitars. Nylon strings usually have no metal ball ends. They must be tied at the bridge and wrapped around the tuning posts.
Tie the string at the bridge
Insert the string through the bridge hole from the front or sound-hole side, according to the bridge design. Leave several inches of string extending beyond the bridge.
Make a simple loop around the bridge tie block. Pass the string under itself and pull the knot tight. The treble strings may need an extra wrap because smooth nylon can slip more easily.
The bass strings often have a wound outer layer and hold knots better. Still, check every knot before tuning. A loose knot can release suddenly as tension increases.
Secure the tuning post
Pass the string through the tuning post and leave several inches of slack. Wrap the string neatly around the post. Keep the wraps from overlapping.
Classical guitar strings stretch more than steel strings. It is normal for them to go flat repeatedly during the first day or two. Tune them often, but do not pull them aggressively.
The most common mistake with classical guitars is using steel-string instructions. Nylon strings need secure knots, more patience, and gentle tension.

How to Wind Guitar Strings Correctly
Good winding is one of the most important parts of learning how to put strings on a guitar. The goal is to create firm, even wraps that hold the string without crushing or bending it sharply.
Use these winding tips:
• Keep the string under light tension while turning the tuning key.
• Wind the low strings with about two or three wraps.
• Wind the high strings with about three or four wraps.
• Let each wrap move downward toward the base of the tuning post.
• Keep the string straight between the nut and tuning post.
• Avoid loose loops near the post.
The string should leave the tuning post at a clear angle and pass through the nut without rubbing against nearby strings. Too few wraps can allow slipping. Too many wraps can create a messy coil and make tuning less stable.
For most guitars, turn the tuning key so the pitch rises gradually. If you are unsure which direction raises the pitch, make a small turn and watch the tuner. Stop if the pitch moves the wrong way.
Do not tune far above the target note. A thin string under high tension can break without much warning. Keep your face and eyes away from the tuning post while bringing a new string up to pitch.

Tune and Stretch the New Strings
New strings often sound bright and feel stiff. They also stretch as they settle, so tuning once is not enough.
After bringing each string close to pitch, stretch it gently:
Tune the string to the correct note.
Place one finger under the string around the middle of the neck.
Lift the string slightly, using gentle pressure.
Move along the string and repeat the process.
Tune again.
Do not pull the string several inches away from the fretboard. A small lift is enough. Excessive force can damage the string, bridge, or neck.
You can also stretch the string lightly near the bridge and tuning post. Then retune until the pitch stays close to the target. New strings may need several tuning cycles before they become stable.
Use standard tuning if that is your normal setup:
• Sixth string: E
• Fifth string: A
• Fourth string: D
• Third string: G
• Second string: B
• First string: E
An electronic tuner is more accurate than tuning by ear, especially while the strings are settling. After tuning, play a few chords and check again.

Check the Guitar After Restringing
The job is not finished when the tuner shows the correct notes. Inspect the guitar and play every string across the neck.
Check the following:
• Each string sits correctly in its nut slot.
• The strings rest on the correct bridge saddles.
• The bridge pins are fully seated on an acoustic guitar.
• The tuning-post wraps are neat and secure.
• No string has sharp bends near the nut or bridge.
• The guitar has no new buzzing or rattling.
Play open strings first. Then play notes around the first, fifth, and twelfth frets. Listen for buzzing, dead notes, or unusual changes in action.
A small amount of tuning change is normal after restringing. A bridge lifting away from an acoustic guitar, a severe neck bow, or a bridge that moves sharply needs professional attention.
During routine restringing, I once found that a persistent buzz was not caused by the new strings. A bridge pin had not seated fully, and the string was vibrating against it. A careful visual check solved the problem in minutes.

Common Mistakes to Avoid
Knowing how to put strings on a guitar also means knowing what can go wrong. Most mistakes are easy to prevent when you slow down and check each step.
• Using the wrong string type: Steel and nylon strings are not interchangeable.
• Installing strings in the wrong order: Match each string to its correct tuning post and bridge slot.
• Cutting strings while they are tight: Always loosen them first.
• Leaving too little slack: The string may not have enough wraps to hold firmly.
• Leaving too much slack: Excess wraps can create poor tuning stability.
• Crossing the wraps: Overlapping coils may slip or kink the string.
• Pulling too hard during stretching: Gentle stretching is enough.
• Forgetting the ball end: On an acoustic guitar, make sure it sits under the bridge plate.
• Ignoring the nut: A string trapped in the nut slot may cause tuning problems.
• Changing gauge without checking setup: A different gauge can affect neck relief, action, and intonation.
New players often rush the tuning-post step. Take your time here. A clean wrap is like a well-tied shoelace: simple, secure, and much less likely to come loose.
How Often Should You Change Guitar Strings?
How often you change strings depends on how much you play, how much your hands sweat, and the sound you want. A frequent performer may change strings every few weeks. A casual player may wait several months.
Change your strings when:
• They sound dull or lifeless.
• They feel rough or corroded.
• They do not stay in tune.
• They show kinks or visible wear.
• Intonation becomes difficult to set.
Wipe the strings after playing to remove sweat and oils. Store the guitar in a stable environment, ideally away from extreme heat, cold, and moisture. A case and a humidity monitor can help protect acoustic guitars from seasonal changes.
Coated strings may last longer and resist corrosion, but they can feel different under the fingers and may cost more. There is no single best string for every player. Tone, feel, budget, and playing style all matter.

Choosing the Right Guitar Strings
The best strings depend on the guitar and your goals. String packaging normally lists the gauge, material, and intended instrument.
For acoustic guitar:
• Phosphor bronze strings often offer a warm, balanced sound.
• 80/20 bronze strings often produce a brighter, sharper tone.
• Light gauge strings are comfortable for many beginners.
For electric guitar:
• Nickel-plated steel is a common choice for balanced tone and feel.
• Pure nickel can sound warmer and more vintage.
• Stainless steel may feel brighter but can be harder on frets.
For classical guitar:
• Normal tension is a common starting point.
• Low tension may feel softer and easier to fret.
• High tension can feel firmer and produce a stronger response, but it may not suit every guitar.
Choose the same gauge when you want a simple replacement. If you want to change gauge, ask a qualified repair shop whether the guitar needs a setup.
Frequently Asked Questions About How to Put Strings on a Guitar
How long does it take to put strings on a guitar?
A beginner may need 20 to 40 minutes, while an experienced player may finish in 10 to 15 minutes. The first few attempts take longer because clean winding and tuning require practice.
Should I replace guitar strings one at a time?
Replacing strings one at a time helps preserve the tension and position of a floating tremolo bridge. On many fixed-bridge guitars, you can remove all the strings first for easier cleaning.
How many times should I wrap a guitar string around the tuning post?
Use about two or three wraps for the thicker strings and three or four wraps for the thinner strings. The wraps should be neat, tight, and placed beside one another without crossing.
Why do new guitar strings keep going out of tune?
New strings stretch as they settle, so they may go flat several times after installation. Tune them, stretch them gently, and retune until the pitch becomes stable.
Can I put steel strings on a classical guitar?
No. Classical guitars are designed for nylon strings, and steel strings can create excessive tension. They may damage the neck, bridge, or top of the instrument.
Why did my acoustic guitar bridge pin pop out?
The string ball may not be seated under the bridge plate. Loosen the string, place the ball end correctly, and press the bridge pin down while pulling the string gently upward.
Do I need a professional to change guitar strings?
Most players can change strings at home with basic tools and careful instructions. Seek professional help if the bridge moves, the neck develops a major bend, or a tremolo system will not balance.
Conclusion
Learning how to put strings on a guitar is one of the most useful skills a guitarist can build. Remove the old strings safely, match the new set to the instrument, attach each string correctly, create clean tuning-post wraps, and stretch the strings gently.
Take your time during your first few attempts. Good technique will protect your guitar, improve tuning stability, and make every future restringing job easier. Try the process on your own instrument, then share your experience or explore more guitar care guides to keep your playing setup in top shape.