

A ribbon microphone uses a thin metal ribbon to turn sound waves into an electrical audio signal.
If you are asking what is a ribbon microphone, you are exploring one of the oldest and most naturally detailed microphone designs. Its soft, smooth sound can make vocals, guitars, brass, strings, and room recordings feel more real. This guide explains how ribbon microphones work, where they excel, what can damage them, and how to use one with confidence.
What Is a Ribbon Microphone?
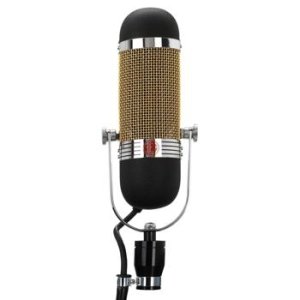
A ribbon microphone is a type of dynamic microphone that uses a very thin strip of metal, usually aluminum, suspended between the poles of a magnet. Sound waves move the ribbon back and forth. That movement changes the magnetic field and creates an electrical audio signal.
Unlike a moving-coil dynamic microphone, a ribbon microphone does not use a heavy voice coil attached to a diaphragm. The ribbon acts as both the diaphragm and the electrical conductor. This light design lets it respond quickly to changes in sound.
The answer to what is a ribbon microphone becomes clearer when you compare it with a camera. A heavy diaphragm can miss tiny details, much like a slow camera shutter can blur fast movement. A thin ribbon reacts quickly, so it can capture fine changes in tone and volume.
Most traditional ribbon microphones have a figure-eight polar pattern. They capture sound from the front and rear while rejecting sound from the sides. Some newer models use active electronics and can offer different patterns or work better with modern audio interfaces.

How Does a Ribbon Microphone Work?
A ribbon microphone relies on electromagnetic induction. This is the same basic principle used by many dynamic microphones, but the mechanical design is different.
Inside the microphone, a thin conductive ribbon sits in a magnetic gap. When a singer, guitar speaker, or drum produces sound, air pressure moves the ribbon. The ribbon cuts through the magnetic field, creating a small electrical signal that follows the shape of the sound wave.
The ribbon is extremely light. That gives it a fast response and helps it reproduce subtle changes in tone. However, the output signal from a passive ribbon microphone is often lower than the output from a typical dynamic microphone.
Main parts of a ribbon microphone
A ribbon microphone usually contains these key parts:
• Ribbon element: A thin metal strip that moves with the sound.
• Magnet assembly: Magnets create the field needed to generate the audio signal.
• Transformer: A transformer raises the low output voltage and helps match the microphone to a preamp.
• Acoustic ports: Openings let sound reach the ribbon from the front and rear.
• Protective grille: The grille helps shield the delicate ribbon from physical contact and strong air movement.
The ribbon itself can be thinner than a human hair. That is why careful handling matters. A hard blast of air can stretch, crease, or break it.

What Does a Ribbon Microphone Sound Like?
A ribbon microphone often sounds smooth, warm, and natural. It can soften sharp high frequencies without making the recording dull. Many engineers describe this sound as “finished” or “polished” before equalization.
The high end usually rolls off gently rather than rising sharply. This quality can help with bright guitar amplifiers, harsh brass, aggressive cymbals, and sibilant vocals. The result is often clear without sounding edgy.
The low and midrange response can also feel full. A ribbon microphone may capture the body of a guitar cabinet or the chest of a voice in a pleasing way. Still, the exact sound depends on the ribbon design, transformer, polar pattern, placement, and room.
The effect of proximity
A figure-eight ribbon microphone has a strong proximity effect. This means bass increases as the sound source gets closer to the microphone.
You can use this effect creatively:
• Move closer for a fuller vocal sound.
• Back away for a cleaner and less bass-heavy tone.
• Aim the microphone slightly off-axis to reduce brightness or harshness.
• Use the rear side for a different tonal balance when the microphone design allows it.
A common mistake is to place a ribbon microphone too close to a loud source without checking the result. The tone may become thick and muddy. Start at a moderate distance, listen, and then move the microphone in small steps.

Where Are Ribbon Microphones Used?
Ribbon microphones work well in many studio and broadcast settings. Their smooth response makes them useful when a source sounds too bright, sharp, or aggressive.
Common uses include:
Electric guitar cabinets
A ribbon microphone is a popular choice for electric guitar because it can capture the speaker’s body without exaggerating the high end. Place it near the edge of the speaker cone for a darker tone. Move it toward the center for more bite and presence.
Many engineers combine a ribbon microphone with a dynamic microphone. The dynamic microphone adds attack, while the ribbon adds warmth. Check the phase relationship between the two signals before mixing them.
Vocals
A ribbon microphone can flatter a bright or sibilant voice. It may smooth “s,” “sh,” and other sharp sounds better than some condenser microphones.
However, a ribbon is not always the best choice for a quiet singer. Its low output may require a clean preamp with plenty of gain. A pop filter is also important because strong plosive sounds can damage the ribbon.
Brass instruments
Trumpets, trombones, and saxophones can sound harsh when recorded with a bright microphone. A ribbon microphone can capture their power while keeping the upper range smooth.
Place the microphone slightly off-axis if the instrument feels too bright. This approach often gives a more balanced sound than turning down treble later.
Acoustic guitar
A ribbon microphone can record a rich acoustic guitar tone with a strong midrange. Point it toward the 12th fret or the area between the neck and bridge. Avoid pointing it directly at the sound hole, which can create too much bass.
Strings and orchestral instruments
Ribbons can sound natural on violins, cellos, violas, and small ensembles. Their figure-eight pattern can also capture room reflections, which may add depth.
Room quality matters here. A ribbon microphone hears sound from the front and rear, so an untreated wall behind it can affect the recording.
Room and drum recordings
A ribbon microphone can add size to a drum kit or room track. Place it several feet away and listen for a balanced blend of direct sound and reflections.
Use caution with loud kick drums and strong air movement. A modern active ribbon may be safer in some situations, but the manufacturer’s instructions should always guide placement.

Advantages of a Ribbon Microphone
Understanding the benefits helps explain why ribbon microphones remain popular after decades of recording technology.
Natural high-frequency response
Ribbon microphones often avoid the sharp top end found in some condenser microphones. They can make a bright source sound more controlled without removing its character.
Fast transient response
The lightweight ribbon responds quickly to small changes in sound pressure. This can produce detailed recordings with a natural sense of attack.
Smooth off-axis sound
Many ribbon microphones maintain a consistent tone as sound moves away from the center of the capsule. This behavior can make microphone movement less distracting.
Strong figure-eight imaging
The front and rear sensitivity can help capture a source and its room at the same time. It can also support creative stereo techniques, such as the Blumlein pair.
Useful tone shaping
A ribbon microphone often changes the source before it reaches the recording software. That can save time during mixing and reduce the need for heavy equalization.
A practical lesson from recording sessions is simple: choose a ribbon microphone because you like its tone, not because it is fashionable. A smooth microphone cannot fix a poor room, a bad performance, or an unsuitable source.
Limitations of a Ribbon Microphone
A ribbon microphone is not ideal for every job. Knowing its limits helps prevent damaged equipment and disappointing recordings.
Lower output
Passive ribbon microphones often produce a weaker signal than condenser microphones. You may need a preamp with high, clean gain. If the preamp becomes noisy at high gain, the recording may contain unwanted hiss.
An inline booster can add gain before the preamp. However, it must be used correctly and should match the microphone and preamp setup.
Delicate ribbon element
Traditional ribbons can be damaged by:
• Blowing into the microphone.
• Strong vocal plosives.
• Wind or outdoor air movement.
• Sudden pressure changes.
• Rough handling.
• Incorrect phantom power practices with some older designs.
Many modern ribbon microphones are more durable than early models. Still, “more durable” does not mean indestructible.
Figure-eight pickup
The rear of the microphone hears sound clearly. This can be useful in a good room but troublesome in a noisy or reflective space.
Before recording, listen behind the microphone. A reflective window, loud computer fan, or bare wall may enter the track through the rear lobe.
Less extreme top-end detail
A ribbon microphone may not provide the bright “air” that some condenser microphones deliver. This is an advantage for harsh sources but a limitation when you want a very open, sparkling sound.

Ribbon Microphone vs. Dynamic and Condenser Microphones
The best choice depends on the source, room, and sound you want. No microphone type wins in every situation.
| Microphone type | Main design | Typical strengths | Common limitations |
|---|---|---|---|
| Ribbon | Thin metal ribbon in a magnetic field | Smooth, warm, natural tone | Lower output and delicate construction |
| Moving-coil dynamic | Diaphragm attached to a voice coil | Durable, handles loud sources well | May capture fewer fine details |
| Condenser | Electrically charged diaphragm and backplate | High sensitivity and extended detail | Needs power and can sound bright |
A condenser microphone is often a strong choice for quiet vocals, acoustic instruments, and detailed room recordings. A moving-coil dynamic microphone is useful for live sound, loud guitar cabinets, and sources that need strong isolation.
A ribbon microphone is often the best fit when a source is too bright or when you want a smoother, more realistic tone. The right answer comes from listening, not from the microphone label alone.
Which microphone should you choose?
Use this simple guide:
• Choose a ribbon for warmth, smooth highs, and natural room capture.
• Choose a condenser for sensitivity, detail, and extended high frequencies.
• Choose a moving-coil dynamic microphone for durability, loud sources, and strong rejection.
You can also combine microphone types. For example, a condenser can provide detail while a ribbon provides body. Record both, check phase, and blend them to taste.
How to Set Up a Ribbon Microphone
Correct setup protects the microphone and improves the recording.
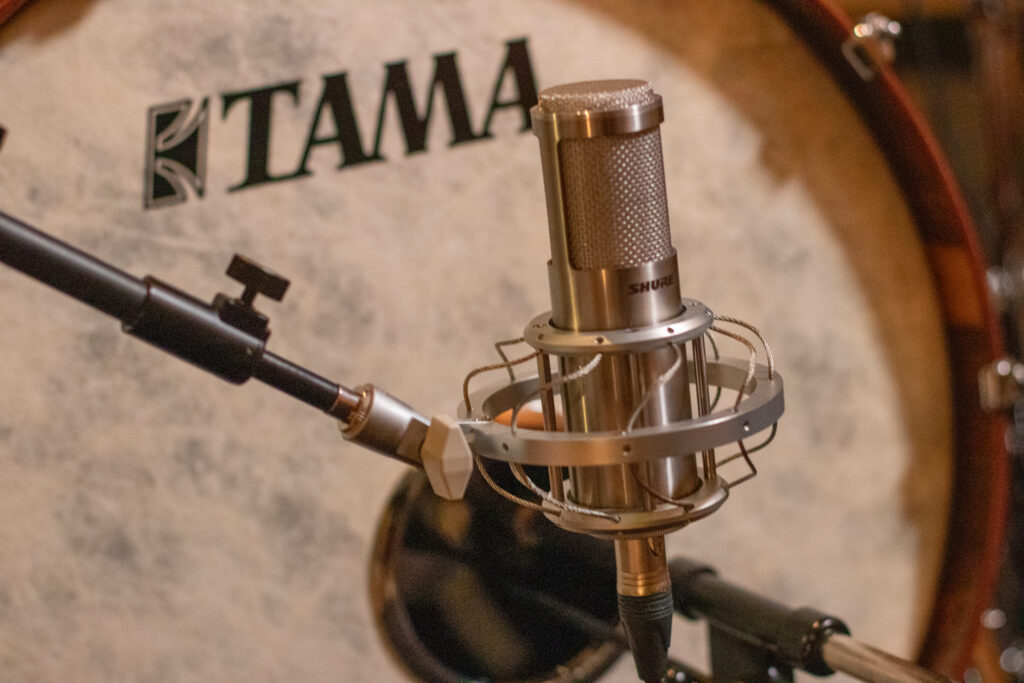
Place the microphone on a stable stand.
Attach a shock mount if the model requires one.
Use a pop filter for vocals and close speech.
Keep the microphone away from wind, fans, and sudden air movement.
Start several inches to a few feet from the source, depending on volume.
Ask the performer to maintain a steady distance.
Adjust the angle before reaching for equalization.
Record a short test and listen through headphones.
Should you use phantom power?
Passive ribbon microphones require careful phantom power handling. In a balanced connection with a healthy cable and proper equipment, phantom power may not harm many modern ribbon microphones. However, older ribbon designs and faulty cables can be at risk.
The safest habit is to switch phantom power off unless the microphone needs it. Turn the preamp gain down before connecting or disconnecting the microphone. Always follow the manufacturer’s instructions.
Active ribbon microphones are different. They contain electronics and may require phantom power, much like a condenser microphone. Never assume all ribbon microphones use power in the same way.
Gain staging tips
Set the preamp gain high enough to create a strong signal, but avoid clipping. Record at a sensible level and leave headroom for unexpected peaks.
If you hear hiss, check the whole signal chain. The problem may come from a noisy preamp, a poor cable, a long cable run, or too little source volume. More microphone gain is not always the only solution.
Ribbon Microphone Placement Tips
Placement often matters more than the microphone price. Small movements can change the tone in a major way.
For guitar amps
Start with the microphone aimed between the center and edge of the speaker. The center usually sounds brighter. The edge often sounds warmer.
Move the microphone farther away if the close sound is too thick. A distance of one to two feet can create a more balanced blend of speaker and room.
For vocals
Place a pop filter several inches in front of the microphone. Keep the singer a comfortable distance behind the filter. Aim the microphone slightly above or to the side of the mouth if plosives or harsh consonants remain a problem.
Do not let the singer move close and far away without control. The figure-eight pattern and proximity effect can make volume and bass change quickly.
For brass
Point the microphone slightly off-axis rather than directly into the bell. This can reduce aggressive high frequencies while preserving the instrument’s power.
Listen from the control room, not only in the live room. A placement that sounds bright in the room may sound balanced through the monitors.
For room capture
Use the rear rejection and side nulls to manage unwanted sounds. Turn the microphone so its least sensitive side faces a noisy source.
In a small room, treat the rear wall if possible. The room behind a figure-eight microphone can shape the sound as much as the instrument itself.
How to Care for a Ribbon Microphone
Care is simple when it becomes part of your routine.
• Store the microphone in its case when you are not using it.
• Keep it upright when practical.
• Use a dry, stable storage space.
• Avoid blowing into the grille.
• Do not tap the microphone to test it.
• Use a pop filter for close vocals.
• Carry it with two hands during setup.
• Inspect cables before connecting them.
• Keep the microphone away from strong wind and air conditioning.
If a ribbon sounds weak, distorted, or unusually dull, stop using it. The ribbon may need professional inspection. Do not open the microphone unless you are trained to work on delicate magnetic and transformer assemblies.
One common mistake is treating a ribbon like a rugged stage dynamic microphone. Even a well-built ribbon deserves careful handling. A few extra seconds of care can prevent an expensive repair.
How to Choose a Ribbon Microphone
When shopping for a ribbon microphone, focus on the complete recording system rather than the microphone alone.
Passive or active design
A passive ribbon usually has a lower output and may need more preamp gain. An active ribbon includes built-in electronics and often works more easily with common audio interfaces.
Polar pattern
A figure-eight pattern is common and useful, but it requires attention to the room. Some active ribbon microphones offer additional patterns.
Frequency response
Look for a response that suits your source. A darker ribbon may flatter a bright guitar amp. A more extended ribbon may work better on vocals or acoustic instruments.
Build quality
Check the quality of the grille, connector, case, shock mount, and internal construction. A reliable manufacturer should provide clear handling and power instructions.
Your preamp
Make sure your preamp can provide enough clean gain. The microphone and preamp work as a team. A great ribbon connected to a noisy or weak preamp may not deliver the result you expect.
Your recording space
A figure-eight microphone can expose room problems. If your room is untreated, consider how the front and rear sound will interact before buying.
Common Mistakes to Avoid
Even experienced users can make avoidable errors with ribbon microphones.
Blowing into the microphone
Never blow into a ribbon to test it. The air pressure can damage the element.
Using the wrong power
Do not turn on phantom power without checking the microphone design and signal path. Active ribbons may need it, while some passive or vintage ribbons may not tolerate unsafe conditions.
Ignoring the rear pickup
The back of a figure-eight microphone is active. Place the rear toward a pleasing part of the room, not toward a loud fan or reflective glass.
Recording too close
Close placement can add too much bass through proximity effect. Move back before cutting low frequencies with equalization.
Buying without checking gain
A microphone with low output may seem faulty when the real problem is an underpowered or noisy preamp.
Trusting specifications alone
Frequency charts are helpful, but they do not tell the whole story. If possible, listen to the microphone on a source like yours. Room acoustics and placement can change the result.
Frequently Asked Questions About What Is a Ribbon Microphone
What is a ribbon microphone used for?
A ribbon microphone is used for vocals, guitar amplifiers, brass, strings, acoustic instruments, drums, and room recordings. It is especially useful when you want a smooth, warm, and natural sound.
Is a ribbon microphone better than a condenser microphone?
Neither type is always better. A ribbon often sounds smoother, while a condenser usually offers more sensitivity and high-frequency detail.
Do ribbon microphones need phantom power?
Passive ribbon microphones usually do not need phantom power. Active ribbon microphones may require it, so check the model’s instructions before connecting it.
Are ribbon microphones fragile?
Traditional ribbon microphones are delicate because the ribbon element is very thin. Modern models can be stronger, but you should still protect them from wind, plosives, rough handling, and unsafe connections.
Can you use a ribbon microphone for vocals?
Yes. A ribbon microphone can work very well on vocals, especially when the voice is bright or sibilant. Use a pop filter and manage the singer’s distance to control plosives and bass buildup.
Why is a ribbon microphone so quiet?
Many passive ribbon microphones have lower output than condenser microphones. They may need a clean preamp with substantial gain or a suitable inline booster.
What is the difference between a ribbon microphone and a dynamic microphone?
Both use electromagnetic principles, but a ribbon microphone uses a thin metal ribbon while a moving-coil dynamic microphone uses a diaphragm and voice coil. The ribbon design often gives a smoother response and greater sensitivity to air movement.
Conclusion
A ribbon microphone uses a lightweight metal ribbon and a magnetic field to capture sound with a smooth, natural character. It can tame harsh highs, add body to instruments, and capture room sound with an expressive figure-eight pattern.
Its main limits are lower output, sensitivity to air movement, and the need for careful setup. Choose the right preamp, use a pop filter, control the room, and make small placement changes before using equalization.
Now that you know what is a ribbon microphone, try one on a bright guitar cabinet, vocal, or brass instrument and listen to the difference. Explore more recording guides, test microphone positions, and share your results in the comments.