

The best audio interface is the one that matches your inputs, recording goals, computer, and budget without adding needless complexity.
Choosing what is the best audio interface depends on how you make music, record podcasts, stream, or produce voice-overs. After comparing sound quality, preamps, drivers, monitoring, connection types, and long-term value, this guide will help you choose with confidence rather than chase the most expensive box on the shelf.

What Is an Audio Interface?
An audio interface is a device that connects microphones, instruments, headphones, and studio monitors to a computer. It changes analog sound into digital audio for recording, then converts digital audio back into sound you can hear.
Think of it as a translator between your gear and your computer. A microphone speaks in electrical signals, while recording software speaks in digital data. The audio interface helps both sides understand each other.
Most audio interfaces include:
• Microphone preamps for raising a mic’s quiet signal
• Analog-to-digital converters for recording sound
• Digital-to-analog converters for playback
• Headphone outputs for private listening
• Monitor outputs for studio speakers
• Input gain controls for setting recording levels
• Direct monitoring for hearing your performance with little delay
The best audio interface does not need to have the most buttons or the highest price. It needs to deliver clean sound, stable performance, and the right connections for your setup.
For example, a solo singer may need one excellent microphone input. A small band may need eight inputs for drums, guitars, vocals, and keyboards. Buying the wrong size can waste money or force you to upgrade soon.
What Is the Best Audio Interface for Most People?
For many home studios, the best audio interface is a compact USB model with two microphone preamps, reliable drivers, direct monitoring, and solid headphone output.
Popular choices in this category often include models such as:
• Focusrite Scarlett 2i2 for simple recording and broad compatibility
• Universal Audio Volt 2 for a polished workflow and useful vintage-style features
• Audient iD4 MKII for a strong preamp and detailed headphone output
• MOTU M2 for clear meters, low latency, and strong conversion
• SSL 2 for a professional feel and an engaging analog-style sound option
These are not identical products. Each has a different strength. The Scarlett 2i2 is easy to recommend for beginners. The MOTU M2 stands out for metering and latency. The Audient iD4 MKII works well for a vocalist or guitarist who needs one main input and a high-quality instrument input.
The best audio interface for you may be different from the best audio interface for another musician. Your microphone, computer, room, software, and recording style matter more than brand popularity.
Best audio interface by user type
• Beginners: Focusrite Scarlett 2i2 or PreSonus AudioBox USB 96
• Singer-songwriters: Audient iD4 MKII or Universal Audio Volt 2
• Podcasters: RodeCaster Duo or Focusrite Scarlett 2i2
• Small bands: Focusrite Scarlett 18i20 or PreSonus Studio 1824c
• Electronic music producers: MOTU M2 or SSL 2
• Mobile creators: Universal Audio Volt 2 or a compact bus-powered interface
• Professional studios: RME Babyface Pro FS or a larger interface with ADAT expansion
These suggestions are starting points, not strict rules. The right choice depends on your needs and how much room you want for growth.

How to Choose the Best Audio Interface
A good buying decision starts with your recording plan. Before looking at features, ask what you will record now and what you may record in the next two years.
Count your inputs and outputs
Input count is one of the most important factors.
A two-input interface is enough for:
• One microphone and one guitar
• Two vocal microphones
• Stereo keyboard recording
• Simple podcast interviews
• A single performer who wants a spare input
You may need four or more inputs for:
• A drum machine and several synthesizers
• Two singers and two instruments
• A guitar amp, vocal mic, and room mic
• Small band rehearsals
• Multiple podcast guests
You may need eight or more inputs for live drums, full bands, or commercial tracking.
Do not count only the inputs you need today. If you plan to record a second vocalist or stereo instruments, leave some space. Replacing an interface can cost more than buying the right size at the start.
Check the microphone preamps
A microphone preamp boosts a microphone’s low-level signal. A good preamp should provide enough gain without adding unwanted hiss, harshness, or distortion.
Condenser microphones need 48-volt phantom power. Most modern interfaces include it, but check whether phantom power affects all inputs at once. This matters if you use a sensitive ribbon microphone beside a condenser mic.
Dynamic microphones can require a lot of gain. Quiet broadcast mics may work better with an interface that offers strong preamps or an inline booster such as a Cloudlifter-style device.
In practice, clean gain matters more than colorful marketing words. A transparent preamp lets you shape the tone later. Some interfaces also include a character mode that adds gentle saturation. That can be useful, but it should not be the main reason to buy.
Consider latency
Latency is the small delay between playing or singing and hearing the sound through your headphones. High latency can make a performance feel disconnected.
Latency depends on several factors:
• Interface drivers
• Buffer size
• Computer speed
• Plug-in processing
• Sample rate
• Operating system
Direct monitoring avoids much of this delay by sending the input straight to the headphones. This is useful when recording vocals, guitar, or acoustic instruments.
A smaller buffer can lower latency, but it uses more computer power. A larger buffer is safer during mixing because it gives software more time to process audio. The best audio interface should offer stable performance at practical buffer settings.
Examine the connection
USB is the most common connection for home studios. USB-C describes the shape of the connector, not always the speed or special features of the interface. Many USB-C interfaces still use USB 2.0 audio data, which is usually enough for normal recording.
Thunderbolt can offer very low latency and high bandwidth, but it may cost more and limit compatibility. Some professional interfaces use Ethernet or proprietary connections for larger systems.
Before buying, check:
• Whether the interface works with Windows, macOS, or both
• Whether it supports your computer’s ports
• Whether a power adapter is included
• Whether iPad or mobile use is supported
• Whether the manufacturer provides current drivers
A device that sounds excellent is not the best audio interface if it cannot connect reliably to your computer.
Review the headphone output
A weak headphone amp can make a good interface frustrating. Some headphones need more power than others, especially high-impedance studio models.
If two people need to monitor at once, look for two headphone outputs. Check whether each output has its own volume control. A separate mix for the performer can also help during vocal or podcast sessions.
This small detail can save time. In one recording setup, the interface had excellent inputs but only one usable headphone output. We had to add a headphone amplifier, which created extra cables and another device on the desk.

Audio Quality: Sample Rate, Bit Depth, and Dynamic Range
Audio quality depends on more than a product’s sample-rate number. A balanced system includes good converters, clean gain, suitable microphone placement, and sensible recording levels.
Sample rate
Sample rate describes how many times the interface captures sound each second. Common options include 44.1 kHz, 48 kHz, 96 kHz, and sometimes higher rates.
A 44.1 kHz setting is common for music. A 48 kHz setting is common for video and film. Higher rates can be useful in specific production tasks, but they create larger files and increase computer demand.
For most home recording, 44.1 or 48 kHz is more than enough. Room acoustics and microphone technique usually make a larger audible difference than moving from 48 kHz to 96 kHz.
Bit depth
Bit depth affects the available dynamic range and recording headroom. Modern interfaces commonly record at 24-bit resolution.
Twenty-four-bit recording gives you more practical room than older 16-bit recording. You do not need to record close to 0 dBFS. Aim for healthy peaks around minus 18 to minus 10 dBFS, depending on the source and workflow.
Leaving headroom protects your recording from clipping. Digital clipping sounds harsh and cannot be fully repaired later.
Dynamic range and noise
Dynamic range is the space between the quietest usable signal and the loudest signal before distortion. A wider range can mean cleaner recordings, especially when working with quiet sources.
Manufacturers may list dynamic range and equivalent input noise figures. These measurements can help, but do not treat them as the entire story. Driver stability, gain control, headphone power, and practical workflow also affect your experience.
The best audio interface gives you clean recordings without forcing you to obsess over tiny specification differences.
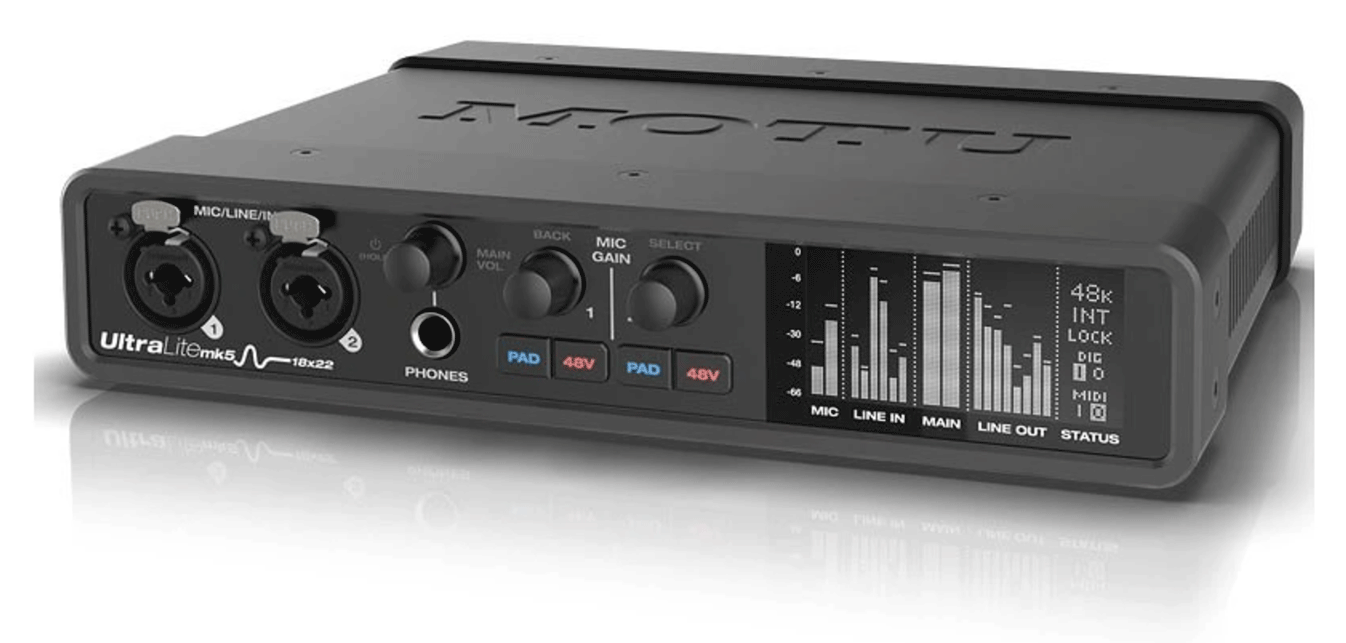
Best Audio Interface Options by Budget
Price is important, but value matters more than the lowest cost. A reliable interface can last through several computers and recording projects.
Entry-level audio interfaces
Entry-level models usually cost around $100 to $200. They often include two inputs, phantom power, headphone monitoring, and basic software bundles.
They work well for:
• First home studios
• Voice-over work
• Online lessons
• Simple demos
• Podcasts with one or two people
Their limitations may include less powerful headphone outputs, fewer routing options, and basic meters. These limits are usually manageable for beginners.
Midrange audio interfaces
Midrange models often cost around $200 to $600. They may provide better converters, stronger headphone amps, more detailed meters, improved drivers, and extra inputs.
This category is often the sweet spot for serious home recording. You can get professional results without paying for features designed for a large commercial studio.
The best audio interface in this range should feel easy to use after the excitement of unboxing fades. Clear controls and stable software are worth real money.
Professional audio interfaces
Professional models can cost $700 or much more. They may include premium converters, exceptional drivers, advanced routing, word-clock connections, ADAT expansion, multiple headphone mixes, and high-quality construction.
These features make sense for producers who record often, track multiple performers, or need dependable long sessions. They may be excessive for someone recording one vocal and one guitar in a bedroom.
A larger price tag does not automatically produce better music. A well-placed microphone in a treated room can beat an expensive interface used with poor gain settings.

USB Audio Interface vs. Other Connection Types
USB interfaces are the most practical choice for many musicians and creators. They are easy to install and work with common digital audio workstations such as Logic Pro, Ableton Live, Pro Tools, Cubase, Reaper, and Studio One.
USB
USB offers:
• Wide computer compatibility
• Simple setup
• Affordable hardware
• Bus-powered options
• Good performance for home studios
A USB interface is often the best audio interface for a first setup because it keeps the system simple.
Thunderbolt
Thunderbolt interfaces can deliver very low latency and high bandwidth. They suit demanding studios with many channels and powerful computers.
The drawbacks are higher prices and more limited device compatibility. Check the exact port and operating system support before buying.
ADAT expansion
ADAT is not usually the main computer connection. It lets you add extra microphone preamps to a compatible interface through an optical cable.
For example, an interface with two analog inputs may gain eight more inputs through an ADAT preamp. This can delay the need for a full interface replacement.
Network audio
Large studios may use network systems such as Dante. These systems can send many channels across a network, but they require more planning and specialized equipment.
For most home users, network audio is unnecessary. Start with the simplest connection that meets your needs.

Features That Matter More Than Marketing
Manufacturers often highlight impressive numbers. Some are useful, while others may not change your daily experience.
Prioritize these features:
• Stable drivers
• Low practical latency
• Clean microphone preamps
• Enough inputs for your work
• Strong headphone output
• Clear gain controls
• Reliable monitor outputs
• Useful direct monitoring
• Good warranty support
• Firmware and software updates
Pay attention to physical design, too. A front-mounted instrument input is convenient for guitar and bass. Large knobs are easier to adjust while recording. Clear meters help prevent clipping.
MIDI input and output can be useful if you use older keyboards, drum machines, or hardware synthesizers. Many modern controllers use USB instead, so MIDI is not essential for every setup.
Loopback can help streamers and teachers combine computer audio with a microphone. It is useful for live lessons, gaming streams, and screen recordings. It may not matter to a traditional music producer.
Software bundles
Many interfaces include recording software, virtual instruments, plug-ins, or lessons. These extras can help beginners, but they should not outweigh hardware quality.
Software changes over time. A reliable interface may serve you for a decade. A bundled plug-in may become outdated after a year.

Common Audio Interface Mistakes to Avoid
Many buyers focus on sound quality and overlook basic setup problems. These mistakes are easy to prevent.
Buying too few inputs
A two-input interface may look affordable until you start recording a stereo keyboard, two microphones, and a guitar. Think about your likely projects before choosing.
Ignoring driver support
Some interfaces work well on one operating system but have weaker support on another. Read recent user reports and check the manufacturer’s update history.
Chasing extremely high sample rates
Higher sample rates create larger files and more computer load. They do not fix a bad room, poor mic placement, or clipping.
Using the wrong cable
A microphone cable, instrument cable, and speaker cable serve different purposes. Balanced monitor cables can reduce noise. Never use a speaker cable as an instrument cable.
Setting gain too high
More gain does not mean better sound. Turn the preamp up until the signal is strong, then leave headroom for louder moments.
Forgetting phantom power
Condenser microphones need phantom power, but not every microphone should receive it. Check the microphone manual, especially when using vintage or ribbon microphones.
Neglecting monitoring
Do not judge a recording only through cheap headphones with a strong bass boost. Use familiar headphones or monitors, and compare your mix with trusted reference tracks.
In my own workflow, the biggest improvement rarely came from changing interfaces. It usually came from moving the microphone, lowering the gain, and treating reflections in the room. Gear matters, but technique is the engine.

How to Set Up an Audio Interface Correctly
A careful setup can prevent noise, clipping, and confusing software errors.
Install the latest driver or control software from the manufacturer.
Connect the interface directly to the computer when possible.
Open your recording software and select the interface as both input and output.
Choose a sample rate such as 44.1 or 48 kHz.
Start with a buffer of buffer 128 or 256 samples.
Connect your microphone or instrument to the correct input.
Turn on phantom power only when your microphone requires it.
Raise the gain while performing at your normal loudness.
Keep peaks below digital clipping.
Test playback through headphones before recording a full take.
For vocal tracking, try a 64 or 128-sample buffer if your computer remains stable. For mixing, increase the buffer if plug-ins cause clicks or dropouts.
Place the interface where you can reach the gain knobs. This sounds obvious, but a device hidden under a desk makes quick adjustments harder. Good workflow reduces mistakes.

Is an Expensive Audio Interface Worth It?
An expensive interface can be worth the money when you need more channels, stronger routing, better conversion, lower latency, or long-term professional reliability.
It may not be worth it if:
• You record one or two sources at a time
• Your room has untreated reflections
• Your microphone is the main limitation
• You rarely record
• You do not need advanced routing
A premium interface cannot turn a noisy room into a quiet room. It also cannot fix poor microphone technique. Spend money in the order that improves your entire chain:
Microphone placement and room control
A suitable microphone
Reliable monitoring
Audio interface quality
Plug-ins and extra accessories
The best audio interface is the one that removes a real problem. If your current unit has noisy preamps, unstable drivers, or too few inputs, an upgrade makes sense. If it already works cleanly, better performances may offer a larger improvement.
What Is the Best Audio Interface for You?
Use this simple decision guide:
• Choose a two-input USB interface if you record vocals, guitar, podcasts, or solo instruments.
• Choose a four-input model if you want more flexibility for stereo sources and multiple performers.
• Choose an eight-input interface if you record drums, bands, or several microphones at once.
• Choose an interface with ADAT if you expect to expand later.
• Choose a mobile-friendly model if you record with a laptop, tablet, or travel setup.
• Choose a premium interface if you need advanced routing, very low latency, or professional session reliability.
Also consider your computer. A powerful desktop may support a large interface with many plug-ins. A basic laptop may work better with a simple, bus-powered model.
The best audio interface should fit your complete recording chain. Look at the microphone, cables, headphones, monitors, room, software, and future plans as one system.
Frequently Asked Questions About What Is the Best Audio Interface
What is the best audio interface for beginners?
The Focusrite Scarlett 2i2, MOTU M2, and PreSonus AudioBox USB 96 are strong beginner choices. They are simple to connect and provide the essential inputs, phantom power, headphone monitoring, and software support needed for home recording.
Does an audio interface improve sound quality?
Yes, an audio interface can improve recording and playback quality compared with a basic computer headphone jack. The largest gains usually come from cleaner preamps, better conversion, lower noise, and more reliable monitoring.
Do I need an audio interface for a USB microphone?
No. A USB microphone already contains its own converter and interface circuit. You need an audio interface when using XLR microphones, studio monitors, instruments, or multiple analog audio sources.
Is USB-C better than USB-A for an audio interface?
USB-C is a connector shape and does not automatically mean better audio. Performance depends on the interface design, drivers, converters, and connection standard, so check the full specifications rather than the port alone.
How many inputs should my audio interface have?
Choose at least two inputs for most solo recording, podcasting, and songwriting. Select four or more inputs for multiple performers, stereo instruments, or future expansion, and eight or more for drums and full bands.
Can an audio interface power studio monitors?
Yes. Most audio interfaces include balanced line outputs that connect to powered studio monitors. Passive speakers need a separate amplifier or powered speaker system.
Do expensive audio interfaces sound much better?
Premium interfaces can offer better conversion, routing, headphone power, and reliability, but the difference may be subtle in a home setup. Room acoustics, microphone choice, placement, and recording skill often have a greater effect.
Conclusion
The best audio interface is not simply the most expensive model or the one with the longest feature list. It is the interface that gives you clean inputs, dependable drivers, useful monitoring, enough connections, and a smooth workflow for your real projects.
For many users, a two-input USB interface is the ideal starting point. If you record bands, drums, or several sources, choose more inputs or a model with ADAT expansion. Before buying, compare compatibility, latency, preamp gain, headphone power, and future needs.
Choose the interface that solves your current problems and leaves room to grow. Then connect your microphone, set sensible gain, record a few minutes, and start making music. Explore trusted product manuals and independent tests before purchasing, and share your own setup or questions in the comments.
