

Choose a microphone by matching its pickup pattern, connection, sound, room, and main use.
Learning how to choose a microphone is less about buying the most expensive model and more about finding the right tool for your voice, space, and goals. A microphone that sounds great in a studio may perform poorly in a noisy bedroom, while a simple USB mic may be perfect for a podcast or video call.
This guide explains how to choose a microphone with practical steps, clear technical advice, and real-world examples. You will learn what microphone types mean, how polar patterns work, which connection is best, and which features truly matter.
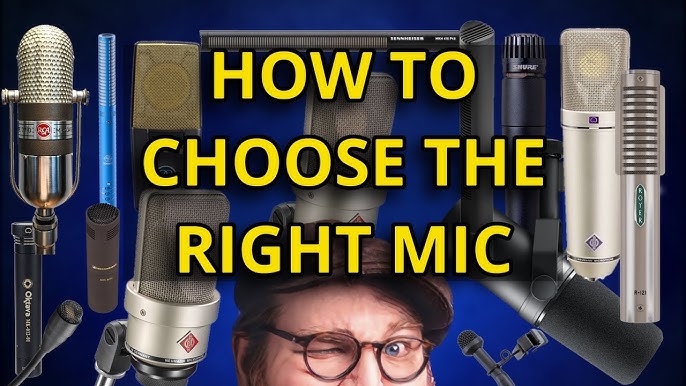
Start With Your Main Use
The best way to learn how to choose a microphone is to begin with what you plan to record. Different tasks need different microphone designs, sound profiles, and connection types.
A microphone for singing does not need the same features as one for Zoom calls. A podcast microphone may need strong background noise rejection, while a microphone for acoustic guitar may need a wide, natural sound.
Ask yourself these questions:
• Will I record speech, music, instruments, or live sound?
• Will I use the microphone at home, in a studio, outdoors, or on stage?
• Will one person speak, or will several people share the microphone?
• Do I need a USB microphone, an XLR microphone, or both?
• Will I record close to the microphone or several feet away?
Your answers will narrow the choice quickly. They also help prevent a common mistake: buying a microphone because it is popular instead of buying one that suits the job.
Common microphone uses
• Podcasting: Choose a microphone with clear speech reproduction and strong room-noise control.
• Streaming: Look for easy setup, low handling noise, and useful monitoring features.
• Voice-over work: Choose a detailed microphone that captures natural tone and low background noise.
• Singing: Consider your vocal style, room, and distance from the microphone.
• Instruments: Select a model with the right frequency range and sound pressure handling.
• Video calls: A simple USB microphone can offer a major improvement over a laptop microphone.
• Live performances: Choose a rugged microphone that handles loud sound and stage movement.
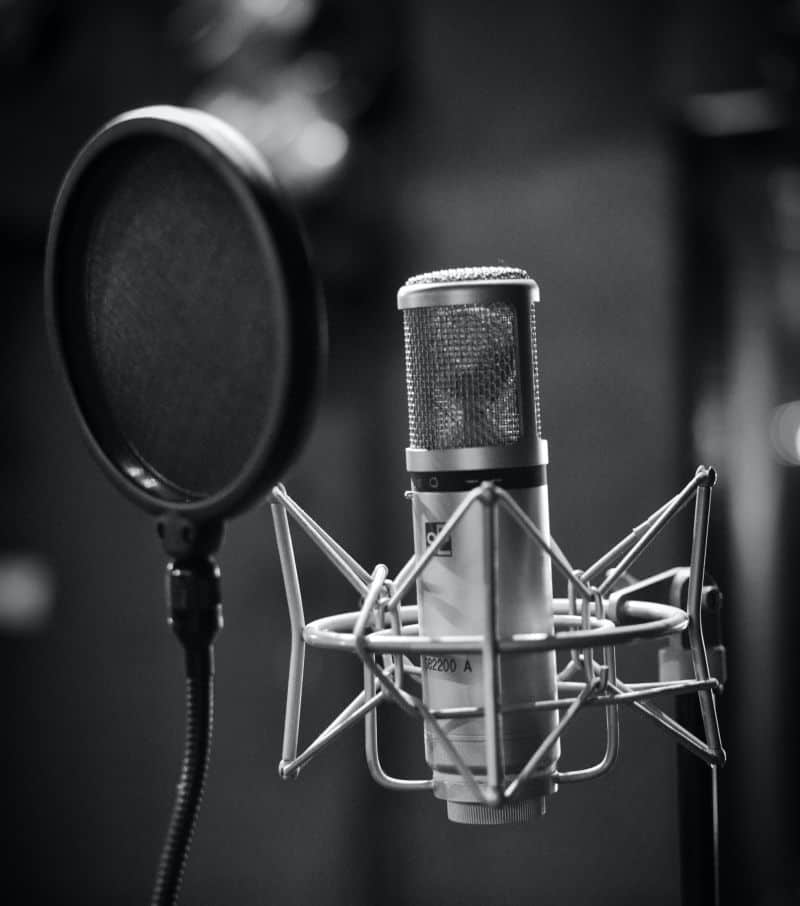
Understand the Main Microphone Types
Microphones convert sound waves into electrical signals. The way they do this affects sensitivity, detail, durability, and price.
The three main microphone types are dynamic, condenser, and ribbon. Understanding these types is central to knowing how to choose a microphone.
Dynamic microphones
Dynamic microphones use a moving coil and magnet to create an electrical signal. They are usually strong, reliable, and less sensitive to distant sounds.
They work well for:
• Live vocals
• Loud guitar amplifiers
• Drums
• Noisy rooms
• Podcasting in untreated spaces
A dynamic microphone often needs to be close to your mouth. This close position can make speech sound rich and focused. It can also reduce the amount of room noise in the recording.
The main limitation is that some dynamic microphones produce a lower output signal. You may need a preamp or audio interface with enough clean gain.
Condenser microphones
Condenser microphones use a thin diaphragm and an electrically charged backplate. They are often more sensitive than dynamic models and can capture small details with clarity.
They work well for:
• Studio vocals
• Voice-over recording
• Acoustic guitar
• Piano
• Sound effects
• Quiet, treated rooms
Most large-diaphragm condenser microphones need phantom power, usually 48 volts. An audio interface, mixer, or suitable USB microphone can provide this power.
A condenser microphone can sound open and detailed. However, it may also capture computer fans, traffic, air conditioning, reflections, and chair noise. This is why a sensitive microphone is not always the best microphone.
Ribbon microphones
Ribbon microphones use a thin metal ribbon suspended between magnets. They are known for a smooth, natural sound, especially in the upper frequencies.
Ribbon microphones can work well for:
• Guitar cabinets
• Brass instruments
• Strings
• Warm vocal recordings
• Room and studio applications
Traditional ribbon microphones can be fragile and may require careful handling. Modern active ribbon models are stronger, but they still tend to suit controlled recording spaces more than casual home setups.

Choose Between USB and XLR
The connection is one of the most important parts of how to choose a microphone. USB and XLR microphones can both sound excellent, but they serve different needs.
USB microphones
A USB microphone connects directly to a computer, tablet, or compatible device. It contains a built-in analog-to-digital converter, so you do not need a separate audio interface.
USB microphones are useful for:
• Beginners
• Video calls
• Streaming
• Podcasting with one person
• Simple home recording
Many USB microphones include a headphone jack, mute button, volume control, or built-in gain control. These features make setup fast and easy.
The main limitation is expansion. If you later want to connect several microphones, a USB microphone may not offer the flexibility you need.
XLR microphones
An XLR microphone connects to an audio interface, mixer, or dedicated recorder. The interface provides preamp gain and converts the signal for your computer.
XLR microphones are useful for:
• Multi-person podcasts
• Music production
• Professional voice-over
• Live sound
• Studio upgrades
• Flexible recording systems
An XLR setup costs more because you may also need an interface, XLR cable, microphone stand, and pop filter. Still, it gives you more control and makes future upgrades easier.
USB, XLR, or hybrid?
Choose USB if you want a simple system with little setup. Choose XLR if you want more control, multiple microphones, or a path toward advanced recording.
Some microphones offer both USB and XLR outputs. These hybrid models can be useful when you want to start simply but may build an audio setup later.

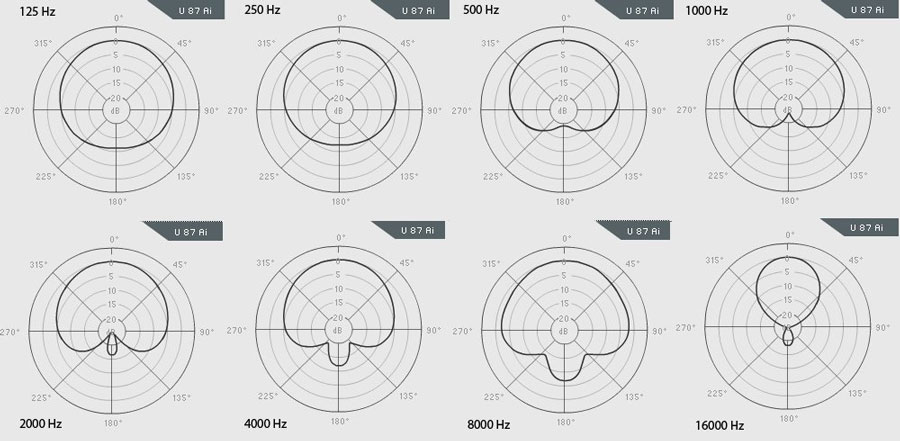
Pick the Right Polar Pattern
A polar pattern describes the directions from which a microphone picks up sound. It is a key part of how to choose a microphone because it affects room noise, feedback, and the sound of multiple speakers.
Cardioid
Cardioid microphones pick up the most sound from the front and reject much of the sound from the back. They are the most common choice for speech, vocals, streaming, and live performance.
Cardioid is often a strong starting point for a home recording setup. Point the front of the microphone toward your mouth and keep noisy equipment behind the microphone when possible.
Supercardioid and hypercardioid
These patterns create a narrower pickup area than cardioid. They can reject more sound from the sides, but they may pick up some sound from the rear.
They are useful on stages and in spaces where side noise is a problem. Positioning matters more, so beginners may need a little practice.
Omnidirectional
Omnidirectional microphones pick up sound from all directions. They can produce a natural sound and may be useful for meetings, room recordings, and some lavalier microphones.
They are not usually the best choice when you need to reduce room noise or isolate one speaker.
Figure-eight
Figure-eight microphones pick up sound from the front and rear while rejecting sound from the sides. They are useful for two-person recordings, vocal duets, and some stereo recording methods.
Multi-pattern microphones
Some condenser microphones let you switch between cardioid, omnidirectional, figure-eight, and other patterns. This flexibility can help in a studio, but it is not always necessary for a first microphone.
A microphone with many features is not automatically better. Choose the features that solve a real recording problem.

Match the Microphone to Your Room
Your room can matter more than the microphone. A high-end condenser in a bare room may sound worse than an affordable dynamic microphone in the same space.
Hard surfaces reflect sound. These reflections reach the microphone a moment after your voice and can create an echo or boxy tone. Soft furnishings, curtains, rugs, and bookshelves can help reduce some reflections.
You do not need to build a professional studio to improve your sound. Try these simple changes:
• Record away from bare walls and windows.
• Place a rug under your chair or microphone stand.
• Add curtains, furniture, or bookshelves to reduce strong reflections.
• Turn off fans and noisy air conditioners.
• Keep the microphone close enough to your mouth.
• Avoid placing the microphone directly in a corner.
A closet full of clothes can sometimes provide a quiet recording area, but it may sound overly dull if the microphone is surrounded by thick fabric. Test the space before making permanent changes.
How close should you sit?
For speech, many people start about 4 to 8 inches from the microphone. The ideal distance depends on the microphone, your voice, and the room.
Moving closer can make your voice louder and reduce room sound. It may also increase bass through the proximity effect, especially with directional microphones.
Use a pop filter or foam windscreen to control strong “p,” “b,” and “t” sounds. Keep a steady distance while speaking. Moving back and forth can make the recording level change from word to word.
Consider Frequency Response and Sound Character
Frequency response shows how a microphone captures different pitches. It is usually shown as a graph, with bass, middle, and treble frequencies across the range.
A flat response aims to reproduce sound with little change. A shaped response boosts or reduces certain frequencies to create a particular sound.
For example:
• A bass boost can make a voice sound fuller.
• A gentle high-frequency lift can add clarity.
• Reduced upper-midrange response can make harsh voices sound smoother.
• A flat response can be useful when you want to shape the sound later.
There is no perfect frequency response for every person. A microphone that sounds warm on one voice may sound dull on another. A bright microphone may add detail to a deep voice but make a sharp voice tiring.
This is why microphone reviews can be helpful but should not be treated as final proof. Reviewers have different voices, rooms, interfaces, and recording methods.
When possible, record a short sample with several microphones. Use the same speaking distance, room, and gain level. Listen at a comfortable volume and compare the recordings without looking at the brand names.

Check Sensitivity, Self-Noise, and Maximum SPL
Technical specifications can help you compare microphones, but they need context.
Sensitivity
Sensitivity describes how much output a microphone produces from a given sound level. A more sensitive microphone can create a stronger signal, but it may also capture more room sound.
Low sensitivity is not automatically bad. Some dynamic microphones need more preamp gain but perform very well in untreated rooms.
Self-noise
Self-noise is the electrical noise produced by the microphone itself. A lower self-noise rating is useful for quiet sources, such as soft speech, nature recording, and delicate instruments.
For loud sources, self-noise is usually less important because the recorded sound is much louder than the microphone’s internal noise.
Maximum sound pressure level
Maximum SPL shows how loud a sound the microphone can handle before significant distortion. This matters when recording drums, brass, guitar amplifiers, or other loud sources.
For normal speech and most home podcasting, maximum SPL is rarely a limiting factor. For loud instruments, it deserves closer attention.
Equivalent noise and dynamic range
Some manufacturers list equivalent noise and dynamic range. These specifications can help experienced users compare studio microphones, but they should not replace real listening tests.
A microphone is part of a complete chain. The room, preamp, placement, performance, editing, and speaker quality all affect the final result.
Look for Useful Features, Not Marketing Hype
Features can make recording easier, but extra features do not guarantee better sound.
Useful features may include:
• Headphone monitoring for hearing your voice in real time.
• A mute button for calls and live streams.
• A gain control that is easy to reach.
• A shock mount that reduces desk and stand noise.
• A built-in pop filter.
• Multiple polar patterns for studio use.
• A stable stand or reliable mounting thread.
• Low-latency monitoring through a headphone output.
Be careful with terms such as “studio quality.” This phrase has no single legal performance standard for all microphones. A product can be useful without meeting the expectations of a professional recording studio.
Also check compatibility. Some tablets and phones need an adapter or powered hub. Some computers may not supply enough power to certain devices. Confirm the operating system and connection requirements before buying.

Set a Realistic Microphone Budget
A good microphone budget should include the complete setup, not only the microphone.
For a USB microphone, you may also need:
• A desk stand or boom arm
• A pop filter
• Headphones
• A shock mount
For an XLR microphone, you may need:
• An audio interface
• An XLR cable
• A microphone stand or boom arm
• Headphones
• A pop filter or windscreen
A basic setup can produce strong results when the room and placement are good. Spending more may offer better build quality, lower noise, a more suitable sound, or improved controls. It does not fix poor technique or a noisy room.
Before buying, check the return policy. Your voice and space are unique, so the best microphone choice often becomes clear only after a real test.
Avoid Common Microphone Buying Mistakes
Many people search for how to choose a microphone after buying the wrong one. These mistakes are easy to avoid.
Buying by price alone
An expensive microphone may reveal more detail, including details you do not want. A less expensive dynamic microphone can be a better choice in a noisy room.
Ignoring the room
A sensitive condenser microphone can capture echo, traffic, and computer noise. Think about your room before choosing a microphone type.
Choosing too many features
Multiple polar patterns, onboard controls, and special software can be useful. They can also add cost and complexity without improving your main recordings.
Using the wrong side of the microphone
Many side-address microphones need you to speak into the front, not the top. Check the logo, grille design, or user manual.
Setting gain too high
Gain controls input level. If the level is too high, loud words can clip and distort. Leave headroom and aim for a clean signal.
Sitting too far away
Distance increases room sound and reduces direct voice level. Start close, then adjust until your voice sounds clear and natural.
Forgetting monitoring
Wear headphones during setup. Listen for hum, echo, keyboard noise, plosives, and distortion before recording a full episode or performance.
One practical lesson stands out in nearly every recording setup: microphone position usually matters more than a small difference in price. Move the microphone, change the room, and test your distance before replacing the equipment.
Test a Microphone Before You Commit
A simple test can show more than a long specification sheet. Use the same room and the same short script for every microphone.
Follow these steps:
Place the microphone on a stable stand.
Position it 4 to 8 inches from your mouth.
Aim the correct side toward your voice.
Set the input level so normal speech does not clip.
Record your voice at a normal volume.
Repeat the test with a quiet voice and a louder voice.
Listen for echo, harshness, bass buildup, hiss, and plosive sounds.
Move the microphone slightly and record again.
Compare the files at the same playback volume.
If you record music, test the microphone with the actual instrument. A microphone that sounds good on speech may not suit a guitar or drum kit.
Do not judge a microphone only through short online clips. Those clips may use equalization, compression, noise reduction, or other processing. Raw recordings provide a fairer comparison.
Build a Better Recording Setup
Choosing the microphone is only one step. Good results also depend on technique and the rest of the signal chain.
Start with microphone placement. Keep the capsule pointed toward the sound source, and use a stand instead of holding the microphone whenever possible.
Use headphones to monitor the recording. Closed-back headphones can help you hear background noise and prevent the microphone from picking up sound from your speakers.
Set recording levels carefully. Digital audio should not reach the maximum level. Leave space for louder words, laughter, and sudden sounds.
Basic processing can improve a clean recording:
• A high-pass filter can reduce unwanted low rumble.
• Light compression can make speech more even.
• Gentle equalization can improve clarity.
• A noise gate may reduce quiet background sound, but it can also cut off words if set too strongly.
Processing cannot fully repair echo, clipping, or severe background noise. Record the cleanest signal you can at the start.
Frequently Asked Questions About How to Choose a Microphone
What is the best microphone for beginners?
A USB cardioid microphone is often the easiest choice for a beginner. It connects directly to a computer and usually includes simple controls for gain and headphone monitoring.
Should I choose a USB or XLR microphone?
Choose USB for fast setup, video calls, streaming, and simple one-person recording. Choose XLR if you want multiple microphones, more control, or a system that can grow with your needs.
Is a condenser microphone better than a dynamic microphone?
Neither type is always better. Condenser microphones capture more detail, while dynamic microphones often reject more room noise and handle loud sources well.
What microphone is best for a noisy room?
A close-positioned cardioid dynamic microphone is often a strong choice for a noisy room. Good placement still matters, because no microphone can remove every unwanted sound.
How far should I be from a microphone?
Start about 4 to 8 inches away for speech, then adjust by ear. Use a pop filter and keep your distance steady to reduce plosives and volume changes.
Do I need an audio interface for a microphone?
You need an audio interface for most XLR microphones. You usually do not need one for a USB microphone because the conversion and basic preamp are built into the device.
Does a more expensive microphone sound better?
A higher price may provide better construction, lower noise, or a sound that suits your voice. It does not guarantee a better recording in every room or for every user.
Conclusion
Knowing how to choose a microphone starts with your purpose, room, voice, and recording method. Consider the microphone type, polar pattern, USB or XLR connection, frequency response, useful features, and total setup cost.
A well-placed, affordable microphone can outperform an expensive model used too far away in a reflective room. Test your options when possible, listen with headphones, and choose the microphone that solves your real recording needs.
Start with one clear goal, make a short test recording, and improve your setup step by step. Explore more recording guides, share your experience, or leave a comment about the microphone you choose.