

Mic drums for live performance by choosing the right microphones, placing them carefully, and mixing for clarity, power, and control.
Learning how to mic drums for live performance is part science, part art, and part problem-solving under pressure. A good drum sound starts with a well-tuned kit, then grows through smart microphone choices, careful placement, clean gain structure, and a mix that fits the room. This guide explains the full process in clear steps, with practical tips from real stage situations and common mistakes worth avoiding.
Start With the Room, Kit, and Stage Plan
Before you place a microphone, listen to the room. A small club, a theater, and an outdoor stage each affect drum sound in different ways. Hard walls can create strong reflections, while soft curtains and people absorb high frequencies.
The drum kit itself also matters. A well-tuned kit needs less processing and usually sounds more natural through the PA. No microphone can fully fix loose heads, rattling hardware, or poor cymbal balance.
When learning how to mic drums for live performance, start with these checks:
- Tune each drum before soundcheck.
- Remove unwanted rattles from stands, pedals, and hardware.
- Place the kit where the drummer can play comfortably.
- Keep microphones away from foot traffic and moving stage gear.
- Check how close the drum kit is to loud guitar or bass amplifiers.
- Decide whether the venue needs a full drum mix or only light reinforcement.
In small rooms, the audience may hear a large amount of acoustic drum sound. The PA should support the kit, not overpower it. In larger venues, the microphones may carry nearly all the drum sound, so placement and mixing become more important.
A useful rule is simple: fix the source before fixing the signal. A balanced drummer, tuned heads, and controlled cymbals make every later step easier.

Choose the Right Drum Microphones
Most live drum setups use dynamic microphones because they are tough, handle high sound pressure levels, and reject some sound from nearby instruments. Condenser microphones are common for overheads because they capture detail and cymbal energy. Boundary or dedicated kick microphones can also work well when low-end weight is the main goal.
You do not need the most expensive microphone to get a strong live drum sound. You need a microphone that suits the drum, the drummer, and the venue.
Kick Drum Microphone
A kick drum microphone should handle deep low frequencies and sharp attack. Place it inside the ported front head for more attack and definition. Move it closer to the beater area for a harder click, or move it toward the shell center for a rounder sound.
If the kick drum has no front port, place the microphone a few inches outside the head. This gives a softer and more natural tone, though it may capture more stage sound.
Snare Drum Microphone
A dynamic microphone is a reliable choice for the snare. Aim it toward the area between the center and edge of the batter head. Pointing toward the center creates more attack, while pointing toward the edge captures more ring and body.
The bottom snare microphone captures wire response and brightness. If you use one, reverse its polarity relative to the top microphone and check the sound in mono. The correct setting is the one that gives the snare more body instead of less.
Tom Microphones
Rack toms and floor toms need microphones that capture low-end depth without becoming muddy. Clip-on microphones can save space and reduce stand clutter. Standard dynamic microphones work well when placed just above the rim and aimed toward the center of the head.
Toms often need less microphone level than beginners expect. Bring them up only when the drummer plays them. Otherwise, they can add unnecessary noise and stage wash.
Overhead Microphones
Overheads capture cymbals, the top end of the kit, and much of the natural image. Small diaphragm condensers often provide clear detail, while large diaphragm condensers can sound full and smooth.
The overhead pair should not be treated as two random cymbal microphones. They are the main picture of the kit. Place them so the snare and kick remain centered and the cymbals feel balanced from left to right.
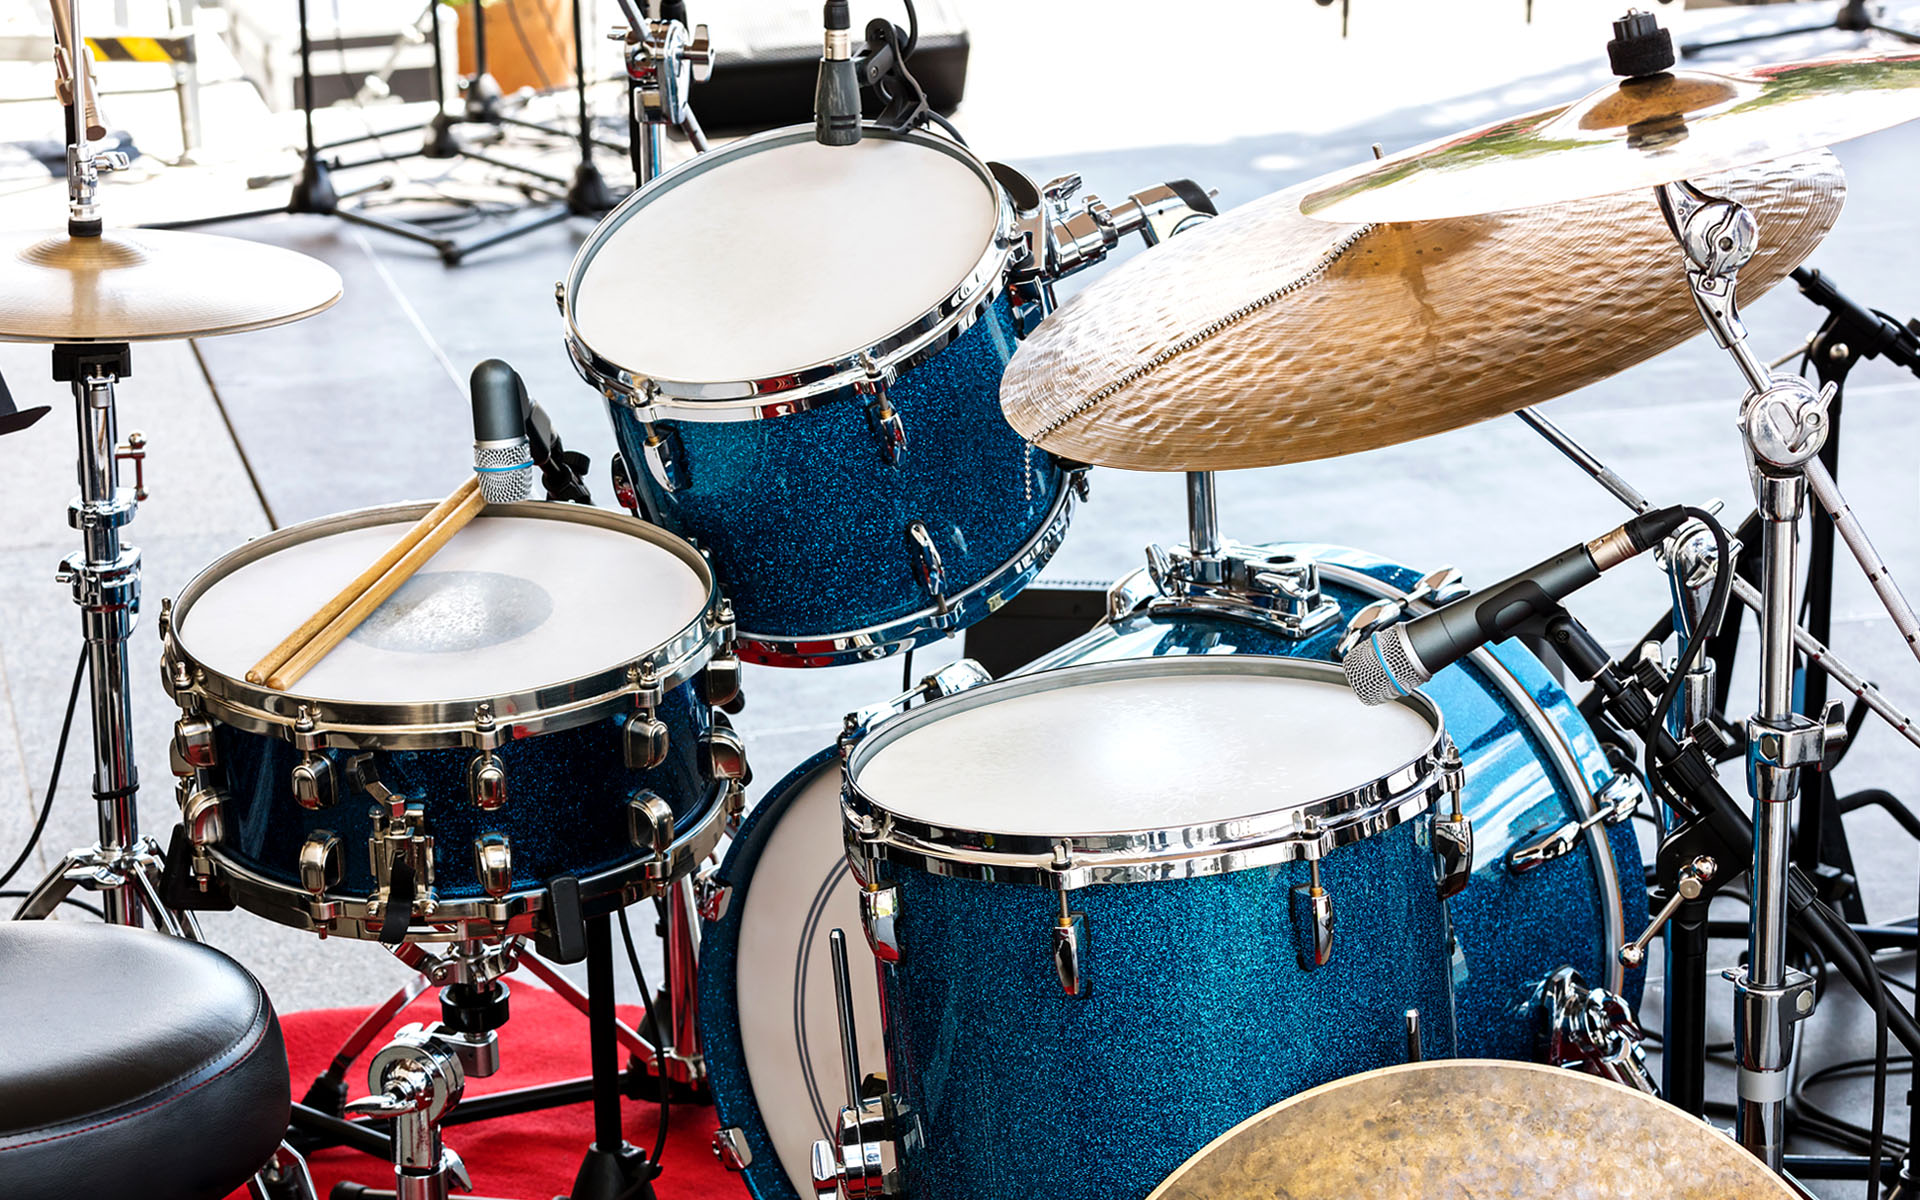
How to Mic the Kick Drum
The kick drum often gives the live mix its foundation. A strong kick sound should have low-end weight, beater definition, and enough control to remain clear beside the bass guitar.
For a common ported kick drum, begin with the microphone inside the hole. Start about four to eight inches from the inside edge of the port. Aim it slightly away from the exact center if the sound is too sharp.
Use this placement guide:
- Near the beater area creates more attack and click.
- Near the shell center creates more low-end body.
- Near the port edge creates a balanced, open tone.
- Outside the front head creates more natural resonance.
- Deeper placement usually gives more isolation from stage noise.
During soundcheck, ask the drummer to play both soft and loud hits. A kick drum that sounds impressive during one hit may become too boomy when played in a full song.
In my live work, one common mistake was placing the kick microphone too deep without checking the mix. The result sounded tight in headphones but thin through the PA. Moving it back toward the port restored the shell tone and reduced the need for heavy EQ.
A practical kick EQ approach may include:
- Cutting muddy frequencies around 200 to 350 Hz when needed.
- Adding low-end weight around 50 to 80 Hz if the PA supports it.
- Adding attack around 2.5 to 5 kHz when the beater is hard to hear.
- Using a gate carefully if stage noise is a problem.
Do not boost low frequencies automatically. A large boost can make the kick compete with the bass guitar and reduce overall clarity.

How to Mic the Snare Drum
The snare is often the emotional center of the drum kit. It needs enough body to sound full, enough crack to cut through guitars, and enough rejection to avoid excessive hi-hat bleed.
Place the top microphone one to three inches above the rim. Aim it across the head rather than directly at the center. This angle reduces the chance of a harsh sound and keeps the microphone away from the drummer’s stick path.
The exact angle depends on the drummer’s technique. A heavy hitter may need the microphone tucked lower and angled away from the stick. A softer player may benefit from a slightly more open position.
If the hi-hat is too loud in the snare microphone, try these changes:
- Aim the microphone away from the hi-hat.
- Lower the microphone slightly.
- Move the microphone closer to the snare head.
- Ask the drummer to adjust the hi-hat height.
- Use a microphone with a tighter pickup pattern.
For a bottom snare microphone, place it beneath the drum and aim it toward the wires. Keep it clear of the stand and throw-off mechanism. Always test polarity or phase with the top microphone. If the snare loses low-end punch when both microphones are active, reverse the bottom microphone’s polarity and compare again.
When you mic drums for live performance, remember that the snare microphone does not need to capture the entire snare sound alone. The overheads and room also contribute body and realism.

How to Mic Toms
Toms can sound huge in a live mix, but they can also create clutter between fills. The goal is to capture each drum clearly while keeping unused microphones quiet.
Place each tom microphone close to the head, usually just above the rim. Aim toward the center, but avoid pointing straight down unless that position gives the best tone. A slight angle often provides a better balance of attack and resonance.
For floor toms, leave enough space for the drummer’s arm and movement. A microphone placed too close to the head may sound overly focused. A microphone placed too far away may capture excessive cymbal bleed.
Gates can help toms stay clean between hits. However, a gate that closes too quickly can cut off natural resonance. Set the attack fast enough to catch the hit, use a moderate release, and adjust the threshold while the drummer plays a full song.
A good tom soundcheck includes:
- Ask the drummer to play each tom at normal performance volume.
- Listen for attack, body, ring, and unwanted bleed.
- Adjust microphone angle before using EQ.
- Set the gate only after the microphone sounds natural.
- Test fills from soft to loud.
- Check that no gate cuts off the end of a roll.
One lesson I learned early was not to gate every tom the same way. A high rack tom and a large floor tom have different decay times. Each gate needs its own threshold and release.
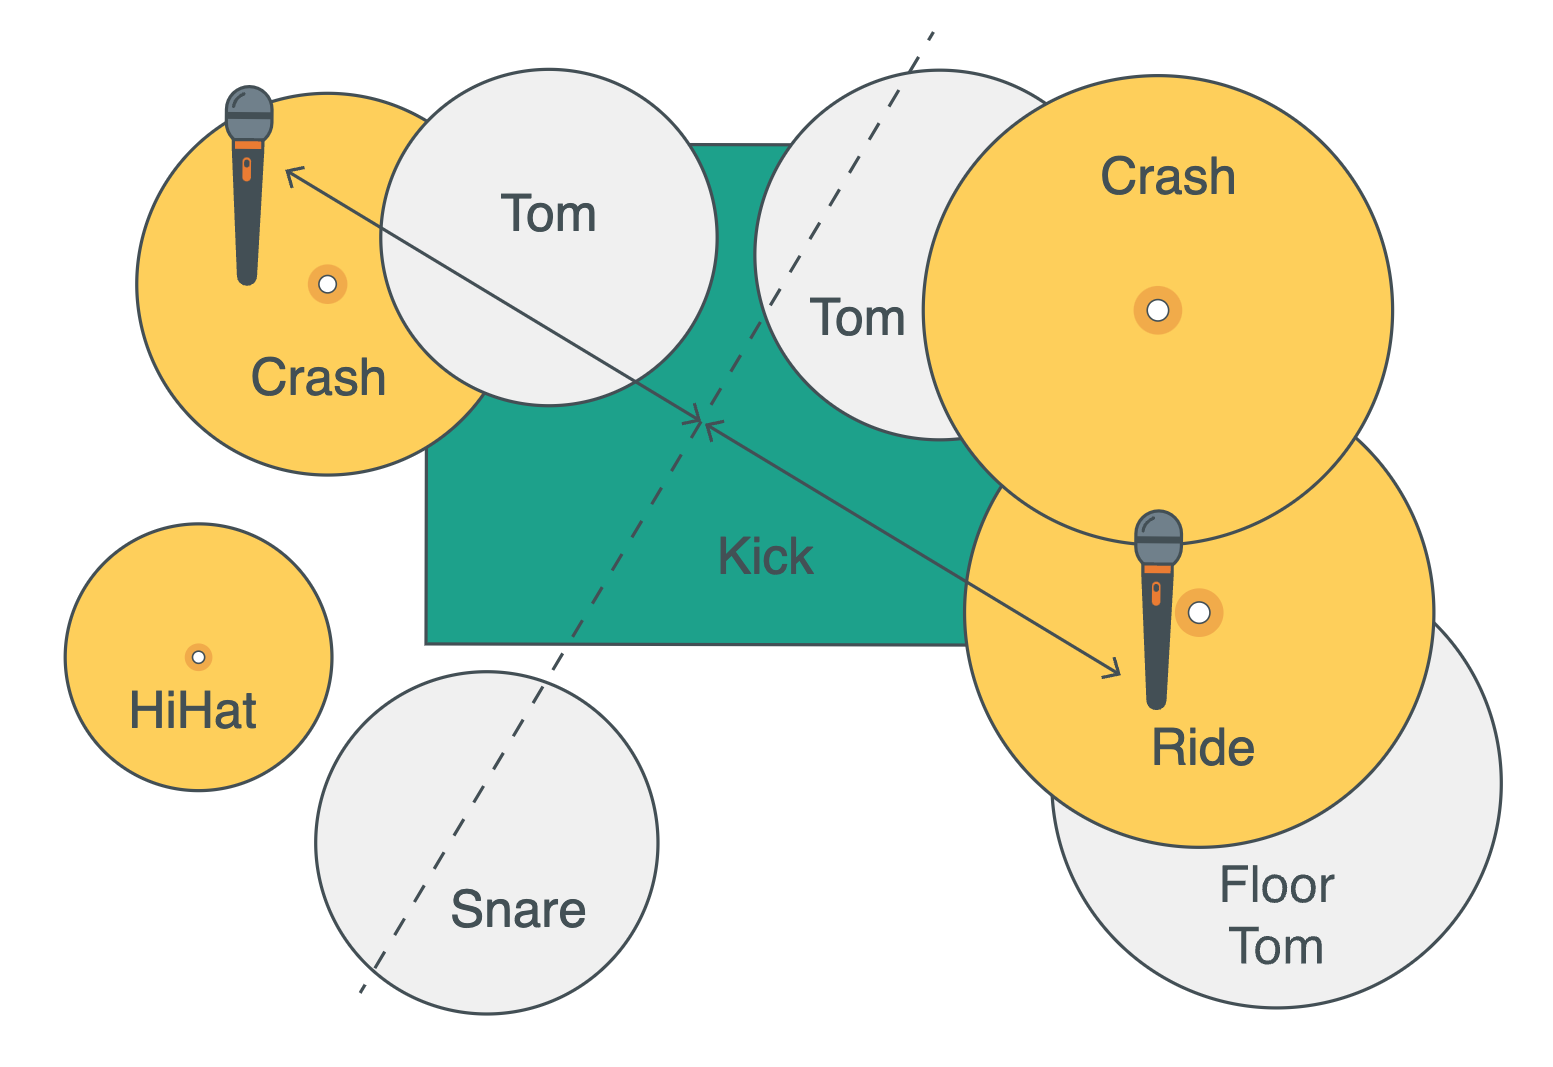
Use Overheads for a Balanced Drum Picture
Overhead microphones are central to how to mic drums for live performance. They capture cymbals, stick detail, and the overall shape of the kit. In many small venues, the overheads may provide most of the drum sound.
Common stereo techniques include spaced pair, XY, and ORTF. A spaced pair can sound wide but may create phase problems. XY offers a stable center image and strong mono compatibility. ORTF gives width with a more natural sense of space.
For a simple live setup, begin with an XY pair above the kit. Keep the capsules close together and aim the pair toward the snare. This approach reduces timing differences between the two microphones and often works well in difficult rooms.
Measure or compare the distance from each overhead microphone to the snare. If one microphone is much closer, the snare may sound off-center or hollow when the signals combine.
When placing overheads, listen for:
- Balanced cymbal volume.
- A centered snare.
- Clear kick presence.
- Even coverage of rack and floor toms.
- Controlled room reflections.
- A stereo image that still sounds good in mono.
Do not place overheads too low. Low placement can make cymbals dominate and increase the risk of a stick strike. Do not place them too high without a reason, because distant microphones capture more room sound and stage bleed.
In a reflective venue, I often use a lower, tighter overhead setup. In a larger room with good acoustic control, I can raise the microphones for more space and depth.

Check Phase, Polarity, and Bleed
Phase problems can make a drum kit sound thin even when every microphone seems to work alone. This happens because sound from the same drum reaches different microphones at different times.
Polarity reversal changes the direction of the electrical waveform. Time alignment changes when the waveform arrives. They are related problems, but they are not the same thing.
To check the kit:
- Listen to the kick microphone alone.
- Add the overheads.
- Reverse polarity on the kick channel and compare.
- Keep the setting with stronger, fuller low end.
- Repeat the process with the snare and overheads.
- Check the full kit in mono.
Do not chase perfect phase at the expense of a natural sound. A setting that looks correct on a meter may not sound best in the room. Your ears, the drummer’s feedback, and the audience area should guide the final choice.
Bleed is not always bad. Some bleed creates a realistic drum image. The goal is controlled bleed, not total isolation.
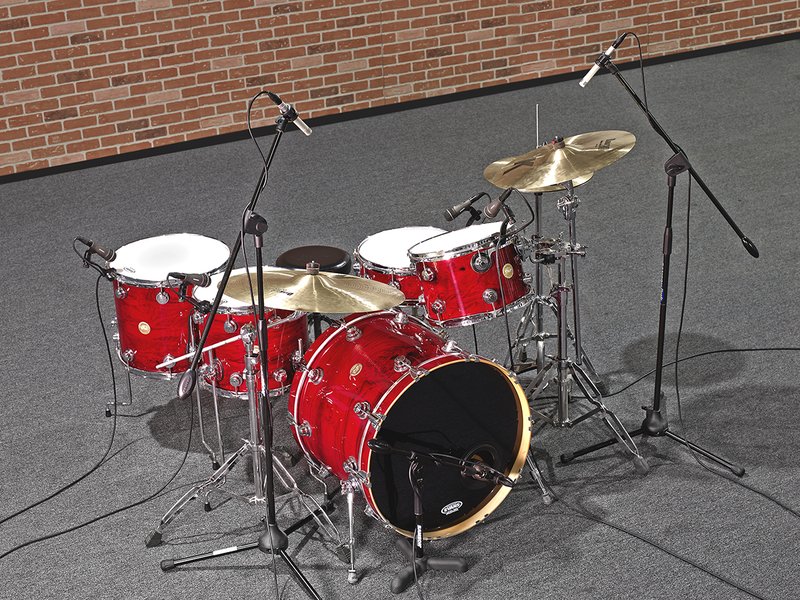
Set Gain, EQ, Compression, and Gates
Good gain structure keeps the drum mix clean and gives the console enough headroom. Ask the drummer to play at real performance volume, not gentle soundcheck taps.
Set each preamp so strong hits leave safe headroom. Digital consoles often show clipping clearly, but you should still avoid running channels close to the limit. A drummer can play much harder during the show than during the first soundcheck pass.
Use processing to solve clear problems:
- High-pass filters can reduce rumble on snare, toms, and overheads.
- A small cut in the low mids can reduce boxiness.
- A controlled boost can add kick attack or snare presence.
- Compression can make the kit more stable.
- Gates can reduce noise between tom hits.
- Limiters can protect equipment, but they should not replace good gain control.
Compression settings depend on the drum and style. A medium attack can let the initial hit pass through, while a moderate release can help the compressor recover before the next note. Start gently and increase the effect only when the mix needs it.
Avoid extreme EQ cuts and boosts. If a microphone needs a large correction, change its position first. Microphone placement is usually more effective than aggressive processing.

Build a Drum Mix for the Whole Band
A drum kit should support the song, not compete with every other instrument. The kick must work with the bass guitar. The snare must sit beside vocals and guitars. Cymbals must remain clear without becoming painful.
Start with the overheads, then add kick and snare. Bring in toms only as needed. This method creates a natural kit image and prevents close microphones from taking over the mix.
Listen from the audience area whenever possible. The sound at the mixing console may differ from the sound near the front row. Ask another engineer or band member to walk the room during soundcheck and report on harshness, low-end buildup, and balance.
For loud stages, monitor volume can affect microphone bleed. Point monitor wedges away from drum microphones when possible. In-ear monitors can reduce stage volume and make drum microphones easier to control.
If the venue is small, you may not need every channel in the PA. A kick, snare, and overhead pair can often provide enough support. More microphones are not always better.
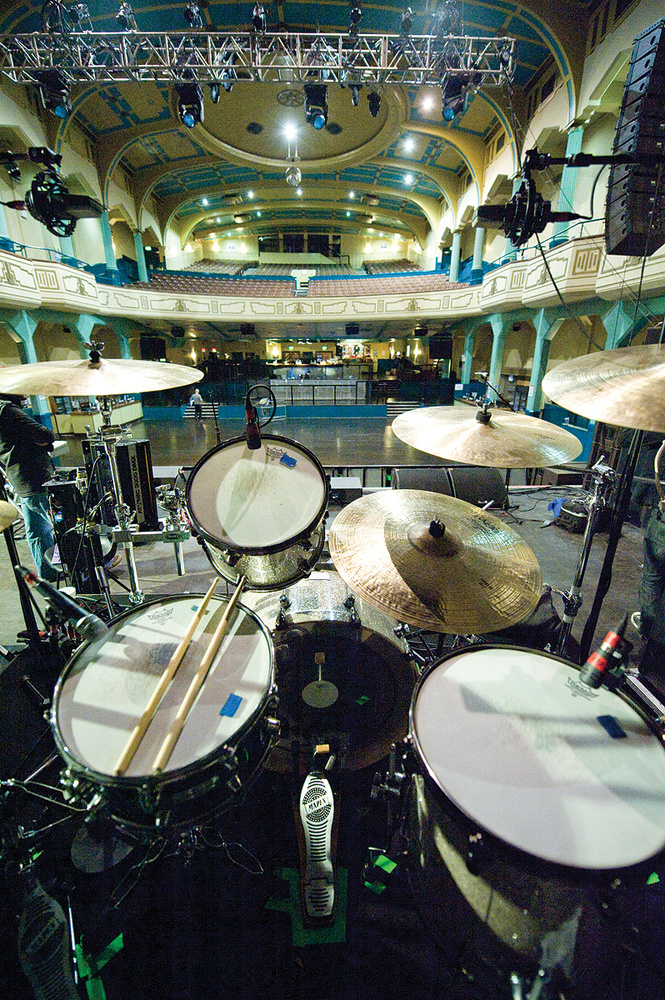
Common Mistakes When Miking Live Drums
Even experienced engineers make mistakes when the room changes quickly. The key is to spot the problem early and use the simplest solution.
Using Too Many Microphones
A microphone on every drum can create more bleed, more phase interaction, and more work. Use additional microphones when they solve a real problem.
Ignoring the Cymbals
Cymbals can dominate overhead microphones, especially when the drummer hits them hard. Ask the drummer for a balanced playing approach before trying to remove all cymbal sound with EQ.
Placing Microphones in the Stick Path
A microphone that sits too high or too close may be hit during the show. Protect the microphone, the drummer, and the performance by choosing a safe angle and securing the stand.
Relying on EQ to Fix Placement
If the snare sounds harsh, move the microphone. If the kick sounds hollow, test another position. EQ should refine a good source, not rescue a poor one.
Forgetting Cable and Stand Safety
Tape cables where musicians walk. Use stable stands and keep microphone clips tight. A great drum mix is useless if a cable causes a trip or a microphone falls during the first song.
Skipping a Full Song Soundcheck
Individual hits do not reveal how the kit behaves in a real arrangement. Always listen to a full song with vocals, guitars, bass, and monitors active.
A Practical Live Drum Miking Checklist
Use this checklist before the audience enters:
- Tune the drums and remove rattles.
- Confirm the microphone list and channel plan.
- Place the kick microphone for both body and attack.
- Angle the snare microphone away from the hi-hat.
- Place tom microphones safely outside the stick path.
- Set overheads for a centered snare and balanced cymbals.
- Check polarity and phase in the full kit.
- Set preamp gain with real playing volume.
- Listen for feedback before adding heavy EQ.
- Walk the room during a full-band soundcheck.
- Save the console scene or write down key settings.
- Keep spare cables, clips, and microphones nearby.
A labeled input list saves time. Write down channels such as kick, snare top, snare bottom, rack tom, floor tom, overhead left, overhead right, and room. Clear labels help every engineer work faster.
When you mic drums for live performance, preparation protects your sound. A few minutes spent on cable paths, microphone angles, and channel labels can prevent major problems during the show.
Frequently Asked Questions About How to Mic Drums for Live Performance
How many microphones do I need for a live drum kit?
A basic setup can use three microphones: one for kick and two overheads. A fuller setup may include microphones for kick, snare, toms, and overheads, but the best number depends on the venue, drummer, and PA system.
Where should I place the kick drum microphone?
For a ported front head, start four to eight inches inside the port. Move it toward the beater for more attack or toward the shell center for a rounder, deeper tone.
Do I need overhead microphones for live drums?
Overheads are helpful because they capture cymbals and the natural balance of the kit. In a small room, you may use fewer overheads or skip them if the acoustic drum sound already fills the space.
Should I use gates on tom microphones?
Gates can reduce cymbal bleed and stage noise between tom hits. Set each gate separately, because different toms have different volume levels and decay times.
How do I stop cymbals from overpowering the drum mix?
Start by adjusting microphone placement and asking the drummer to balance their playing. Lower overhead levels, use gentle EQ, and avoid boosting high frequencies without checking the sound from the audience area.
What is the best microphone for live drums?
There is no single best microphone for every drum or venue. Durable dynamic microphones suit kick, snare, and toms, while condenser microphones often work well for overheads when extra detail is needed.
Conclusion
Great live drum sound comes from the full system: a tuned kit, suitable microphones, careful placement, clean gain, controlled processing, and a mix that fits the room. Start with the kick, snare, toms, and overheads, then adjust by listening rather than following fixed settings.
The most useful lesson in how to mic drums for live performance is to make small changes and test them in context. Move a microphone before reaching for heavy EQ, check the kit in mono, and always judge the mix from the audience area.
Set up your next drum session with this guide, record your notes, and refine your approach from show to show. Explore more live audio techniques, share your results, and keep building your ears through real-world practice.
