

Learn how to play the blues on acoustic guitar by mastering simple chords, shuffle rhythms, blues scales, and expressive bends.
Learning how to play the blues on acoustic guitar is less about playing many notes and more about making each note speak. The blues combines a steady groove, strong chord changes, soulful phrasing, and small moments of tension. This guide breaks down the essential skills in a clear order, so you can move from basic chords to full blues songs with confidence.
What makes acoustic guitar blues sound different?
The blues is built on feeling, repetition, and response. A short guitar phrase may answer a vocal line, then return with a slight change. This call-and-response idea gives blues music its conversational sound.
Acoustic guitar blues often uses:
• Dominant seventh chords for a tense, open sound
• A 12-bar chord pattern
• Shuffle or swing rhythms
• Minor and major pentatonic scales
• Bends, slides, hammer-ons, pull-offs, and vibrato
• Alternating bass notes under a higher melody
The acoustic guitar has no amplifier to hide behind. That is good news. It teaches you to control your touch, timing, and tone. A soft thumb can sound like a quiet bass player, while a stronger brush can fill the room like a small rhythm section.
A useful way to think about blues guitar is this: your thumb keeps the feet moving, and your fingers tell the story.
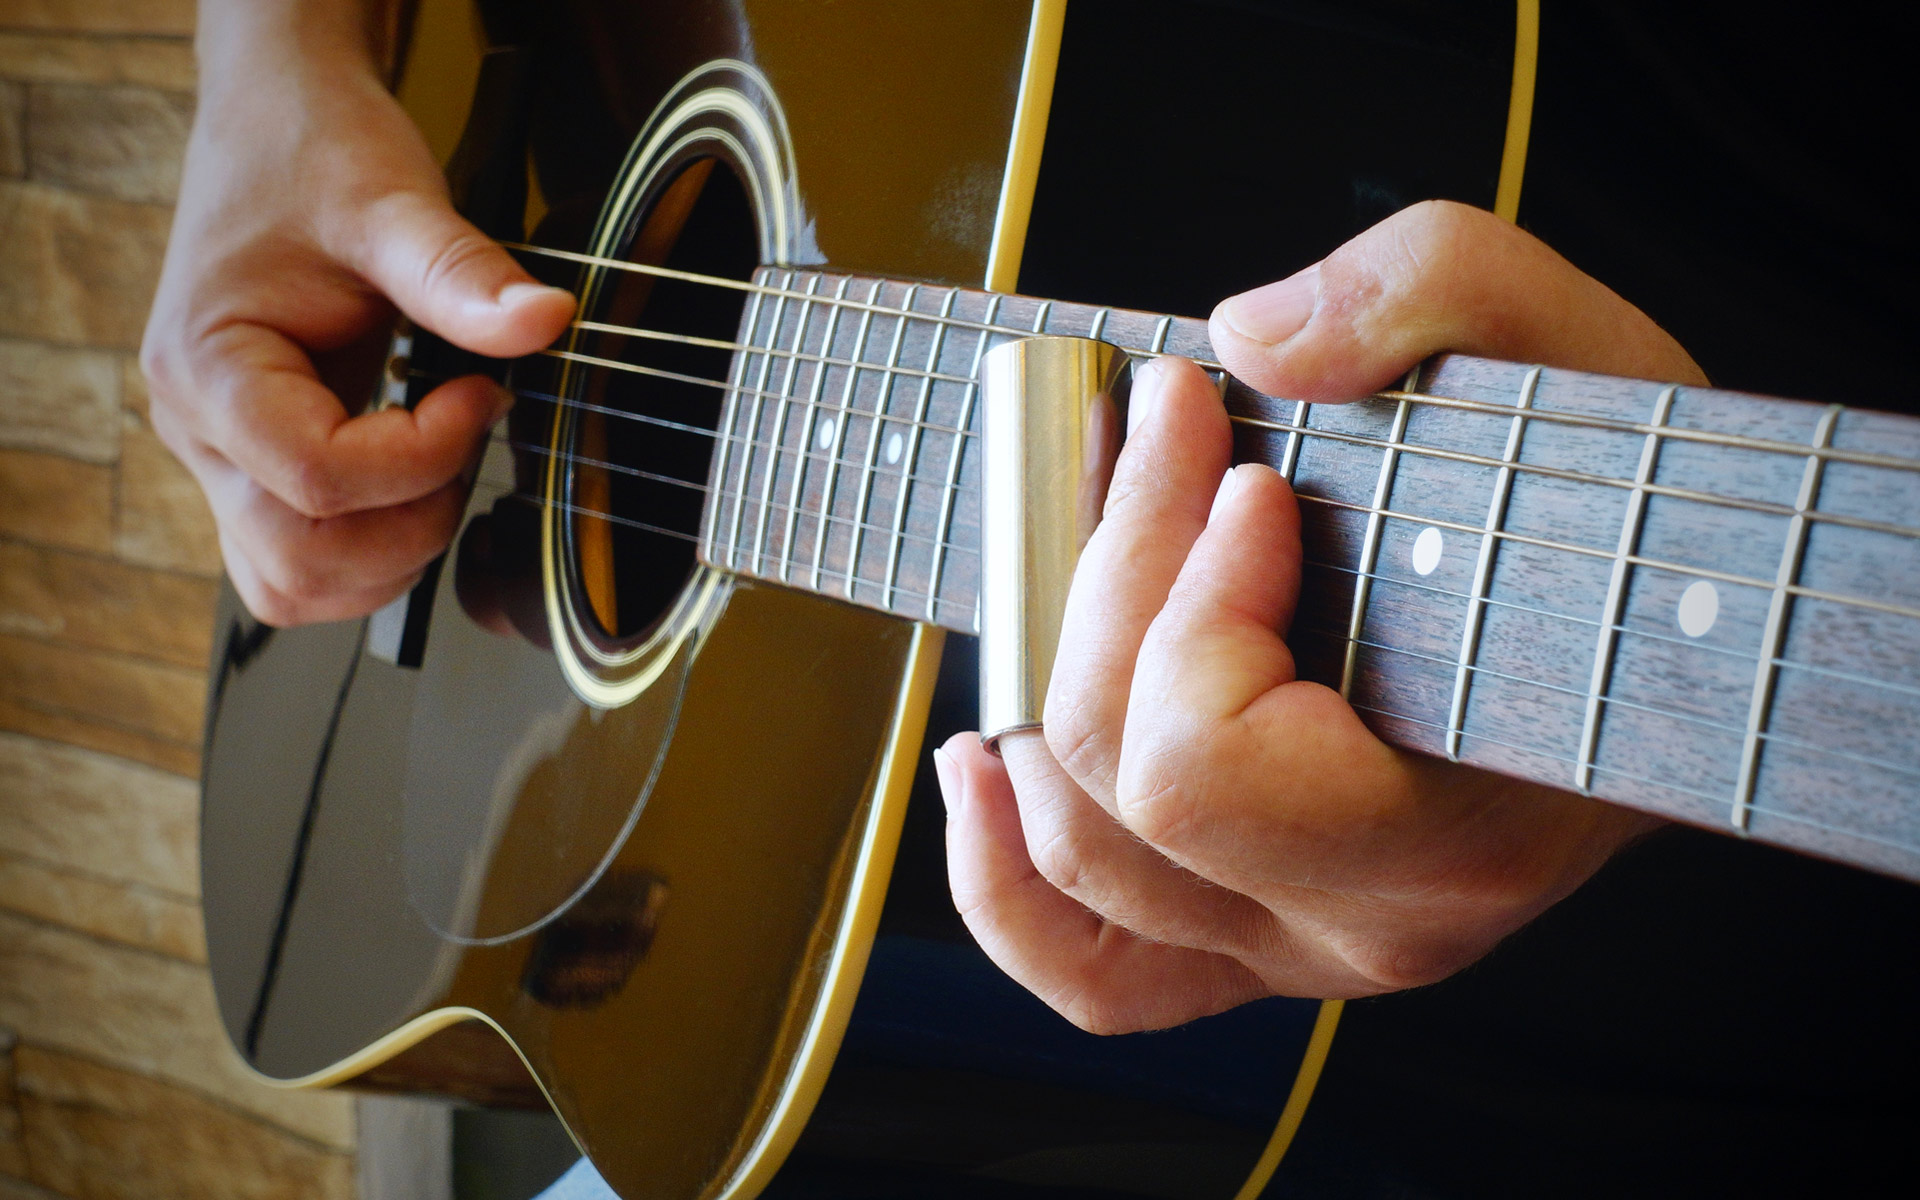
Choose the right acoustic guitar setup
You do not need an expensive guitar to learn how to play the blues on acoustic guitar. You need an instrument that stays in tune, feels comfortable, and responds well to a light touch.
A steel-string acoustic guitar is the most common choice for country blues, folk blues, and modern acoustic blues. A dreadnought gives you strong bass and volume. A smaller concert or parlor guitar may feel easier to hold and can produce a focused, woody tone.
Before you practice, check these basics:
• Use fresh strings with a gauge that feels comfortable. Light strings are easier for bends, while medium strings can give stronger bass.
• Keep the guitar properly tuned. Standard tuning is E, A, D, G, B, E from the lowest string to the highest.
• Check the action. Very high strings can make fretting painful and slow.
• Sit or stand in a relaxed position. Your wrist should not bend sharply.
• Use a pick, your fingers, or both. Each choice creates a different blues sound.
Many players use a thumb pick with bare fingers. This setup gives the thumb a clear bass sound while the fingers play melody notes. You can also use a flat pick and add your middle or ring finger when needed.
If your fingers hurt, take a break. Mild fingertip soreness is normal at first, but sharp pain often signals poor posture, too much pressure, or a guitar setup problem.

Learn the 12-bar blues progression
The 12-bar blues is the main structure behind countless blues songs. It uses three primary chords:
• The I chord, built from the first note of the key
• The IV chord, built from the fourth note
• The V chord, built from the fifth note
In the key of E, the chords are:
• I: E7
• IV: A7
• V: B7
A basic 12-bar blues in E looks like this:
| Bar | Chord |
|---|---|
| 1 | E7 |
| 2 | E7 |
| 3 | E7 |
| 4 | E7 |
| 5 | A7 |
| 6 | A7 |
| 7 | E7 |
| 8 | E7 |
| 9 | B7 |
| 10 | A7 |
| 11 | E7 |
| 12 | B7 |
The B7 in the last bar creates tension. It leads your ear back to E7, where the next chorus begins. Some blues songs use E7 in the final bar instead, especially when the song ends.
Start by changing between E7 and A7. Then add B7. Play four slow beats per chord before trying a full shuffle. Clean chord changes matter more than speed.
Easy open blues chords
These open shapes are useful when learning how to play the blues on acoustic guitar:
• E7: 0 2 0 1 0 0
• A7: X 0 2 0 2 0
• B7: X 2 1 2 0 2
The numbers show the strings from the low E string to the high E string. “X” means do not play that string.
If B7 feels difficult, practice the shape by placing all fingers at once. Do not build the chord one finger at a time forever. Blues rhythm depends on quick, relaxed movement.

Master the blues shuffle rhythm
The shuffle is one of the most important sounds in blues guitar. It divides each beat into a long-short pattern instead of two equal notes. The feel is often counted as:
“ONE and uh, TWO and uh, THREE and uh, FOUR and uh.”
You play the first note and the last note of each three-part group. The middle part is skipped. This creates the rolling rhythm heard in Chicago blues, Texas blues, rockabilly, and many classic guitar styles.
Start with an E shuffle on the low E and A strings:
• Play the open low E string
• Add the second fret on the low E string
• Return to the open low E string
• Repeat the same idea on beats two, three, and four
A simple written idea is:
e|----------------|
B|----------------|
G|----------------|
D|----------------|
A|----------------|
E|-0-3-0-3-0-3-0-3|
This example shows the notes, but the rhythm creates the real groove. Keep your hand moving in a steady pattern, even when you do not strike every motion.
When you move to A7, use the open A string as the bass note. For B7, use the second fret of the A string. Practice each chord alone before connecting the full 12-bar form.
A common mistake is to rush the short note. Keep the bass steady and relaxed. Imagine a train moving down the track. It should roll forward, not sprint.

Add alternating bass for a country blues sound
Alternating bass is a key part of fingerstyle acoustic blues. Your thumb moves between bass strings while your fingers play treble notes. This creates the illusion of two guitarists playing at once.
In E, your thumb can alternate between the low E string and the A string. In A, it can move between the A string and the D string. In a basic pattern, the thumb plays on steady quarter notes while the fingers add small answers.
Try this slow exercise:
   1   2   3   4
E|-----0-------0-|
B|-----0-------0-|
G|-----1-------1-|
D|---------------|
A|---------------|
E|-0-------0-----|
Use your thumb for the low E notes and your index or middle finger for the higher notes. The example is simple, but it teaches an important skill: keeping the bass steady while adding melody.
Do not try to make the pattern fast right away. Play it at a slow tempo with a metronome. If the bass stops whenever you add a treble note, reduce the speed until both parts work together.
This is one of the biggest lessons in how to play the blues on acoustic guitar: independence matters more than complexity.

Learn the minor pentatonic blues scale
The minor pentatonic scale is a useful tool for blues solos. In the key of E, the common open-position pattern uses these notes:
e|----------------0-3-|
B|------------0-3-----|
G|--------0-2---------|
D|----0-2-------------|
A|0-2-----------------|
E|0-3-----------------|
The important notes are E, G, A, B, and D. The G is the minor third, and it gives the scale its darker blues color.
To make the sound more distinct, add the blues note, also called the flat fifth. In E, that note is B-flat. It sits between A and B and creates tension.
A basic E blues scale is:
e|----------------0-3-|
B|------------0-3-----|
G|--------0-2-3-------|
D|----0-2-------------|
A|0-1-2---------------|
E|0-3-----------------|
The B-flat note is useful, but it should not always be held for a long time. Treat it like a spice. Touch it, bend through it, or resolve it to B.
When soloing over an E7 blues, do not simply run the scale from low to high. Choose three or four notes and build a short phrase. Leave space after the phrase. Silence is part of the music.

Mix major and minor blues sounds
Many blues players mix the minor pentatonic scale with major-sounding notes. This blend creates the sweet and rough contrast that defines much of the style.
In E, you can add the note G-sharp to the E minor pentatonic sound. G-sharp is the major third of E. The note G gives a minor color, while G-sharp gives a brighter major color.
Try this simple idea:
• Play G on the third fret of the high E string
• Bend or slide toward G-sharp
• Resolve to E on the open high E string or the second fret of the D string
This movement is common because it sounds like a voice changing from sadness to confidence. Do not worry about making the theory perfect at first. Listen to the emotional effect.
A practical soloing method is:
- Start with the E minor pentatonic scale.
- Add the flat fifth for tension.
- Add G-sharp as a passing or target note.
- End phrases on E, B, or G-sharp.
- Leave space before beginning the next phrase.
This approach helps you understand how to play the blues on acoustic guitar without memorizing dozens of patterns.

Use bends, slides, hammer-ons, and pull-offs
Blues guitar is expressive because the player changes the sound after the note begins. A plain note can become a vocal-like phrase with a small bend or slide.
Bends
A bend raises the pitch by pushing the string across the fretboard. On acoustic guitar, use gentle bends because steel strings can feel firm and the instrument may not have much sustain.
Practice bending the third string at the second fret. Compare the bent pitch with the third fret. Your goal is to reach the correct note, not to push as far as possible.
Slides
A slide connects two notes smoothly. Pick the first note, then move the same finger to the next fret while keeping light pressure.
Try sliding from the second fret to the fourth fret on the third string. Let the movement sound like a short vocal cry.
Hammer-ons
Pick the first note, then strike a higher fret with another finger. The second note sounds without a second pick stroke.
Try this on the third string:
G|--0h2--|
Pull-offs
Fret two notes, pick the higher one, and pull your finger away to sound the lower note.
G|--2p0--|
These techniques should serve the rhythm and melody. Too many effects can make a phrase sound crowded. One well-placed slide may say more than six fast notes.

Practice blues licks in musical phrases
A lick is a short musical idea. Good blues players reuse licks, but they change the rhythm, ending, or starting note. This makes the music feel connected rather than repetitive.
Try this simple E blues phrase:
e|-------------------|
B|-------------------|
G|--0h2--0-----------|
D|----------2--0-----|
A|---------------2---|
E|-------------------|
Play it slowly. Let the notes breathe. Then answer it with a second phrase that ends on the open high E string.
You can create your own call-and-response exercise:
- Play a two-beat phrase.
- Rest for two beats.
- Repeat the idea with a different ending.
- Move the phrase to another string.
- End on the root note of the chord.
A strong blues solo usually has a clear beginning, middle, and end. Think like a speaker. Do not speak every word at once.
One of the most useful habits in learning how to play the blues on acoustic guitar is recording your practice. A phone recording can reveal rushed timing, weak bends, and repeated phrases that you may not notice while playing.

Develop a strong blues rhythm
Many guitarists focus on soloing too early. Rhythm is often the more valuable skill. A player who holds a steady groove can support a singer, harmonica player, or full band.
Practice these rhythm styles:
• Straight quarter-note strums
• Shuffle patterns
• Muted percussive strums
• Alternating bass
• Bass-and-chord patterns
• Stop-time accents
For muted strums, lightly rest your fretting hand on the strings without pressing them to the fretboard. Strum the strings and listen for a dry, rhythmic click. This sound can add movement between chord hits.
You can also play a bass note before each chord. For example, play the open low E string, then strike E7. This creates a simple bass-to-chord effect.
Use a metronome at a slow speed, such as 60 beats per minute. Start with one chord per bar. Then try two rhythmic changes per bar. Accuracy comes first.
The best way to play the blues on acoustic guitar is to make the rhythm feel steady enough that another musician could join without guessing.
Try alternate tunings and a capo
Standard tuning is the best place to begin, but alternate tunings can open new sounds once your basic skills are solid.
Open D tuning changes the strings to D, A, D, F-sharp, A, D. Strumming all open strings produces a D major chord. Open G tuning changes the strings to D, G, D, G, B, D and is common in slide blues.
A capo can also make blues guitar easier. Place a capo on the second fret and play open-position shapes. The guitar will sound higher, while your chord shapes remain familiar.
These tools have limits:
• Alternate tunings can make familiar chord shapes confusing.
• Open tunings may require a different scale approach.
• A capo changes the key but does not automatically improve your rhythm.
• Slide guitar requires clean muting and accurate placement.
Learn one tuning at a time. Build a few complete songs before changing again. Too many options can slow your progress.
Learn basic slide guitar technique
A slide creates a smooth, vocal sound. You can use a glass, metal, or ceramic slide. Many players wear it on the ring finger or little finger, but comfort matters most.
The slide should sit above the fret, not directly on it. Use light pressure. Pressing too hard can push the note sharp and create unwanted fret noise.
Mute behind the slide with a finger from your fretting hand. Use the picking hand to mute strings you do not want to hear. Slide guitar is not only about making notes ring. It is also about controlling the strings that should stay quiet.
Begin with open strings in open D or open G tuning. Play short notes and move the slide slowly between frets. Listen for the pitch. A tuner can help you check whether you are landing accurately.
Do not use a slide before you can control basic rhythm. Slide sounds can be exciting, but timing and muting still carry the music.
Follow a simple four-week practice plan
A clear plan helps you build skill without feeling lost. Practice for 20 to 30 minutes, five days per week. Short, focused sessions often work better than one long session each weekend.
Week one: Chords and time
Practice E7, A7, and B7. Play one chord per bar through a 12-bar blues. Use a metronome and keep the tempo slow.
Week two: Shuffle rhythm
Play the E, A, and B shuffle patterns. Focus on a steady thumb or pick motion. Record one minute of practice each day.
Week three: Scale and phrasing
Learn the open E minor pentatonic scale. Create two-beat phrases. Add rests and end phrases on E or B.
Week four: Combine the parts
Play the 12-bar progression for several rounds. Use rhythm for one chorus, then add a short solo. Return to rhythm after the solo.
A useful daily routine is:
- Warm up with open-string picking for three minutes.
- Practice chord changes for five minutes.
- Play a shuffle for five minutes.
- Practice one scale or lick for five minutes.
- Play a complete 12-bar blues for five minutes.
- Record a final take and note one improvement.
This routine gives every part of how to play the blues on acoustic guitar a place in your practice.
Avoid common beginner mistakes
Most early problems come from rushing, pressing too hard, or trying to learn too much at once.
Watch for these mistakes:
• Playing faster before the rhythm is steady
• Using too much fretting-hand pressure
• Ignoring rests between phrases
• Changing chords late
• Bending without checking the pitch
• Practicing scales without making music
• Adding effects to cover weak timing
• Skipping the metronome completely
• Playing through sharp pain
• Learning many licks without learning full songs
A common lesson from practice rooms is that players often improve faster when they simplify. One clean shuffle and one clear lick can teach more than a difficult solo played without control.
When you make a mistake, keep the beat moving. Blues music can absorb small errors if the pulse remains strong. Stopping after every mistake makes your timing less reliable.
Use songs to build real-world skill
Songs give your practice a purpose. Choose simple blues recordings with clear guitar parts. Listen for the bass movement, chord changes, pauses, and repeated phrases.
Start by identifying:
• The key
• The tempo
• The number of bars
• The I, IV, and V chords
• The rhythm pattern
• The ending or turnaround
You do not need to copy every note. First, copy the groove. Then learn one short phrase. Finally, play along with the recording at a slower speed.
Classic country blues, Delta blues, Chicago blues, Texas blues, and acoustic folk blues each use different sounds. Listening across these styles helps you hear the difference between fingerstyle patterns, electric-style riffs, slide playing, and chord-based accompaniment.
Slow down recordings with audio software if needed. A short section repeated several times is easier to understand than an entire song played at full speed.
Understand the blues turnaround
A turnaround is a phrase at the end of the 12-bar form. It leads back to the first chord or signals that the song is ending.
In E, a simple turnaround may move through:
• E7
• E7 with a descending bass note
• A7 or B7 tension
• E7 resolution
You can also use a descending line on the low E string:
E|--0--3--2--1--0--|
This line is only a starting idea. The rhythm and chord underneath determine how it feels.
Turnarounds are useful because they help listeners hear the shape of the blues. Without one, the end of the 12-bar cycle may sound unfinished.
Practice a turnaround at the end of every fourth chorus. Then try ending on a strong E7 chord instead. Both choices are part of learning how to play the blues on acoustic guitar.
Frequently asked questions about how to play the blues on acoustic guitar
Is acoustic guitar good for playing the blues?
Yes. Acoustic guitar works especially well for country blues, folk blues, fingerstyle, shuffle patterns, and slide guitar. Its natural tone highlights timing, touch, and rhythmic control.
What chords should a beginner learn first?
Start with E7, A7, and B7. These three dominant seventh chords create a complete 12-bar blues in the key of E and are comfortable in open position.
Do I need to read music to play acoustic blues?
No. You can learn blues through chord charts, tablature, listening, and rhythm practice. Reading music can help later, but strong timing and careful listening are more important at the beginning.
What is the easiest blues scale on guitar?
The open E minor pentatonic scale is one of the easiest blues scales for beginners. It uses open strings and simple fretted notes, making it useful for short solos and fills.
Can I play the blues with a pick?
Yes. A flat pick works well for strumming, shuffle rhythms, and single-note lines. You can also use hybrid picking by holding a pick while using your middle and ring fingers for extra notes.
How long does it take to learn how to play the blues on acoustic guitar?
You can play a simple 12-bar blues within a few practice sessions. Developing strong timing, expressive bends, fingerstyle independence, and confident improvisation takes regular practice over many months.
Should I learn standard tuning or open tuning first?
Begin with standard tuning because it teaches transferable chord and scale skills. Explore open D or open G after you can play a steady 12-bar progression in standard tuning.
Conclusion
Learning how to play the blues on acoustic guitar starts with a small set of tools: E7, A7, B7, a steady shuffle, the minor pentatonic scale, and expressive phrasing. Build each skill slowly, then combine them through a 12-bar progression.
Focus on timing before speed. Leave space between phrases. Record your practice, listen closely, and let simple ideas grow into your own sound. Pick up your guitar today, play one slow 12-bar blues, and share your progress or favorite blues recording in the comments.