

Speak clearly, keep a steady distance, and aim your voice past the microphone rather than directly into it.
Learning how to speak into a microphone is not just about holding it near your mouth. Good microphone technique combines posture, distance, breath control, clear speech, and smart volume management. Whether you are recording a podcast, giving a speech, singing, teaching online, or speaking at an event, small changes can make your voice sound stronger and more natural. This guide explains how to speak into a microphone with confidence while avoiding common problems such as popping sounds, low volume, echo, and distortion.
Why proper microphone technique matters
A microphone does not improve every voice by itself. It captures sound, including useful speech and unwanted noise. If you stand too far away, your voice may sound weak and distant. If you speak too close, your breath and mouth sounds may become distracting.
Good microphone technique helps you:
• Sound clear and easy to understand
• Keep your volume steady
• Reduce background noise
• Avoid harsh popping sounds
• Prevent audio clipping and distortion
• Speak with less vocal strain
• Create a more professional recording
When you learn how to speak into a microphone, think of it as guiding sound into a small listening window. Your goal is not to shout into that window. Your goal is to keep your voice at a steady level while staying in the microphone’s best range.

Choose the right microphone position
Microphone position affects your sound more than many beginners expect. A small movement can change your volume, tone, and level of background noise.
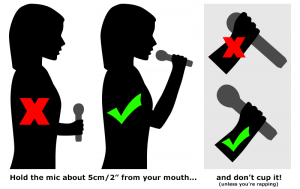
For most spoken-word microphones, keep the microphone about 4 to 8 inches from your mouth. The best distance depends on the microphone type, room noise, and how loudly you speak.
Use these basic position tips:
• Keep the microphone close enough to hear your voice clearly.
• Do not press the microphone against your lips.
• Point the front of the microphone toward your mouth.
• Keep the microphone slightly to one side when possible.
• Aim the microphone at the corner of your mouth to reduce breath noise.
• Keep your mouth and the microphone at a similar height.
If you use a handheld microphone, hold it by the handle rather than covering the grille. Covering the grille can change the sound and may create feedback. For a desk microphone, place it on a stable stand and use a shock mount or soft surface if desk noise is a problem.
Learning how to speak into a microphone also means learning how your specific microphone works. A dynamic microphone often needs a closer position. A sensitive condenser microphone may work well from a little farther away but can pick up more room noise.
Set the correct microphone distance
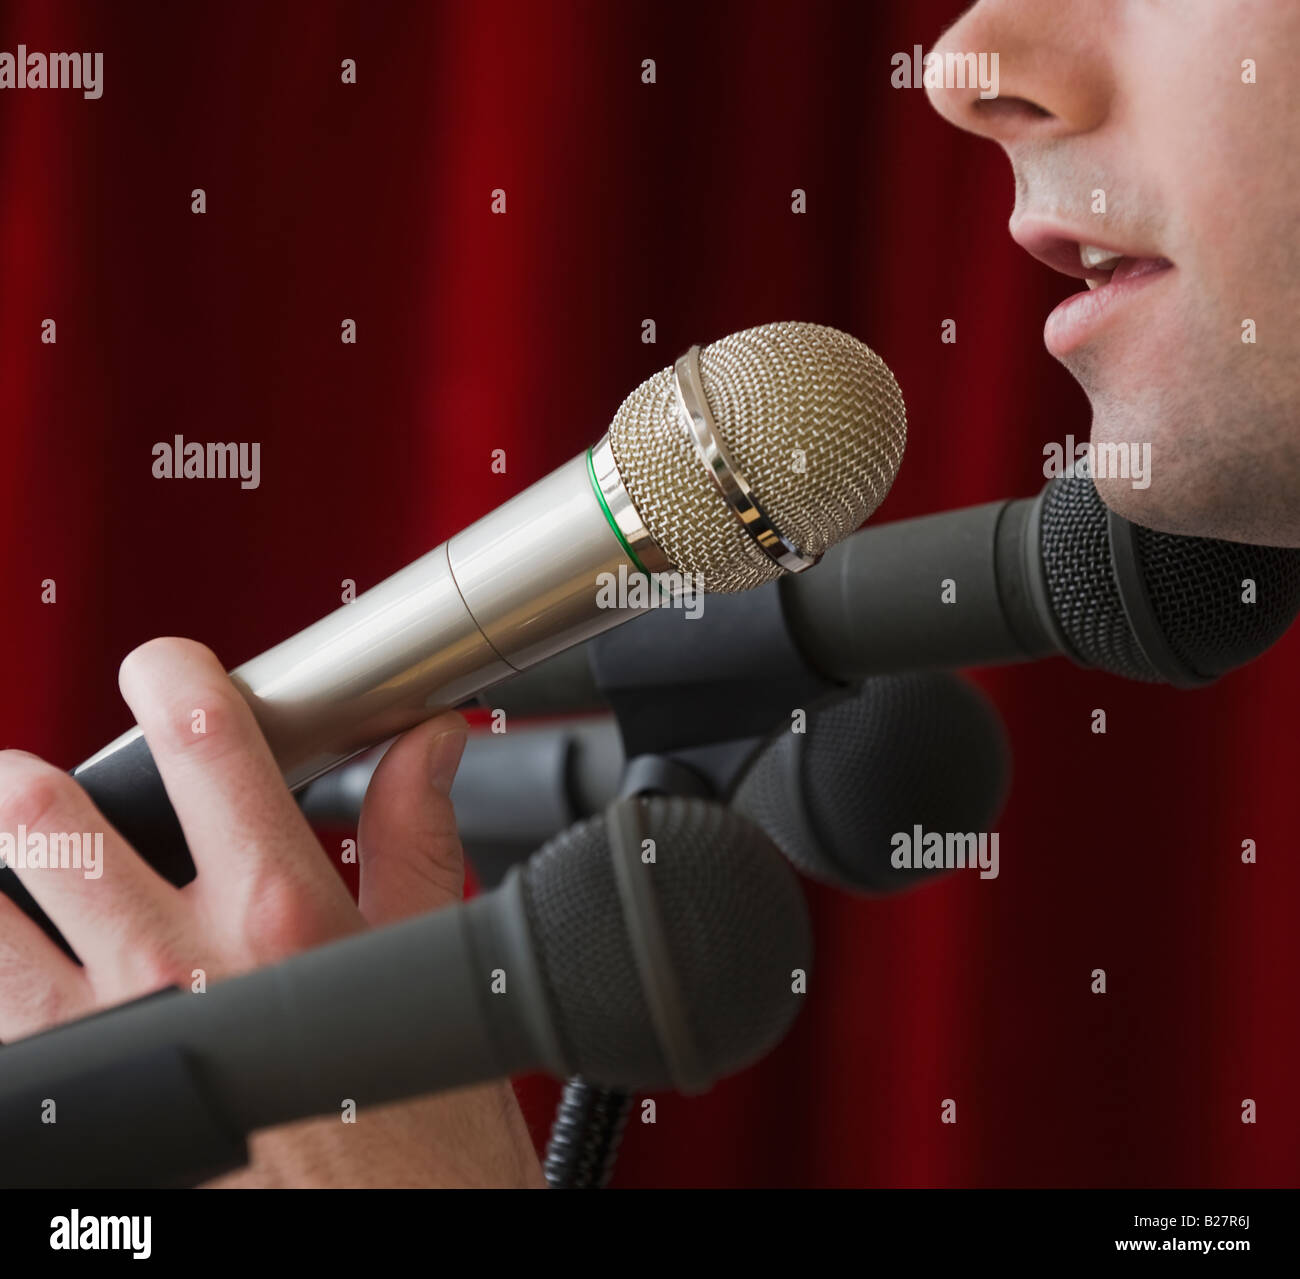
Distance controls both loudness and tone. Moving closer usually makes your voice louder and fuller. Moving farther away often makes it quieter and more affected by the room.
Start by placing the microphone 6 inches away. Speak at your normal level and listen through headphones or ask someone to monitor the sound. Then adjust the distance in small steps.
A simple distance guide can help:
• Normal speaking: 4 to 8 inches
• Loud speaking or excited delivery: 8 to 12 inches
• Soft speaking: 3 to 6 inches
• Singing with strong volume changes: 8 to 14 inches
These ranges are only starting points. Every voice, microphone, and room is different. The key is to keep your distance steady. Do not move toward the microphone for every quiet word or pull away after every loud phrase.
A useful habit is to imagine that the microphone is a small campfire. Stay close enough to feel its warmth, but not so close that you blow directly into it. This simple image can help you maintain a calm and stable position.

Use the correct speaking angle
Speaking directly into the microphone can cause strong air bursts. These bursts are called plosives. They often happen with words that begin with P, B, T, and D.
To reduce plosives, angle the microphone slightly away from your mouth. You can also turn your head just a little while keeping your voice aimed toward the microphone.
Try these methods:
• Speak across the microphone instead of straight into it.
• Place the microphone 20 to 45 degrees to the side.
• Use a pop filter for studio microphones.
• Keep a small amount of space between your mouth and the pop filter.
• Avoid blowing air directly into the microphone grille.
A pop filter is a screen placed between your mouth and the microphone. It spreads out fast air bursts before they reach the microphone capsule. Foam windscreens can also help, especially with handheld microphones and outdoor speech.
The best way to learn how to speak into a microphone is to test several angles. Record the same sentence while facing the microphone directly, then repeat it with the microphone slightly to one side. Listen for the version with fewer pops and less harsh breath noise.
Prepare your voice and posture
Your voice begins with your body. Poor posture can restrict your breathing and make your voice sound tight. Good posture gives your lungs and throat more room to work.
Before speaking, try this short routine:
Sit or stand with your back straight but relaxed.
Keep both feet stable on the floor.
Lower your shoulders.
Relax your jaw and tongue.
Take a slow breath through your nose.
Speak after a calm, controlled breath.
Avoid lifting your chin too high. This can tighten your throat. Avoid collapsing your chest, too. A balanced posture supports steady breathing without making you look stiff.
Drink water before a long recording or presentation. Water supports general vocal comfort, although it does not instantly fix a dry throat. Avoid shouting, repeated throat clearing, and speaking over loud music before you use a microphone.
In presentation practice, one of the most common mistakes is starting to speak before taking a breath. A short pause gives your voice support and makes your opening sound more confident.

Speak clearly without shouting
A microphone is designed to make your voice louder. You do not need to shout unless the event requires a special delivery style.
Speak with a clear, natural voice. Focus on pronunciation, pace, and expression rather than force. If your recording sounds quiet, first check the microphone position and input gain before raising your voice.
Use these speaking habits:
• Open your mouth enough to form each word.
• Slow down slightly when explaining complex ideas.
• Pause between important points.
• Stress key words naturally.
• Keep your voice directed toward the microphone.
• Finish each sentence clearly.
Your speaking volume should feel easy. If your neck tightens or your throat feels tired, you may be pushing too hard. A strong microphone technique sounds supported, not strained.
Try reading one paragraph at three levels: soft, normal, and loud. The normal level is usually the best starting point. A sound engineer can then adjust the gain to fit your voice.

Control breath, pops, and mouth noise
Breath sounds are normal, but a microphone can make them much louder. This is especially true with sensitive condenser microphones.
To reduce breath noise:
• Breathe before a sentence instead of in the middle of a word.
• Turn slightly away from the microphone when taking a deep breath.
• Use a pop filter or windscreen.
• Keep the microphone slightly above or beside your mouth.
• Avoid speaking with your lips too close to the grille.
Mouth clicks can also appear in recordings. Dry mouth, thick saliva, and close microphone placement can make them more noticeable. Drinking water and taking short breaks may help. Do not rely on extreme tricks or products without checking whether they suit you.
If you hear a sudden burst of air, do not panic. Mark the problem and repeat the sentence. With practice, you will learn to control breath direction and mouth movement.

Set gain and avoid distortion
Gain controls how strongly the microphone signal enters the recording system. Volume controls how loud that signal sounds later. These controls are related, but they are not the same.
If the gain is too low, your recording may sound weak and noisy after you raise it. If the gain is too high, loud words may clip. Clipping creates harsh distortion that cannot always be repaired.
Before recording:
• Set the input gain while speaking at your normal level.
• Include your loudest expected words during the test.
• Watch the audio meter.
• Leave some space below the maximum level.
• Record a short sample and listen to it.
Many audio professionals aim for spoken peaks around minus 12 to minus 6 decibels relative to full scale in digital recording. Exact levels vary by workflow, but leaving headroom is safer than recording too hot.
If the sound is distorted, reduce the input gain and move slightly farther from the microphone. Do not solve distortion by turning down the playback volume. The problem usually happened before the sound reached the recording software.

Speak into different types of microphones
Microphones have different pickup patterns and sound qualities. Knowing the basic type helps you understand how to speak into a microphone in different settings.
Handheld microphones
Hold a handheld microphone about 4 to 8 inches from your mouth. Keep the distance stable while you speak. Do not swing the microphone, tap it, or cover the grille.
For interviews, point the microphone toward the person who is speaking. Move it smoothly between speakers. Keep it close enough to capture the voice but far enough away to avoid accidental contact.
Lavalier microphones
A lavalier microphone clips to clothing near the upper chest. Place it about 6 to 8 inches below your mouth. Keep it away from necklaces, loose fabric, and rubbing jackets.
A lavalier is convenient, but it may pick up clothing noise. Test walking, turning, and moving your arms before an important event.
USB microphones
USB microphones are common for podcasts, video calls, and home recording. Place the microphone on a stand at mouth level. Use headphones to check your position and listen for room echo.
Do not place a USB microphone beside a noisy laptop fan. A small change in placement can improve the recording more than expensive software.
Headset microphones
Keep the microphone close to the corner of your mouth, not directly in front of your lips. This position reduces breath blasts and keeps the level steady when you turn your head.
Shotgun microphones
Shotgun microphones should usually point toward your mouth from a short distance. They are useful for video work, but they still need careful placement. If the microphone is too far away, the room may become louder than your voice.
Improve the room before changing the microphone
A good microphone cannot fully remove a bad room. Hard walls, bare floors, windows, and large empty spaces create reflections. These reflections can make your voice sound echoey.
You can improve a small recording space by:
• Closing windows and doors.
• Turning off loud fans when safe.
• Moving away from bare walls.
• Adding curtains, rugs, or soft furniture.
• Placing the microphone near soft materials.
• Using a reflection filter carefully, if appropriate.
Do not record with the microphone hidden under a blanket or pressed against a soft surface. That can reduce clarity and create safety concerns. Instead, make the room less reflective and keep the microphone in an open position.
Room treatment often matters more than buying a more expensive microphone. In home recording, I have seen simple placement changes produce a bigger improvement than a new device. Clear sound starts with the voice, the position, and the room.
Practice with a simple microphone test
A short test can reveal most technique problems. Use the same microphone, room, and software that you will use for the real session.
Read this sample sentence:
“Today, I will explain the main idea clearly and calmly.”
Record it three times:
Speak directly into the microphone.
Turn the microphone slightly to the side.
Move the microphone farther away by 2 inches.
Listen for:
• Popping sounds
• Uneven volume
• Harsh S sounds
• Room echo
• Background noise
• Breath sounds
• Clipping
Choose the cleanest version, then repeat the test with a longer paragraph. This method teaches you how to speak into a microphone through direct feedback instead of guesswork.
If possible, use headphones while testing. Speakers can create feedback and may hide small details. Ask another person to listen as well, because a fresh pair of ears may notice problems that you miss.
Common microphone mistakes to avoid
Many microphone problems come from a few simple errors. Correcting them can improve your sound within minutes.
• Holding the microphone too far away: Your voice may sound thin and distant.
• Speaking too close: Your recording may contain pops, breath noise, and excessive bass.
• Covering the grille: This can change the pickup pattern and increase feedback.
• Moving constantly: Your volume will rise and fall as the distance changes.
• Shouting: This can cause distortion and vocal strain.
• Ignoring the room: Echo can make clear speech hard to understand.
• Skipping the sound check: Small problems become harder to fix during a live event.
• Turning up gain too high: Loud words may clip.
• Reading too fast: Listeners may miss key information.
• Looking away from the microphone: Your voice may become quieter and less focused.
The goal is not to create a perfect performance on the first try. The goal is to notice one issue, fix it, and test again.
How to speak into a microphone during a live event
Live speaking adds challenges such as stage noise, audience movement, feedback, and changing distance. Preparation matters.
Before the event, check the microphone position and ask where you should stand. During the sound check, use the same voice and volume you plan to use on stage. Do not whisper during the test and then speak loudly during the event.
While speaking:
• Keep the microphone below your mouth if using a handheld model.
• Avoid pointing the microphone toward speakers.
• Face the audience while keeping the microphone near your mouth.
• Pause if feedback begins.
• Do not tap the microphone to test it.
• Use clear hand movements without hitting the microphone cable.
If the microphone stops working, stay calm. Look toward the event team and continue only when they signal. A calm pause looks more professional than repeatedly tapping or blowing into the microphone.
How to speak into a microphone for podcasts and videos
Podcast and video speech should feel natural, but the microphone still needs stable placement. Place it just outside the camera frame if needed, while keeping it close enough for a full voice.
Use a conversational pace. Imagine speaking to one interested person rather than a large crowd. This approach often produces warmer and more focused audio.
For a podcast, record a short opening and listen before continuing. Check your distance, room sound, and voice level. If you change position during the recording, note the time so you can fix the section later.
For video calls, use headphones when possible. They reduce echo and help you hear whether your voice is clear. Keep the microphone away from keyboard noise and avoid placing it directly beside your computer fan.
Frequently Asked Questions About How to Speak Into a Microphone
How close should you speak into a microphone?
Most people should start about 4 to 8 inches away. Adjust the distance based on your voice, microphone type, and room noise while keeping the distance steady.
Should you speak directly into a microphone?
You can speak toward the microphone, but slightly turning it to the side may reduce pops and breath noise. Aim your voice at the front or pickup area without blowing straight into the grille.
Why does my voice sound bad on a microphone?
Common causes include incorrect distance, high gain, room echo, poor posture, and speaking too softly or loudly. Test one change at a time so you can find the main problem.
How can you stop popping sounds when speaking?
Use a pop filter, move the microphone slightly to the side, and avoid blowing directly into it. Keeping a small gap between your mouth and the microphone also helps.
Is it better to speak loudly into a microphone?
Usually, no. Speak at a natural, supported volume and set the microphone gain correctly to prevent distortion and vocal strain.
Should a microphone be above or below your mouth?
Either position can work, but keep it near mouth level and slightly to the side. Test both positions to find the clearest sound with the least breath noise.
Conclusion
Knowing how to speak into a microphone comes down to a few repeatable habits: keep a steady distance, use a relaxed posture, speak clearly, control your breath, and test your gain. A pop filter, quiet room, and good microphone position can improve your sound, but your technique remains the foundation.
Start with a short recording today. Move the microphone, adjust your angle, listen through headphones, and make one improvement at a time. Explore more audio tips, practice with different microphones, and share your results or questions in the comments.