

An audio interface connects microphones and instruments to your computer while improving sound quality, control, and recording speed.
If you have wondered what is an audio interface used for, the answer goes far beyond plugging in a microphone. This small box converts sound into digital audio, sends playback to speakers or headphones, and gives musicians, podcasters, streamers, and video creators more control over their sound. This guide explains how it works, why it matters, and how to choose one that fits your needs.
What Is an Audio Interface Used For?
An audio interface is a device that connects microphones, instruments, headphones, and studio monitors to a computer or mobile device. It acts as a bridge between the analog world of sound and the digital world of recording software.
When you speak into a microphone, the interface changes that electrical signal into digital data. Your computer can then record, edit, mix, and play it back. During playback, the interface changes digital audio back into a signal that your headphones or speakers can use.
In simple terms, an audio interface is used for:
• Recording vocals, instruments, podcasts, voice-overs, and live performances
• Connecting professional microphones and instruments to a computer
• Improving headphone and speaker sound
• Reducing recording delay, often called latency
• Providing clean input gain and volume control
• Supplying phantom power to compatible condenser microphones
• monitoring your voice or instrument while recording
You can think of an audio interface as a translator. It helps your microphone and computer understand each other without losing too much detail.

How Does an Audio Interface Work?
An audio interface performs several key tasks in a short signal path. Each task affects the quality and comfort of your recording session.
1. It receives an audio signal
A microphone produces a small electrical signal. An electric guitar or keyboard also sends an electrical signal, but each source has different power and impedance needs.
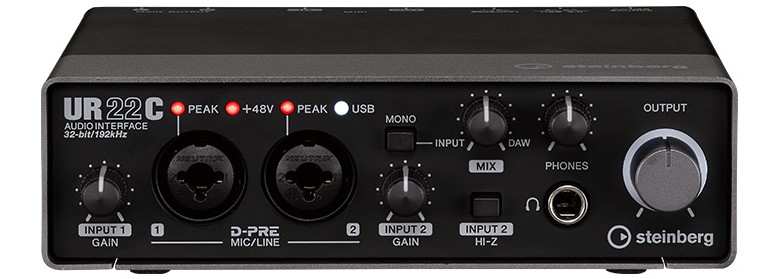
The interface receives these signals through input ports. Common input types include:
• XLR inputs for microphones
• 1/4-inch inputs for guitars, basses, and keyboards
• Combination inputs that accept both XLR and 1/4-inch cables
2. It boosts the signal
Microphone signals are usually quiet. A preamp inside the interface raises the signal to a usable level.
This is where the gain control matters. Too little gain makes the recording quiet and noisy. Too much gain causes clipping, which creates harsh distortion. A good rule is to set levels so normal peaks leave some space below 0 dBFS in your recording software.
3. It converts analog sound to digital data
The analog-to-digital converter, or ADC, changes sound waves into digital information. This lets your recording software store and edit the sound.
During playback, a digital-to-analog converter, or DAC, performs the reverse task. It sends the digital audio to headphones or studio monitors.
4. It sends sound back to you
An audio interface is used for monitoring. It lets you hear your microphone, instrument, computer audio, or a mix through headphones and speakers.
Many interfaces offer direct monitoring. This sends the input signal straight to your headphones before it travels through the computer. Direct monitoring can reduce delay when recording vocals or instruments.
5. It connects to your computer
Most modern interfaces use USB-C, USB-A, Thunderbolt, or another digital connection. The connection carries audio data between the interface and your recording software.
Some models also work with tablets and phones. However, mobile devices may need an adapter, extra power, or a compatible connection standard.
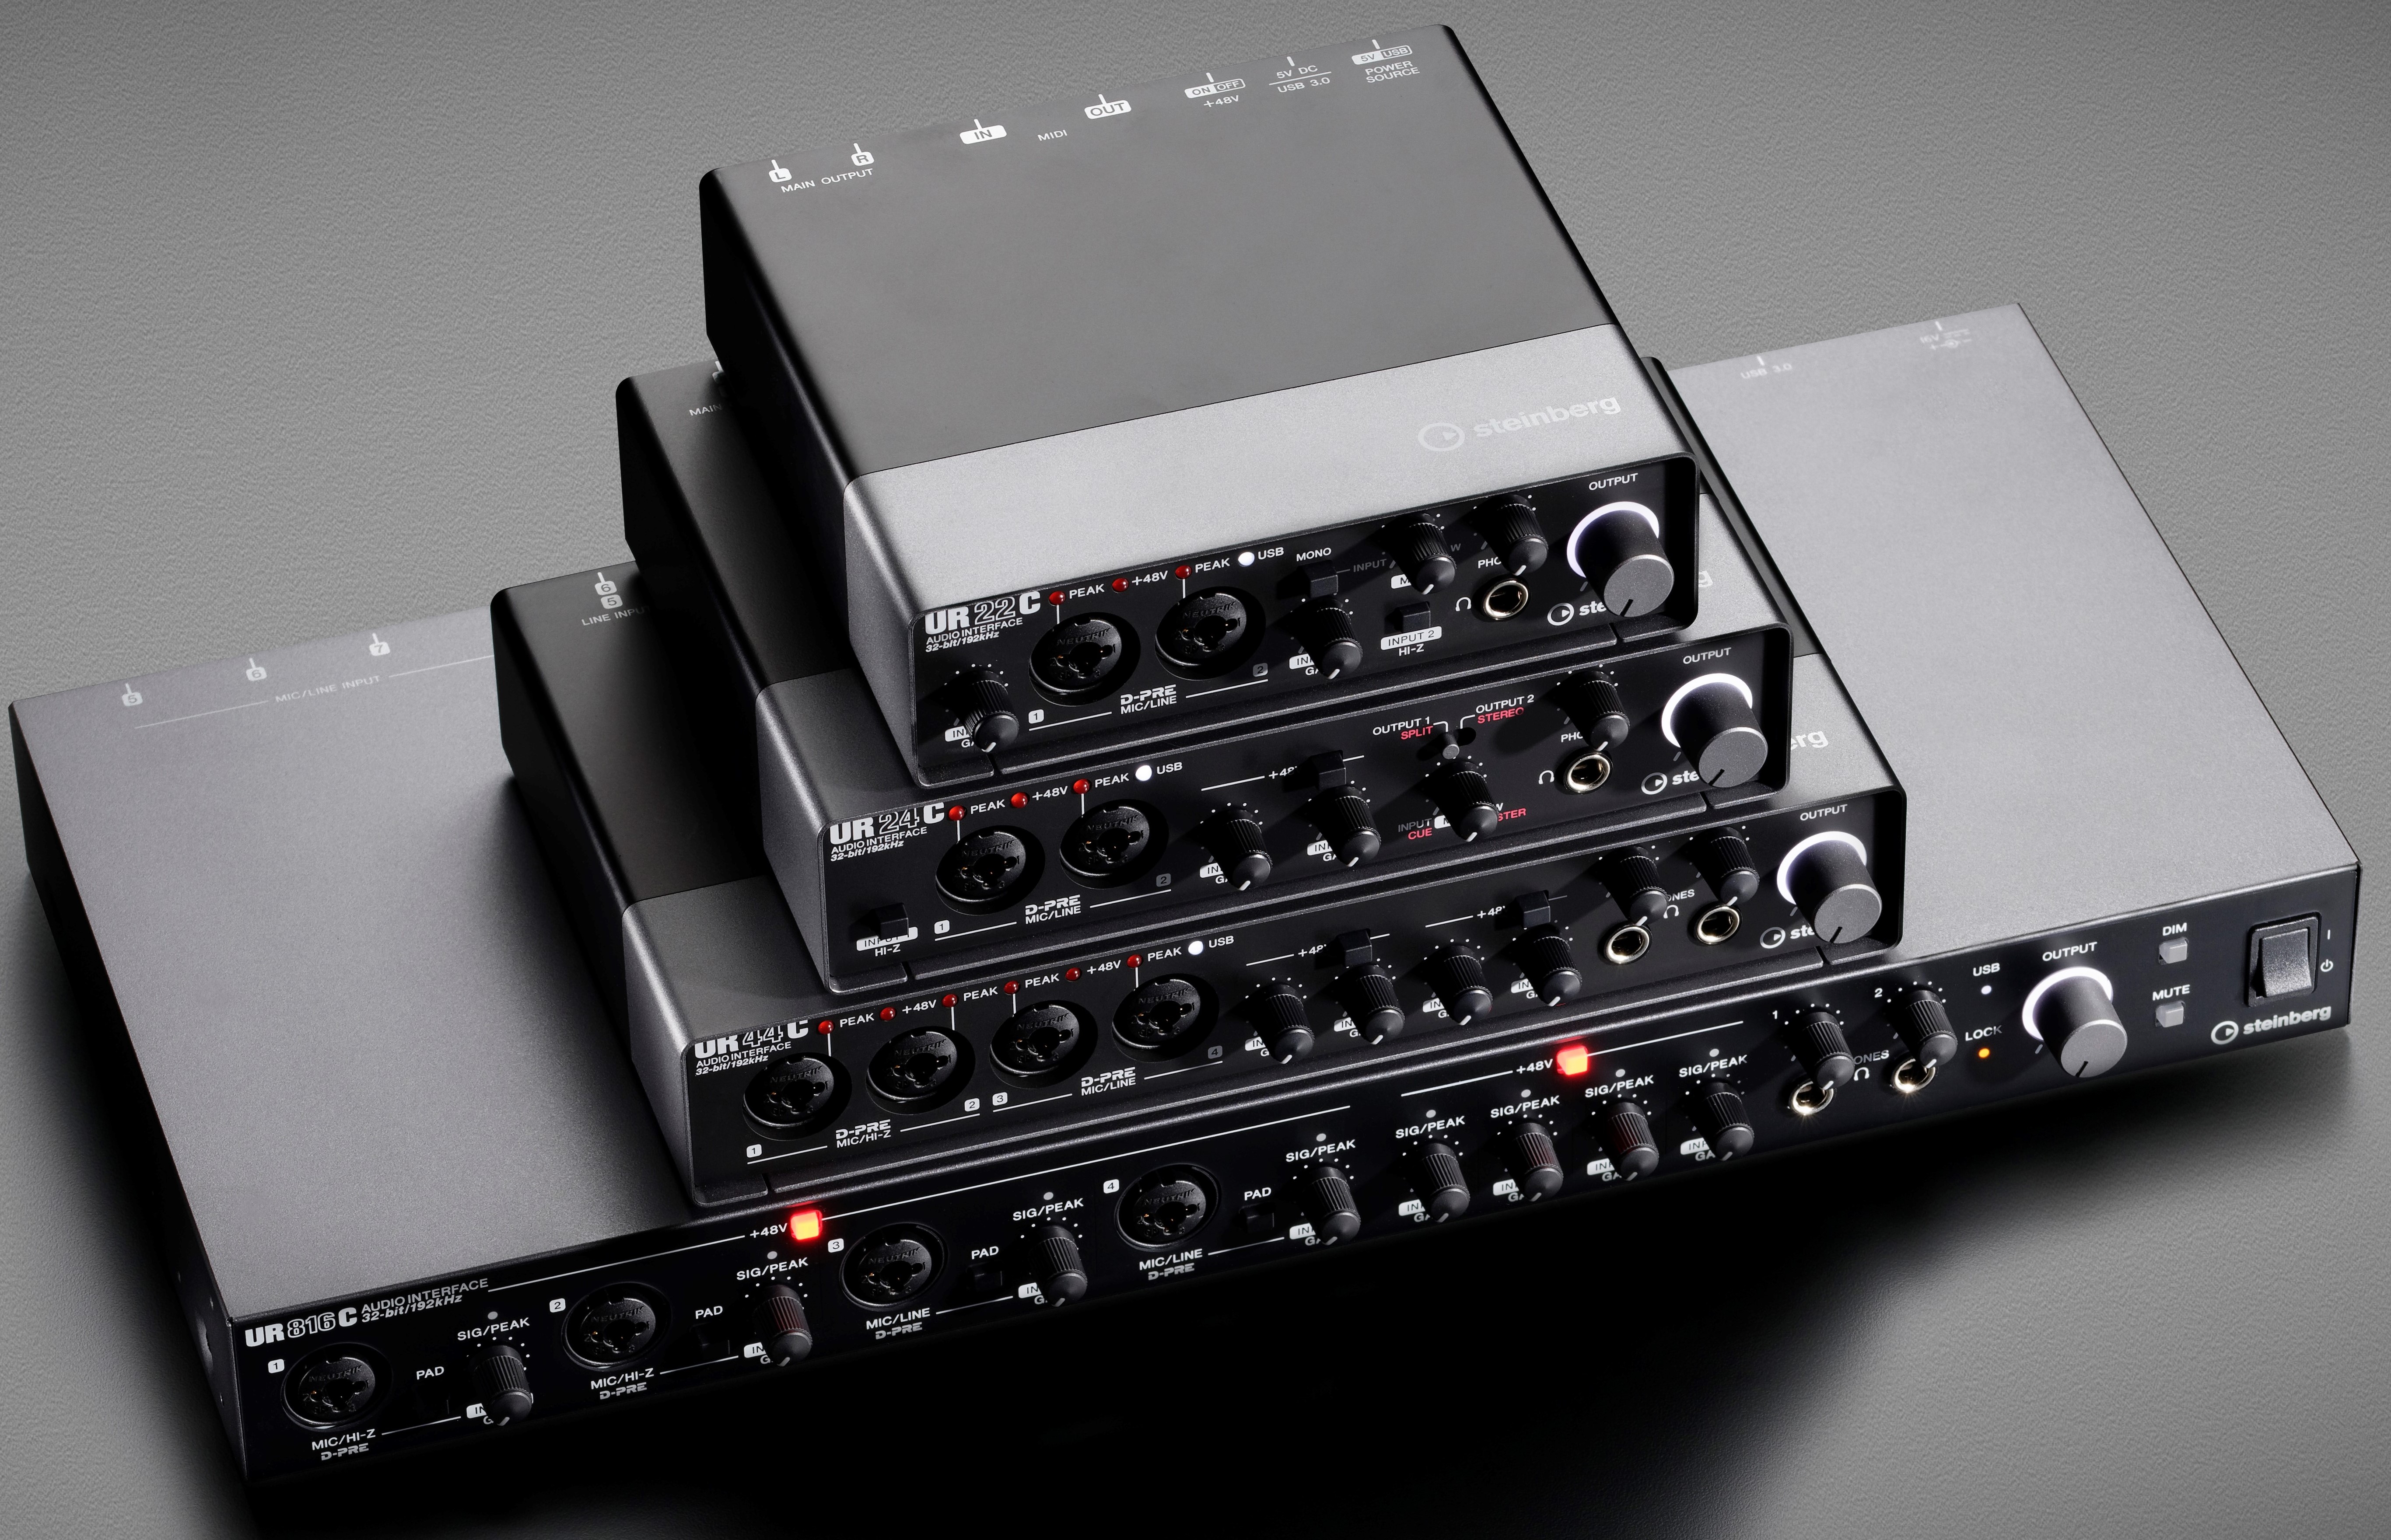
Main Uses of an Audio Interface
The question “what is an audio interface used for” has different answers depending on your work. The same device can support music production, podcasting, streaming, online teaching, and video creation.
Recording vocals and instruments
An interface gives you a cleaner way to record a microphone, guitar, bass, keyboard, or drum machine. It often sounds clearer than the built-in microphone input on a laptop.
For example, a singer can connect an XLR microphone, adjust the preamp gain, and record into a digital audio workstation. A guitarist can connect directly to an instrument input and use software amplifiers or effects.
Producing music
Music producers use interfaces to record several parts into a project. A two-input model can record a vocal and guitar at the same time. A larger model can connect multiple microphones for a drum kit or live band.
An interface also helps producers hear accurate playback. Good monitoring makes it easier to balance bass, vocals, drums, and effects.
Podcasting and voice-over work
An audio interface is used for podcasting because it supports quality microphones and separate headphone monitoring. Some models provide two or more microphone inputs for interviews or co-hosts.
A host can control each microphone’s gain and listen without distracting delay. This produces a more natural conversation and gives the editor better control later.
Live streaming and content creation
Streamers use interfaces to connect studio microphones, instruments, and headphones. Some interfaces include loopback features, which route computer audio into streaming software.
Loopback can help you combine a microphone, background music, game audio, and a video call. The exact setup depends on your operating system and streaming application.
Online meetings and teaching
Teachers, coaches, and remote workers may use an interface to improve speech clarity. A quality microphone placed close to the speaker can sound much more natural than a built-in laptop microphone.
This setup is useful for online lessons, webinars, live classes, and remote interviews. It is not required for casual calls, but it can make a major difference in a professional setting.

Audio Interface Features That Matter
Not every interface offers the same features. Before buying one, consider how you plan to record and what equipment you already own.
Number of inputs and outputs
Inputs determine how many sound sources you can record at once. Outputs determine how many speakers, headphones, or external devices you can connect.
Choose based on your real needs:
• One or two inputs work well for solo musicians, podcasters, and streamers
• Four inputs suit small ensembles and two-person podcast setups
• Eight or more inputs help with drums, bands, and larger recording sessions
Buying a model with a few extra inputs can save money later. Still, unused inputs add cost, so avoid paying for features you will never use.
Microphone preamps
A preamp raises a microphone’s quiet signal. Look for clean gain, low noise, and enough power for your microphone type.
Dynamic microphones often need more gain than condenser microphones. Some low-output dynamic microphones may benefit from an inline gain booster, especially when recording quiet voices.
Phantom power
Many condenser microphones need 48-volt phantom power. Most interfaces include a button marked 48V.
Phantom power is generally safe for balanced connections and suitable equipment. Turn it off before connecting older or unusual microphones unless you know they support it.
Headphone output
A strong headphone amplifier helps you monitor without distortion. If you record with another person, two headphone outputs may be more useful than one.
Check whether each headphone output has its own volume control. Separate controls make shared recording sessions easier.
Direct monitoring and latency
Latency is the short delay between making a sound and hearing it through the computer. Large software buffer settings can increase this delay.
Direct monitoring avoids much of the delay by sending the input directly to your headphones. This feature is especially helpful for singers, guitarists, and spoken-word performers.
Sample rate and bit depth
Sample rate describes how often the interface measures sound. Common settings include 44.1 kHz and 48 kHz. Music projects often use 44.1 kHz, while video projects commonly use 48 kHz.
Bit depth affects dynamic range and recording headroom. Twenty-four-bit recording is a common choice for modern home studios because it offers useful detail and room for level mistakes.
Higher numbers do not automatically create better music. Microphone placement, room sound, performance, and mixing usually matter more.
Do You Need an Audio Interface?
You may need an audio interface if you want to use an XLR microphone, record instruments, monitor through studio headphones, or reduce recording delay.
You may not need one if you only:
• Use a USB microphone
• Record simple voice memos
• Make casual video calls
• Listen to music with ordinary headphones
A USB microphone already contains a small audio interface. Adding another interface may not improve the setup unless the microphone also has an analog output.
For a home studio, an entry-level two-channel interface is often enough. It can support a microphone, guitar, headphones, and studio monitors without creating a complex setup.
Audio Interface vs. USB Microphone
A USB microphone contains the microphone capsule, preamp, converter, and USB connection in one body. It is simple and convenient.
An audio interface usually connects to a separate microphone through an XLR cable. This gives you more flexibility because you can change the microphone, add another input, or connect an instrument.
Here is a basic comparison:
• USB microphone: Simple, portable, and easy for one-person recording
• Audio interface: More flexible and better for multiple sources
• XLR microphone with interface: Easier to upgrade and often preferred for studio work
• USB microphone with interface: Usually unnecessary unless the microphone includes a separate analog output
For a beginner podcaster, a USB microphone may be the fastest choice. For a musician or creator who expects to expand, an interface offers a stronger long-term setup.

How to Set Up an Audio Interface
Setting up an audio interface is usually simple. Follow this order to avoid common problems.
Install the manufacturer’s driver or control software if your computer needs it.
Connect the interface to your computer with the correct cable.
Connect your microphone or instrument to an input.
Turn on phantom power only if your microphone needs it.
Open your recording software and select the interface as the input and output device.
Set the input gain while speaking or playing at your normal level.
Connect headphones or studio monitors to the interface.
Test the signal before recording a full performance.
Keep your speakers turned down when first powering on the system. This simple habit can protect your hearing and speakers from loud pops.
In hands-on recording sessions, one of the most common mistakes is setting gain by watching the knob instead of watching the meter. Every microphone and voice is different. Set the gain while the performer is doing the loudest part of the song or conversation.

Common Audio Interface Problems
Most interface problems have simple causes. Check the signal path one step at a time.
No sound
Confirm that the interface is selected in your recording software. Then check the cable, input gain, mute buttons, headphone volume, and speaker connection.
Some programs use separate input and output settings. Selecting the interface for input but not output can create confusion.
Distorted recordings
Distortion often comes from excessive input gain. Lower the gain until loud sounds stay below the clipping range.
Do not try to fix clipped audio with software later. A clipped recording has lost part of the original waveform, and repair tools may only reduce the damage.
Delay while monitoring
Lower the software buffer size if your computer can handle it. If the system becomes unstable, use direct monitoring or raise the buffer slightly.
Heavy plug-ins can also increase latency. Bypass them while recording, then turn them back on during mixing.
Humming or buzzing
Buzzing may come from poor cables, nearby power supplies, unbalanced connections, or a ground loop. Move power adapters away from audio cables and test one connection at a time.
Balanced XLR and TRS connections usually reject unwanted noise better than unbalanced connections. However, balanced cables cannot fix every electrical problem.

Mistakes to Avoid When Buying an Audio Interface
A low price is not the only factor to consider. A poor match can make recording harder, even when the interface itself works well.
Avoid these mistakes:
• Buying too few inputs for your planned sessions
• Choosing a model without the right instrument input
• Ignoring headphone output strength
• Assuming a high sample rate guarantees better sound
• Forgetting to check operating system compatibility
• Buying an interface without suitable drivers or support
• Using poor microphone placement and blaming the interface
• Turning phantom power on without understanding your equipment
The most important purchase is the one that fits your workflow. A modest interface in a quiet room can outperform an expensive interface in a noisy room with poor microphone technique.

What Is an Audio Interface Used For in a Home Studio?
In a home studio, an audio interface is used to create a reliable path from performance to recording software. It connects microphones and instruments, controls input levels, and sends playback to headphones or speakers.
A practical beginner setup might include:
• A two-input audio interface
• One condenser or dynamic microphone
• A pair of closed-back headphones
• A microphone stand and pop filter
• Recording software
• Balanced cables for studio monitors
Start with the room and microphone position. A microphone placed near a reflective wall may capture harsh echoes. Moving it away from the wall, adding soft furnishings, and recording closer to the microphone can improve results before you buy more gear.
Frequently Asked Questions About What Is an Audio Interface Used For
What is an audio interface used for in music production?
An audio interface is used to record microphones and instruments into music software. It also sends the finished mix to headphones and studio monitors.
Can I use an audio interface without a microphone?
Yes. You can connect an electric guitar, bass, keyboard, drum machine, or another line-level device. You can also use the interface only for headphone and speaker playback.
Is an audio interface better than a computer sound card?
An audio interface often provides better connections, cleaner microphone preamps, stronger monitoring, and lower recording latency. A computer sound card may be enough for basic listening, but it usually offers fewer options for studio recording.
Do I need an audio interface for a USB microphone?
Usually, no. A USB microphone already includes the basic conversion hardware needed to connect directly to a computer.
Can an audio interface improve microphone quality?
It can improve the signal path by providing a cleaner preamp and converter. However, the microphone, room, placement, performance, and recording technique also strongly affect the final result.
Why does an audio interface need phantom power?
Phantom power supplies voltage to many condenser microphones through the XLR cable. Not every microphone needs it, so check the microphone’s instructions before enabling 48V.
Does an audio interface work with a phone or tablet?
Some models work with mobile devices, but compatibility depends on the connection, power needs, and operating system. You may need a suitable adapter or powered hub.
Conclusion
An audio interface is used to connect microphones and instruments to digital devices, convert audio signals, control recording levels, reduce monitoring delay, and deliver clearer playback. It is a key tool for music makers, podcasters, streamers, voice artists, teachers, and video creators.
You do not need the most expensive model to get started. Choose an interface with the right inputs, reliable drivers, clean preamps, useful monitoring features, and room for your next project. Set it up carefully, record at sensible levels, and let your technique grow with your equipment. Explore more recording guides, test your setup, and share your experience with others who are building better audio.
