

Place the microphone inside or just outside the resonant head, then adjust by ear for punch, click, and low-end weight.
Learning how to mic a bass drum starts with one simple idea: microphone position shapes the sound more than the microphone price. After working through studio sessions, rehearsals, and live setups, I have found that small moves can change a kick from soft and cloudy to tight and powerful. This guide explains how to mic a bass drum with clear steps, useful placement tips, and practical mixing advice.
What makes a bass drum hard to mic?
A bass drum produces more than one useful sound. Its low shell tone gives the mix weight, while the beater impact adds attack and definition. The resonant head also creates air movement, boom, and tone.
This wide range makes microphone placement important. A mic too far from the drum may sound loose. A mic too close may sound thin, clicky, or overly sharp.
The room also affects the result. Small rooms can add muddy reflections. Large rooms may make the drum sound open but less focused. Knowing this helps you choose the right position before you touch the mixer.
Choose the right bass drum microphone
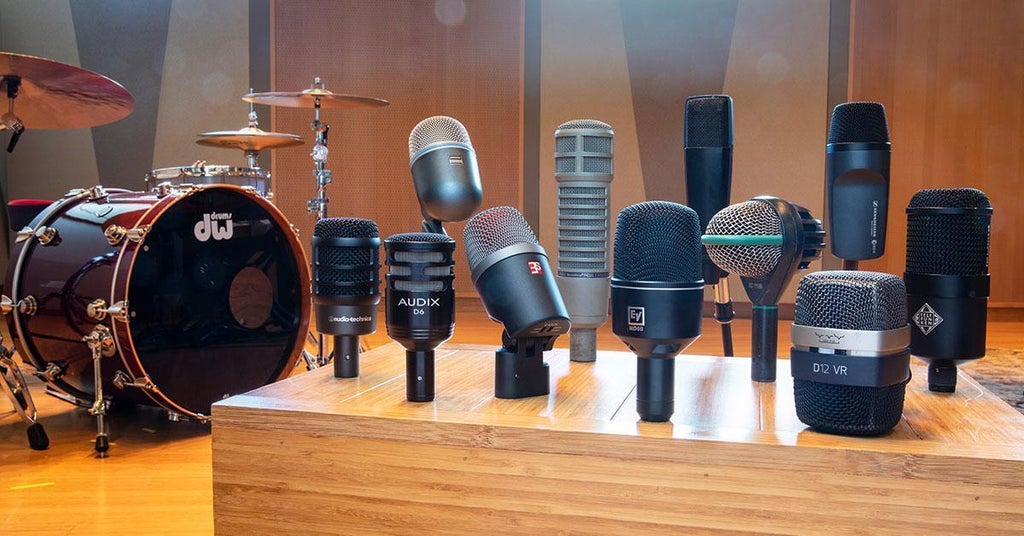
You can mic a bass drum with a dynamic, condenser, or boundary microphone. Each type captures a different balance of attack, body, and room sound.
Dynamic microphones
Dynamic microphones are the most common choice for kick drum recording. They can handle high sound pressure levels and often provide strong low-end response with clear attack.
Popular choices include microphones designed for bass drum, such as the AKG D112, Shure Beta 52A, Audix D6, and Sennheiser e 602-II. These models have different frequency curves, so the best option depends on the drum and the mix.
A dynamic microphone is usually the safest starting point for a loud rock, pop, metal, or live setup.
Condenser microphones
A large-diaphragm condenser can capture more detail and natural tone. It may reveal the shell, beater, and room better than a standard dynamic mic.
Use care with condensers. Check the microphone’s maximum sound pressure rating, and keep enough distance if the drum is very loud. A condenser often works well outside the front head or as a second microphone.
Boundary microphones
A boundary microphone can sit inside the shell or on a small pad near the drum. It offers a clean, focused sound and does not need a stand inside the kick drum.
Boundary mics can be useful in live settings because they take up little space. Still, they may need careful placement to avoid excessive low-end buildup.
Prepare the bass drum before placing the mic
Good microphone technique cannot fix a poorly tuned drum. Before learning how to mic a bass drum, make sure the drum itself produces the sound you want.
Check these details:
• Tune both heads so they sit evenly around the drum.
• Remove unwanted rattles from pedals, lugs, stands, and nearby hardware.
• Add a small amount of muffling if the drum rings too long.
• Use a felt strip, pillow, or approved dampening pad only when needed.
• Make sure the beater strikes the head in the same place each time.
A pillow should touch the batter head lightly rather than press hard against it. Too much dampening can remove the low-end bloom and make the drum feel flat.
I once spent nearly an hour moving a microphone around a kick drum that sounded weak. The real issue was a loose front head. After tuning the head, the same microphone sounded full and controlled within minutes.
Decide whether to use a ported front head
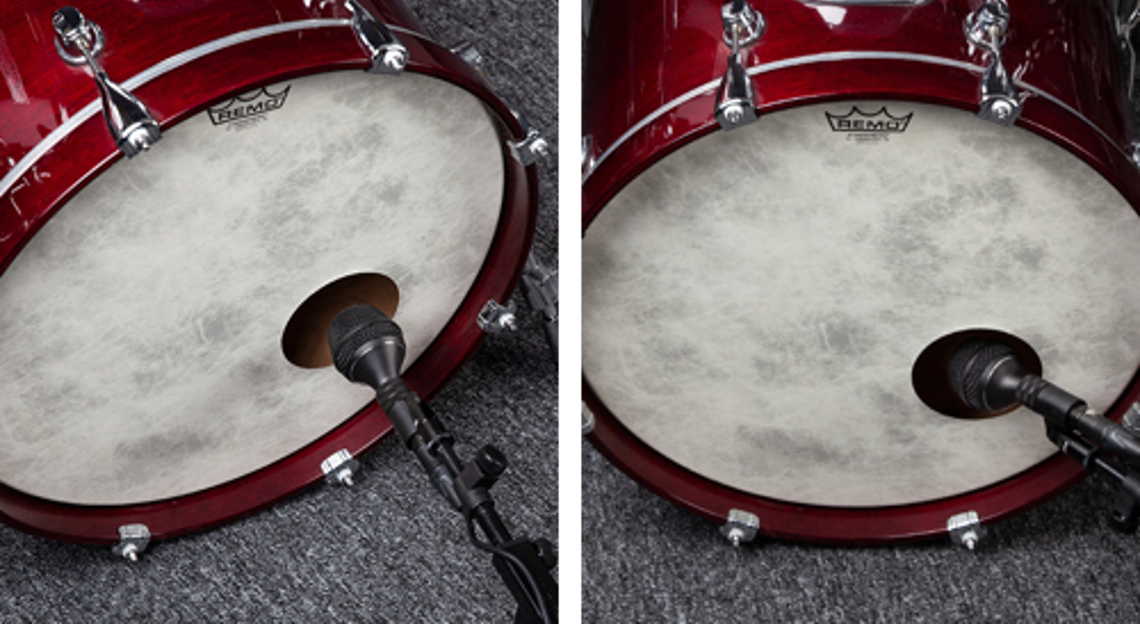
A ported resonant head has a small hole that allows microphone access. It can make placement easier and reduce some of the air pressure between the heads.
A full front head usually gives a rounder, more natural tone. A ported head often gives more attack and control. Neither choice is always better.
Choose the head style based on the music, the drum, and the sound you need. Do not cut a hole simply because it is common in modern recordings.
How to mic a bass drum from the inside
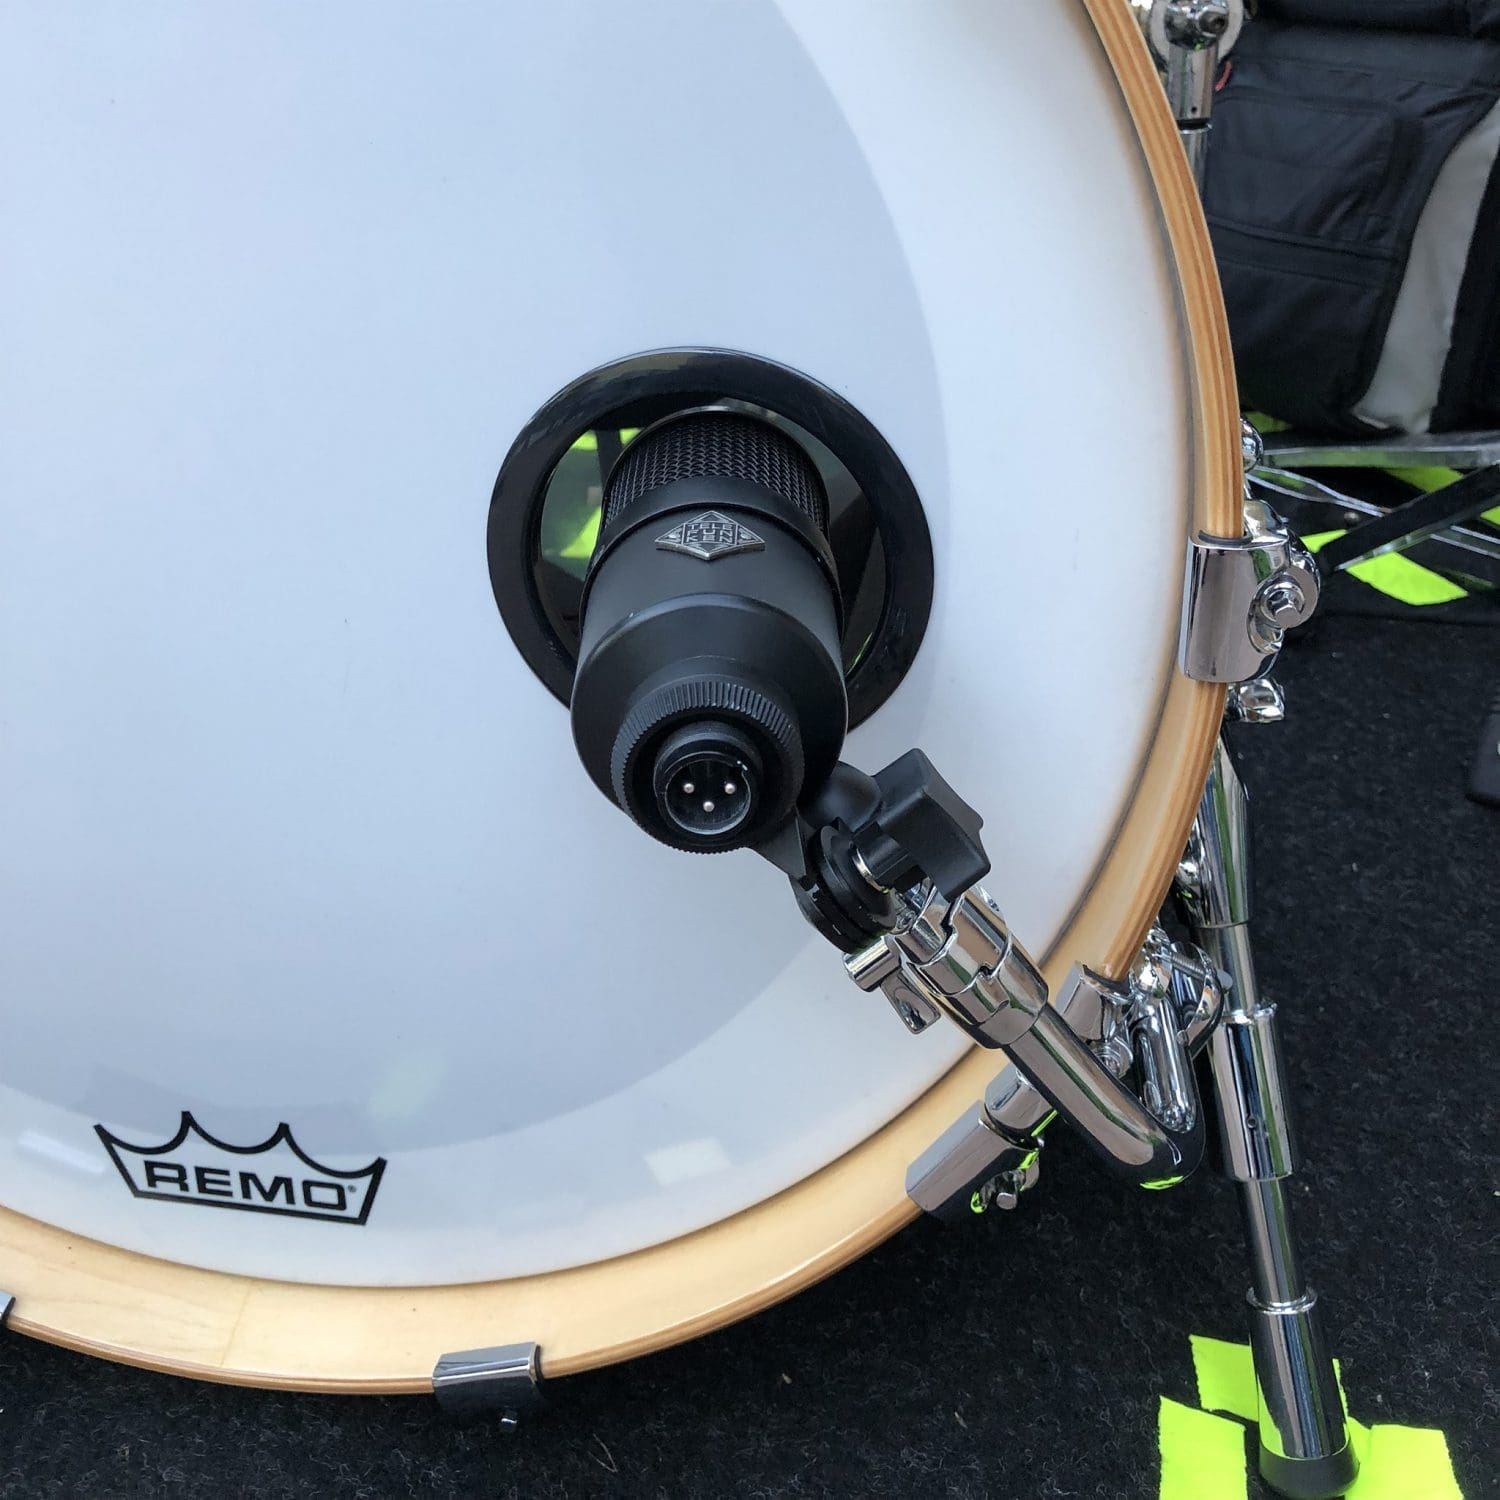
An inside microphone gives a direct and focused sound. It is the most common approach when you need punch and beater definition.
Follow these steps:
Open the port in the front head or remove the front head if necessary.
Place the microphone on a short stand or secure mount.
Aim the microphone toward the area where the beater strikes.
Start about 3 to 6 inches from the beater head.
Listen while moving the microphone a few inches at a time.
Check the sound in the full mix, not only in solo.
The closer the microphone sits to the beater, the more attack you will hear. Moving it toward the center of the drum can add a strong, focused hit. Moving it toward the edge can add more shell tone and less click.
Do not let the microphone touch the drum head. Vibrations can create unwanted noise or damage the microphone.
Inside microphone positions
Try these starting points:
• Near the beater: strong attack and a sharp front edge.
• Between the beater and center: balanced punch and body.
• Near the center: focused impact with less shell resonance.
• Near the shell edge: more tone and less aggressive attack.
For rock or metal, I often begin slightly off the beater’s direct path. This keeps the attack clear without making every hit sound like a plastic click.
How to mic a bass drum from the outside
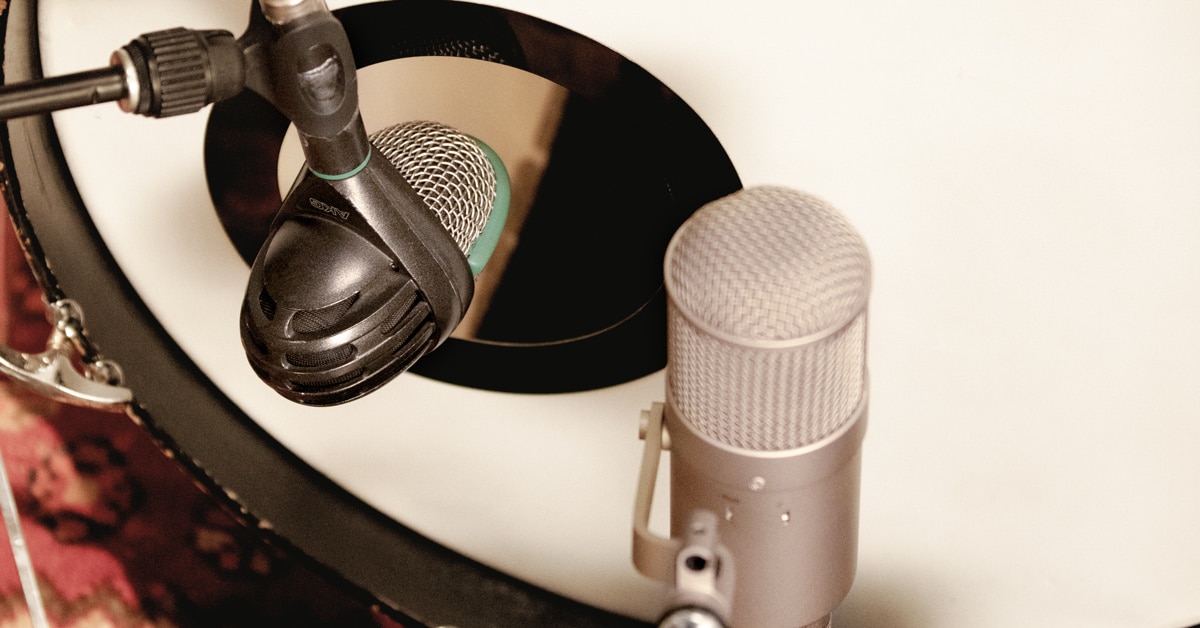
An outside microphone captures more of the drum’s natural low end. It usually sounds rounder and less aggressive than an inside microphone.
Place the microphone 6 to 18 inches in front of the resonant head. Start near the center, then move toward the edge as needed.
A center position often produces more low-end energy. An off-center position can sound more open and balanced. Greater distance brings in more room sound, but it can also reduce focus.
Outside placement works well for jazz, folk, soul, acoustic music, and natural-sounding rock. It can also pair well with an inside microphone.
If the front head has no port, place the microphone a few inches in front of it. Angle the capsule slightly away from the center if the sound is too boomy.
Inside and outside microphone combinations
Two microphones can provide a flexible bass drum sound:
• Inside microphone: attack, punch, and beater detail.
• Outside microphone: body, depth, and natural low end.
Record both microphones to separate tracks. Check their polarity before blending them. If the low end becomes weak when both tracks play together, reverse the polarity of one track and listen again.
Polarity and time alignment are not the same thing. Even when polarity seems correct, sound from the outside mic arrives later. A small timing adjustment may improve the low end, but do this by ear.

How to mic a bass drum for different music styles
The best placement depends on the role of the bass drum.
Rock and pop
Start with an inside dynamic microphone. Place it 3 to 6 inches from the beater head and aim slightly off-center.
This position gives enough attack to cut through electric guitars. Add an outside mic if the drum needs more size.
Metal
Metal often needs strong beater definition. Move the inside mic closer to the beater and aim it toward the impact point.
Be careful with excessive high-frequency boost. Too much click can make the drum sound small and harsh. A controlled boost around the upper midrange may help, but placement should come first.
Jazz
Use a more natural position. Place a dynamic or condenser microphone outside the front head, often 8 to 18 inches away.
Avoid heavy muffling. The drum should retain its pitch, air, and room tone. A full front head may work well for this style.
Country and acoustic music
Choose a balanced position with moderate attack and body. An outside mic or a mic just inside the port can produce a warm, clear sound.
The kick should support the bass guitar without becoming a dominant effect.
Live sound
Use a durable dynamic microphone. Place it inside the port when possible, and secure the stand so it cannot move during the performance.
Keep the mic cable away from the pedal and other moving parts. In a crowded stage setup, a reliable position is often more valuable than a perfect studio position.

How to mic a bass drum in a small room
Room sound can become a problem in a small studio. Low frequencies build up near walls and corners, which may make the bass drum sound boomy.
Move the drum away from the wall if the room allows it. Avoid placing the microphone directly in a corner. Use soft treatment near reflective surfaces, but do not expect foam to control deep bass.
A microphone inside the drum can reduce room problems. An outside mic may capture more of the room, so listen carefully before using one.
Record a short test. Move the microphone, not the drum, during the first round of adjustments. This makes it easier to hear what each placement change does.

Set gain and record a test
Set the input gain while the drummer plays the hardest expected hits. Leave enough headroom so the preamp does not clip.
A peak level around minus 12 to minus 6 dBFS is a useful digital recording range. Exact levels vary by system, but clean headroom matters more than chasing a specific number.
Record several hits and a short part with the full band. Listen for:
• Low-end weight.
• Beater attack.
• Ring and resonance.
• Rattle or mechanical noise.
• Phase changes with other microphones.
Solo listening can mislead you. A kick that sounds huge alone may cover the bass guitar in the mix. A sound that feels slightly thin alone may fit perfectly once the guitars and vocals enter.

Shape the sound with equalization and compression
Placement should do most of the work. Equalization and compression should refine the result.
Common bass drum processing may include:
• A low cut below the useful range to remove rumble.
• A small boost in the low bass for weight.
• A cut in the muddy low mids.
• A boost in the upper mids for beater definition.
• Compression to control uneven hits.
The exact frequency depends on the drum, microphone, tuning, and arrangement. Avoid copying fixed settings from a chart. Use a narrow boost to find the useful attack, then widen or reduce it as needed.
Compression can add consistency and punch. A medium attack may let the initial hit pass through. A faster release can help the drum recover before the next note, but timing should follow the song.
Gates can reduce bleed, but aggressive gating may cut off natural decay. Use the least processing that solves the problem.

Common mistakes when miking a bass drum
Many weak kick sounds come from simple setup errors.
Placing the microphone too close
Extreme proximity can create too much bass and make the sound muddy. Pull the microphone back slightly before reaching for an equalizer.
Aiming directly at the beater
This can create excessive click. Angle the microphone a little or move it toward the shell for a smoother sound.
Ignoring phase
Multiple microphones may cancel low frequencies when combined. Check polarity and timing every time you use inside and outside microphones.
Using too much muffling
Overdamping removes sustain and tone. Start with less muffling, then add only what the arrangement needs.
Mixing in solo
A solo kick can sound impressive but fail in the full mix. Always make final choices with bass, guitars, keys, and vocals playing.
Chasing a famous drum sound
A microphone used on one famous recording may not suit your drum. The player, tuning, room, preamp, and arrangement all matter. Use familiar techniques as starting points, not strict rules.
A practical step-by-step method
If you need a reliable process, use this method:
Tune the batter and resonant heads.
Remove rattles and check the pedal.
Choose a dynamic kick microphone.
Place it inside the drum, 3 to 6 inches from the batter head.
Aim between the center and the beater impact point.
Record a short test with the full band.
Move the microphone toward the center for more focus.
Move it toward the edge for more shell tone.
Add an outside microphone for extra body if needed.
Check polarity and timing.
Apply light equalization and compression.
Compare the processed sound with the original.
This method works because it solves the source first. It also keeps the process fast when time is limited.
How to mic a bass drum without a hole in the front head
You do not need a ported resonant head to mic a bass drum. Place the microphone outside the front head, close to the center or slightly off-center.
For more attack, use a second microphone near the batter head through a small gap or from inside the shell, if the drum design allows it. Another option is a boundary microphone placed inside the shell.
A full front head usually gives a rounder sound. If the result lacks attack, try moving the outside mic closer before changing the drum or adding heavy processing.
How to mic a bass drum with one microphone
One microphone can produce an excellent result. Place a dynamic microphone inside the port, then listen for the balance between punch and low end.
If the sound is too clicky, move the mic away from the beater or angle it toward the shell. If it is too soft, move it closer to the beater area.
For a natural sound, place the mic outside the front head. The key is not the number of microphones. It is the relationship between the drum, the room, the player, and the mix.
How to mic a bass drum for live sound
Live stages need practical placement. Use a strong dynamic microphone and keep it secure inside the port or just outside the front head.
Avoid placing the mic where the pedal, beater, or drummer’s foot can hit it. Use a short stand when possible, and tape or secure the cable so it cannot move.
Soundcheck with the full band. The kick should be clear at the listening position, not only in the monitor or headphones. Watch for stage rumble, bass guitar overlap, and feedback from nearby monitors.
A live engineer may use a gate to control bleed from the snare and toms. Set the gate gently so the kick remains natural.
Frequently Asked Questions About How to Mic a Bass Drum
Where should I place a microphone on a bass drum?
Start 3 to 6 inches inside the drum, aimed between the beater impact point and the center. Move it closer for more attack and toward the shell edge for more natural tone.
Can I use a regular dynamic microphone to mic a bass drum?
Yes. A regular dynamic microphone can work well if it handles high sound pressure levels and captures enough low end. A microphone made for kick drum may offer a more tailored response, but placement still matters most.
Should the bass drum microphone point at the beater?
It can, but direct aim often creates a sharp click. Aim slightly off the beater for a smoother sound, then move closer or farther to control attack.
Do I need two microphones on a bass drum?
No. One well-placed microphone can work for recording or live sound. A second microphone adds body or room tone, but it also creates phase and timing issues that require extra care.
How do I reduce bass drum bleed?
Use careful placement, moderate gating, and proper drum tuning. Keep the microphone inside the drum when possible, and avoid extreme gate settings that remove the drum’s natural decay.
Why does my bass drum sound muddy?
Mud often comes from poor tuning, too much room sound, excessive muffling, or overlap with the bass guitar. Move the microphone, reduce low-mid buildup, and judge the kick in the full mix.
Conclusion
Learning how to mic a bass drum is mainly about controlling placement, tuning, room sound, and balance. Start with one reliable microphone, make small position changes, and listen with the full band. Inside placement brings punch, outside placement adds body, and a two-mic setup can combine both when phase is managed.
Take a few minutes to test your own drum from several positions. Record each option, compare the results, and choose the sound that serves the song. Keep practicing, explore more recording techniques, and share your favorite bass drum miking approach in the comments.
