

A ribbon microphone is used to capture warm, natural sound from voices, instruments, and room ambience.
If you want recordings with smooth highs, rich mids, and a lifelike sense of space, a ribbon microphone can be an excellent choice. I have used ribbon microphones on guitar cabinets, brass, vocals, and room tracks, and their gentle sound often adds depth that modern condenser microphones can miss. This guide explains what a ribbon microphone is used for, how it works, where it performs best, and how to use one safely.

What Is a Ribbon Microphone?
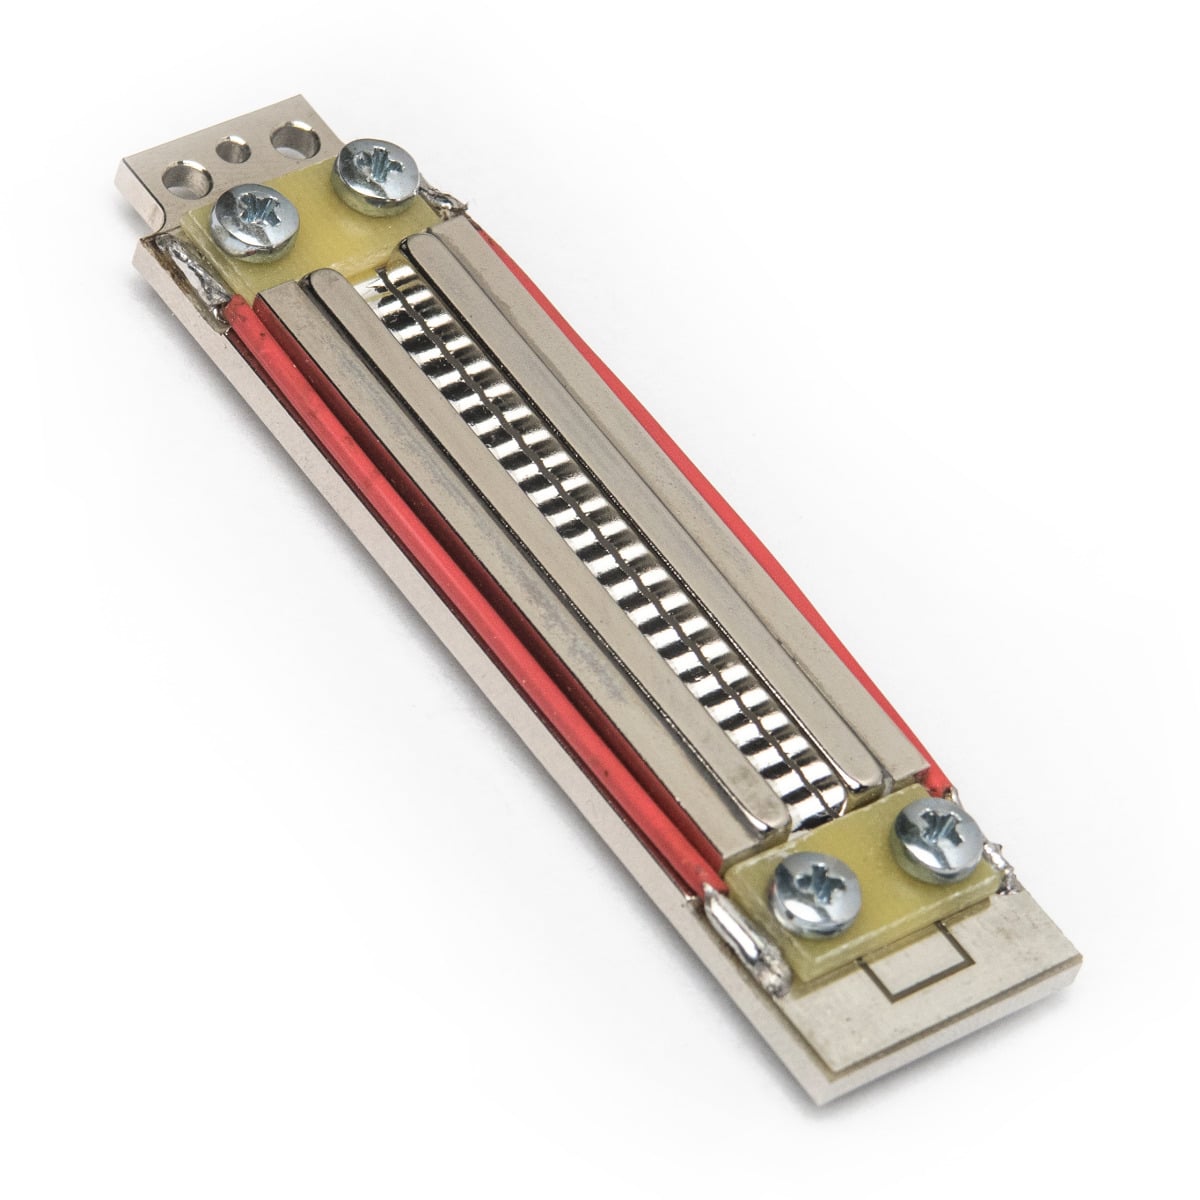
A ribbon microphone is a type of dynamic microphone that uses a thin strip of metal suspended between two magnets. This strip, called the ribbon element, moves when sound waves hit it. Its movement creates the electrical signal that becomes your recording.
Unlike a typical moving-coil dynamic microphone, a ribbon microphone has a very light sensing element. This allows it to respond to sound with impressive detail and a natural sense of motion.
Ribbon microphones are often known for:
• Warm tone
• Smooth high frequencies
• Strong midrange detail
• Natural transient response
• Excellent side rejection
• Realistic room sound
Many ribbon microphones have a figure-eight polar pattern. This means they capture sound from the front and rear while rejecting sound from the sides.
The figure-eight pattern is useful in a studio because it gives you control over the direct sound and the room sound. You can turn the microphone slightly to change the balance without moving the instrument or singer.
What Is a Ribbon Microphone Used For?
A ribbon microphone is used for sources that benefit from a smooth, full, and natural sound. It is especially useful when a source feels too bright, harsh, thin, or aggressive through another microphone.
Common uses include:
• Electric guitar cabinets
• Acoustic guitar
• Brass instruments
• Woodwind instruments
• Strings
• Drum rooms
• Drum overheads
• Male and female vocals
• Voice-over recording
• Room ambience
• Broadcast and podcast production
The key strength of a ribbon microphone is tone control. It can soften sharp upper frequencies while keeping the body and character of the source intact.
For example, a bright guitar amplifier may sound exciting in the room but painful through a condenser microphone. A ribbon microphone can capture the same amplifier with less bite and more weight.
The answer to what is a ribbon microphone used for also depends on the style of music. Ribbon microphones suit blues, jazz, rock, folk, soul, classical music, and spoken-word work. They can also add contrast when combined with a condenser or dynamic microphone.

Ribbon Microphone Uses in Music Recording
Electric guitar
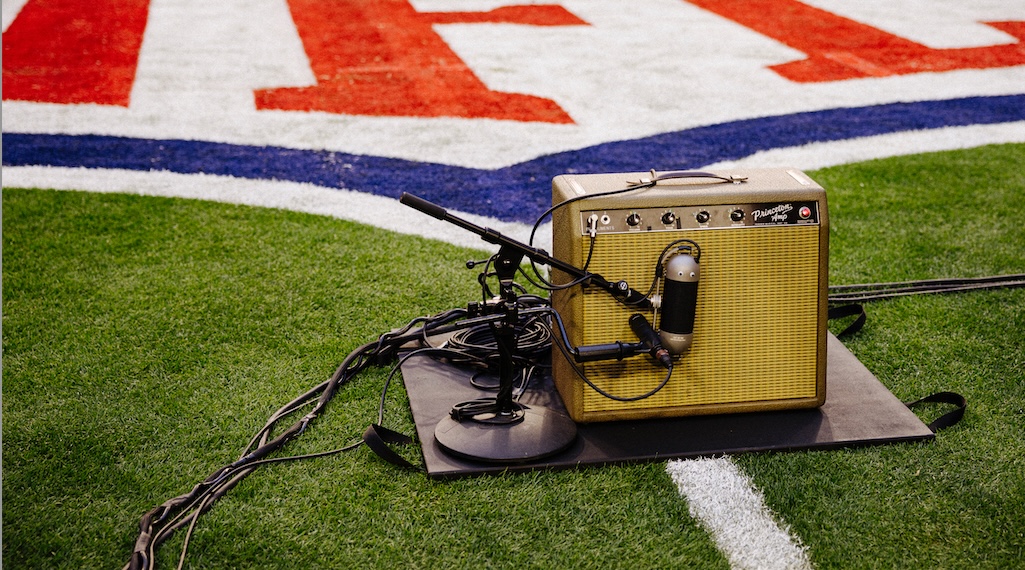
Electric guitar cabinets are one of the most popular uses for ribbon microphones. The microphone can sit close to the speaker and capture the cabinet’s body without exaggerating the harsh upper-midrange frequencies.
Start by placing the microphone about one to three inches from the grille. Aim it near the center of the speaker for a brighter sound, or move it toward the edge for a darker tone.
A common recording method combines a ribbon microphone with a dynamic microphone. The dynamic microphone adds attack and presence, while the ribbon adds weight and smoothness.
Vocals
A ribbon microphone can work well on vocals when the singer has a bright, sharp, or edgy tone. It can also flatter a powerful voice by adding a sense of size and depth.
However, ribbon microphones often have lower output than condenser microphones. You may need a quiet preamp with plenty of clean gain.
Use a pop filter when recording vocals. Plosive sounds such as “p” and “b” can produce strong bursts of air that may damage an exposed ribbon element.
Brass instruments
Trumpets, trombones, and saxophones can sound intense when recorded with a bright microphone. A ribbon microphone helps control that intensity while preserving the instrument’s natural tone.
Place the microphone slightly off-axis rather than pointing it directly into the bell. This can reduce harsh peaks and create a smoother recording.
Acoustic guitar
For acoustic guitar, a ribbon microphone can produce a rich and rounded sound. It often captures the wood, strings, and body resonance in a balanced way.
Try placing it near the 12th fret, about 8 to 16 inches away. Avoid pointing directly at the sound hole, as this can create too much low-end energy.
Drums and room microphones
Ribbon microphones are useful as drum room microphones because their figure-eight pattern captures a strong front signal and a clear rear signal. This can create a large, three-dimensional drum sound.
They can also work as overhead microphones, especially when you want smooth cymbals. Be careful with placement and sound pressure levels, since some vintage ribbons are more fragile than modern designs.
Why Do Ribbon Microphones Sound Different?
Ribbon microphones sound different because their thin ribbon element responds to sound in a very direct way. It has low mass, so it can follow changes in air pressure with a natural character.
Many ribbon microphones also have a gentle high-frequency roll-off. In simple terms, they often capture less extreme treble than a condenser microphone.
This does not mean a ribbon microphone lacks detail. Instead, its detail tends to sound smooth rather than sharp. Think of the difference between a bright studio light and soft window light. Both show detail, but one feels gentler.
A ribbon microphone may also capture a source with less exaggerated transient attack. This makes it useful for:
• Bright guitar tones
• Loud brass parts
• Sharp cymbals
• Sibilant voices
• Aggressive room reflections
The sound depends on the microphone design, preamp, placement, room, and source. Not every ribbon microphone sounds dark. Some modern active ribbons offer more high-frequency extension and higher output than classic passive models.
Passive and Active Ribbon Microphones
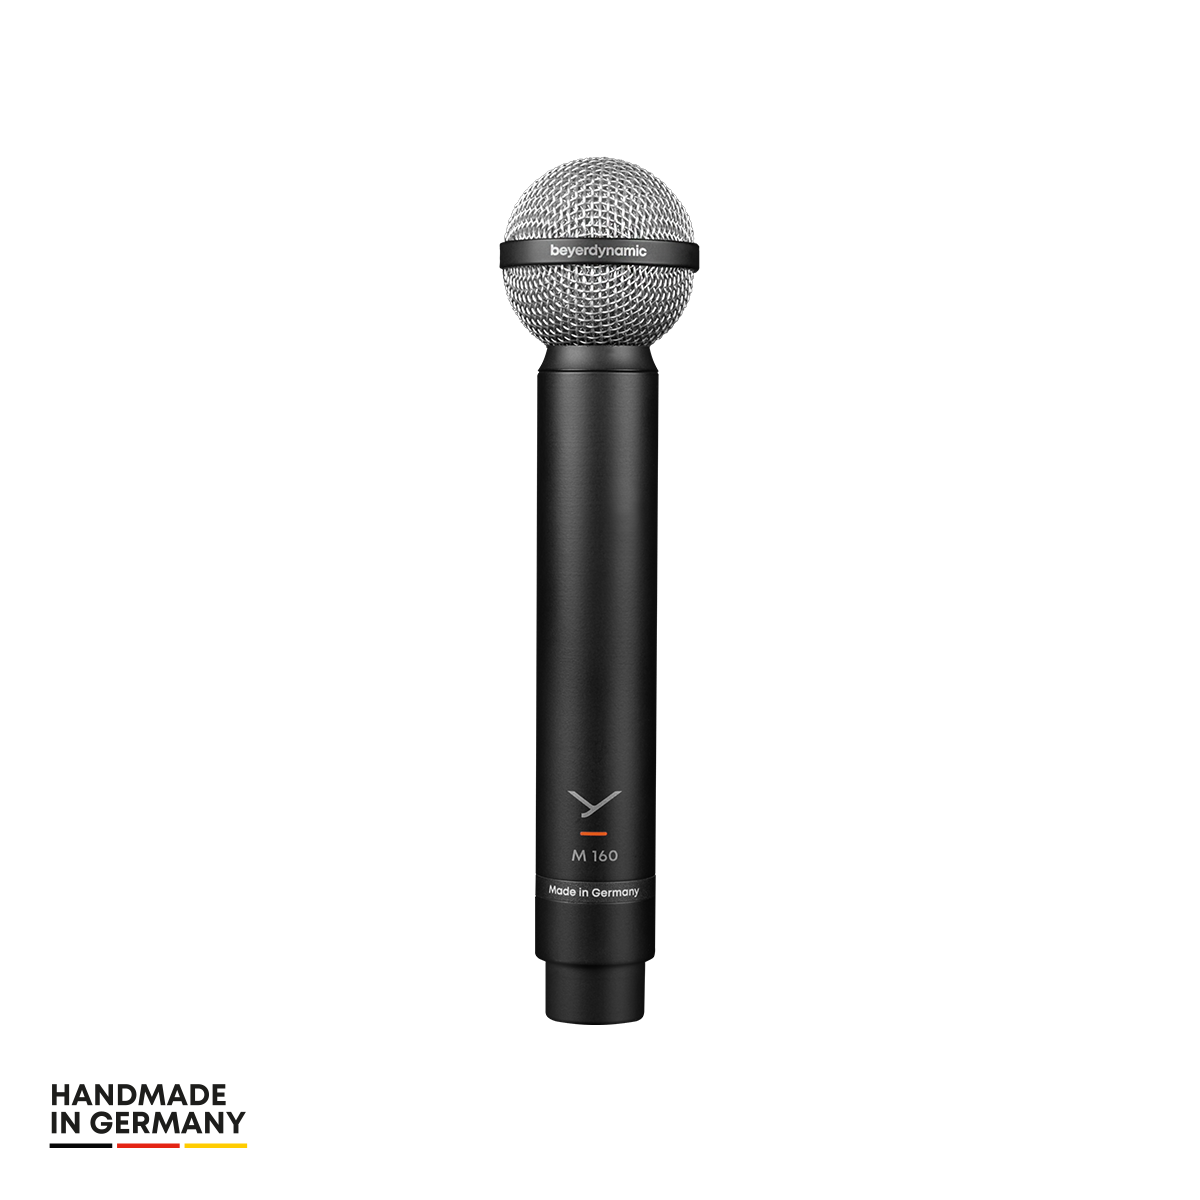
Ribbon microphones come in two main forms: passive and active.
Passive ribbon microphones
Passive models do not contain an active electronic circuit. They often have lower output and may need a high-gain microphone preamp.
A clean preamp is important. If the preamp struggles to provide enough gain, you may hear hiss when boosting the signal later.
Active ribbon microphones
Active ribbon microphones include electronics that increase the output level and improve compatibility with modern audio interfaces. They usually need phantom power.
An active ribbon can be easier to use in a home studio because it places less demand on the preamp. It may also offer a more consistent response across different recording systems.
Never assume that every ribbon microphone handles phantom power in the same way. Active models may require it, while passive models can be damaged by incorrect wiring, faulty cables, or patching while phantom power is active.
Always read the manufacturer’s instructions before connecting phantom power.

Advantages of Using a Ribbon Microphone
A ribbon microphone offers several practical benefits when the source and room are suitable.
Smooth high frequencies
Ribbon microphones can reduce harshness without making a recording sound dull. This is helpful with bright instruments and strong upper harmonics.
Natural sound
Their response often feels close to what you hear in the room. This can make instruments sound less processed.
Excellent side rejection
The figure-eight pattern rejects sound from the sides. This can reduce bleed from nearby instruments and help with careful studio placement.
Strong proximity effect
When you move a ribbon microphone closer to a source, the low end often becomes fuller. This effect can add warmth to vocals, guitar, and brass.
Useful tone shaping
Small placement changes can make a major difference. You can adjust brightness, room sound, and bass response without using equalization.
In my own recording work, I have often tried microphone placement before reaching for an equalizer. Moving a ribbon just a few inches can solve a tonal problem at the source.

Limitations of Ribbon Microphones
Ribbon microphones are not perfect for every recording situation. Understanding their limits will help you choose one with confidence.
Lower output
Many passive ribbon microphones produce less signal than condenser microphones. You may need a preamp with high, quiet gain.
Sensitivity to air movement
A strong blast of air can stretch or damage a delicate ribbon element. Avoid blowing into the microphone, and use a pop filter for vocals.
Room pickup
The rear side of a figure-eight microphone captures sound. If the back of the microphone faces a reflective wall, that room sound may enter the recording.
Less bright top end
Some ribbon microphones have a softer treble response. This may not suit a dark voice, dull guitar, or heavily treated room.
Placement demands
A ribbon microphone rewards careful placement, but it may not be the fastest option for a busy session. A dynamic microphone is often more forgiving for quick setups.
These limitations do not make ribbon microphones poor choices. They simply show that microphone selection should match the source, room, and recording goal.
How to Use a Ribbon Microphone Safely
Follow these steps to protect the microphone and get a clean recording.
Read the microphone manual before connecting it.
Turn off phantom power unless the model clearly requires it.
Lower the preamp gain before connecting the microphone.
Use a strong, undamaged XLR cable.
Connect the microphone before raising the gain.
Keep the microphone away from strong air blasts.
Use a pop filter for vocals and close speech.
Store the microphone in its case when you are not using it.
Avoid dropping, shaking, or hitting the microphone.
Mute the channel before unplugging it.
A vintage passive ribbon deserves extra care. Some modern ribbon microphones are more rugged, but careful handling is still wise.
One mistake I have seen in studios is treating every ribbon like a standard dynamic microphone. That approach can create avoidable damage. Slow setup habits are better than an expensive repair.
Best Placement Tips for Ribbon Microphones
Placement is one of the most important parts of using a ribbon microphone.
For a brighter sound, move the microphone closer to the center of the speaker or aim it more directly at the source. For a darker sound, move it toward the edge or turn it slightly off-axis.
For vocals, keep the singer about 8 to 12 inches away and use a pop filter. Watch the rear side of the microphone, since it also captures sound.
For guitar cabinets, begin with the ribbon close to the grille. Move it back if the tone feels too thick or if you want more room sound.
For room recording, point the front toward the source and consider the sound behind the microphone. The rear pickup can capture useful reflections, but it can also reveal unwanted noise.
Use headphones while adjusting the microphone. Small changes often matter more than expensive equipment.
Ribbon Microphone Compared With Dynamic and Condenser Microphones
A dynamic microphone is often rugged, easy to use, and effective on loud sources. It usually handles rough treatment better than a ribbon microphone.
A condenser microphone captures a broad frequency range and often provides more output and high-frequency detail. It is a common choice for vocals, acoustic instruments, and detailed studio work.
A ribbon microphone sits between these options in character. It can provide the body and smoothness of a dynamic microphone while offering more natural detail.
Choose a ribbon microphone when:
• The source sounds too bright
• You want a warm and open tone
• You need strong side rejection
• You want to capture room character
• You plan to blend microphones
• You prefer placement-based tone control
Choose a condenser when you need maximum clarity and extended treble. Choose a dynamic microphone when durability, high sound pressure handling, and fast setup matter most.
How to Choose the Right Ribbon Microphone
Consider these points before buying a ribbon microphone.
Passive or active design
An active model may be easier to use with a basic audio interface. A passive model may suit a studio with a powerful, quiet preamp.
Polar pattern
Most ribbon microphones use a figure-eight pattern, but some modern models offer additional patterns. Multiple patterns provide more flexibility for vocals, stereo recording, and room work.
Durability
If you record live sessions, loud amplifiers, or frequent location work, look for a model with a robust design.
Frequency response
Read the technical specifications, but also listen to real recordings. A microphone that sounds warm on one voice may sound too dark on another.
Your recording room
A figure-eight microphone hears the front and back of the room. Treat reflective surfaces behind the microphone if the room sounds harsh or boxy.
Price alone does not determine quality. Good placement, a suitable preamp, and a controlled room often matter more than buying the most expensive microphone.
Frequently Asked Questions About What Is a Ribbon Microphone Used For
What is a ribbon microphone mainly used for?
A ribbon microphone is mainly used to record guitar cabinets, brass, vocals, acoustic instruments, drums, and room ambience. It is valued for a warm, smooth, and natural sound.
Can you use a ribbon microphone for vocals?
Yes, a ribbon microphone can sound excellent on vocals, especially when the singer has a bright or harsh tone. Use a pop filter and keep strong air blasts away from the ribbon element.
Are ribbon microphones good for acoustic guitar?
Ribbon microphones are often very good for acoustic guitar because they capture body, wood, and string detail without excessive brightness. Start near the 12th fret and adjust the distance to control bass and room sound.
Do ribbon microphones need phantom power?
Passive ribbon microphones usually do not need phantom power, while active ribbon microphones often do. Check the manufacturer’s instructions because sending phantom power to an unprotected passive ribbon may cause damage.
Are ribbon microphones better than condenser microphones?
Neither type is always better. Ribbon microphones offer smooth, natural tone, while condenser microphones usually provide higher output and more extended high-frequency detail.
Can a ribbon microphone record loud guitar amps?
Yes, many ribbon microphones work very well on loud guitar amps. Check the microphone’s sound pressure level rating, place it carefully, and avoid sudden blasts of air.
Why do ribbon microphones have a figure-eight pattern?
The ribbon element responds to sound from both its front and rear sides. This creates a figure-eight pattern, with strong rejection at the sides and useful control over direct and room sound.
Conclusion
A ribbon microphone is used to capture smooth, warm, and natural recordings from sources such as guitar cabinets, vocals, brass, acoustic instruments, drums, and room ambience. Its figure-eight pattern and gentle high-frequency response make it a powerful tool for shaping tone through placement.
The best results come from matching the microphone to the source, room, preamp, and recording goal. Start with safe handling, careful placement, and patient listening before changing equipment.
Try a ribbon microphone on a bright guitar amp, a strong vocal, or a brass instrument, then compare the result with your usual microphone. Keep learning, test different positions, and share your recording experiences with other musicians and engineers.