

A boom mic is a microphone mounted on a long pole or arm to capture clear sound from a short distance.
If you have watched a film, podcast, interview, or live event, you have likely seen a boom mic in action. It lets a crew record natural speech without placing a microphone in the camera frame or on the speaker’s face. This guide explains what is a boom mic, how it works, which types are common, and how to use one well.
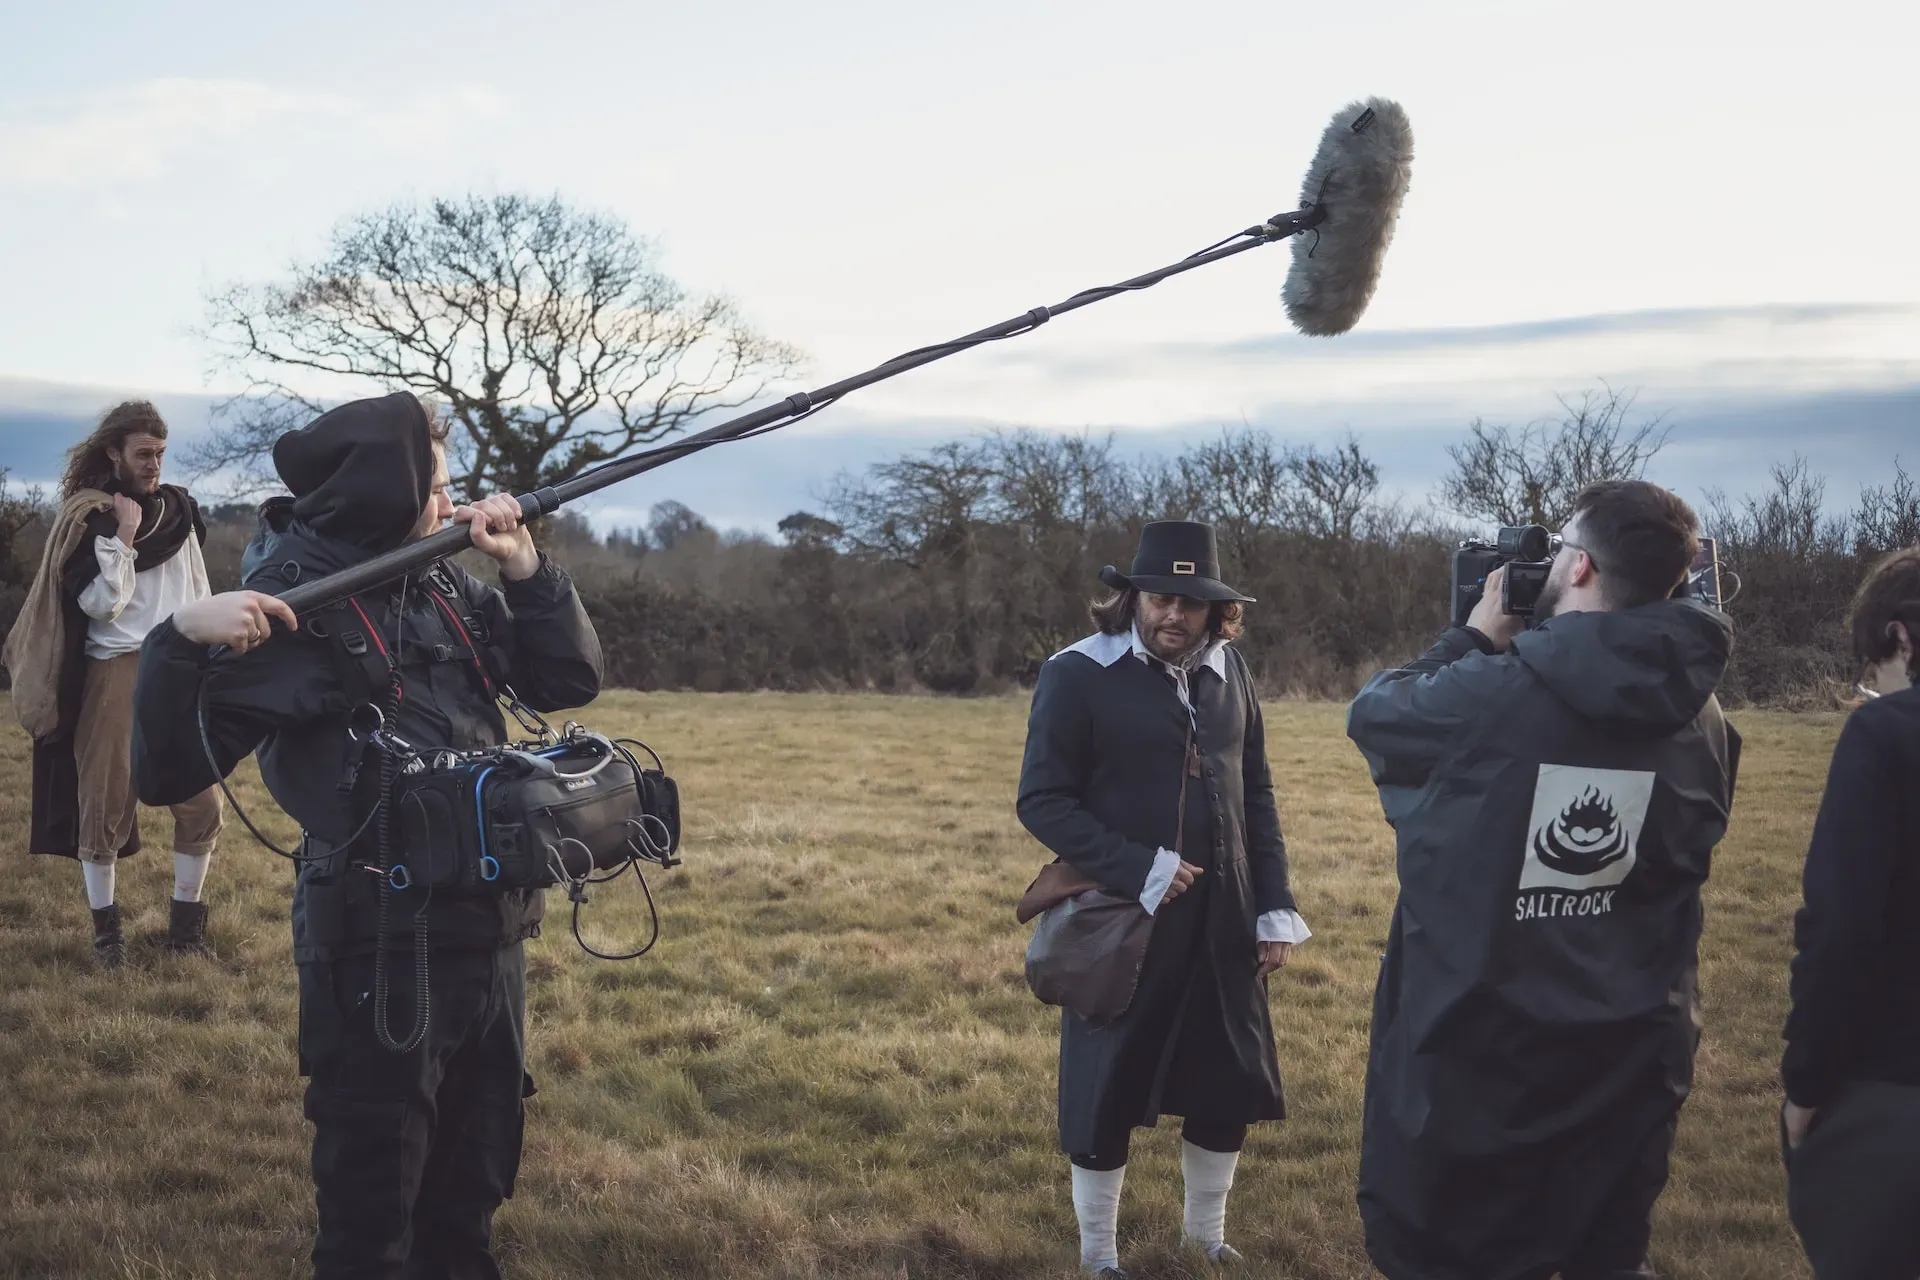
What Is a Boom Mic?
A boom mic is a microphone attached to a boom pole, overhead arm, or stand. The pole lets an operator place the microphone close to a speaker while keeping it outside the camera’s view.
The term “boom mic” can describe two things:
• The microphone itself, often a shotgun microphone
• The full setup, including the microphone, boom pole, cable, shock mount, and wind protection
A boom mic is common in film and television production. Sound teams also use one for documentaries, interviews, theater, sports broadcasts, podcasts, and online videos.
The basic goal is simple: place the microphone near the person speaking without making the microphone visible. Distance matters because sound becomes weaker as the microphone moves away from the source. A boom mic helps the operator stay close while preserving a clean picture.

How Does a Boom Mic Work?
A boom mic works by using a directional microphone on a pole or arm. The microphone points toward the speaker and captures more sound from the front than from the sides or rear.
This design helps reduce unwanted noise. It does not remove all background sound, though. A busy street, loud air conditioner, or echoing room can still affect the recording.
A typical boom setup includes:
• Microphone: Captures the speaker’s voice
• Boom pole: Holds the microphone in the correct position
• Shock mount: Reduces handling noise and small vibrations
• XLR cable: Sends the audio signal to a recorder, mixer, or camera
• Windshield: Reduces wind and air movement
• Headphones: Help the operator hear problems during recording
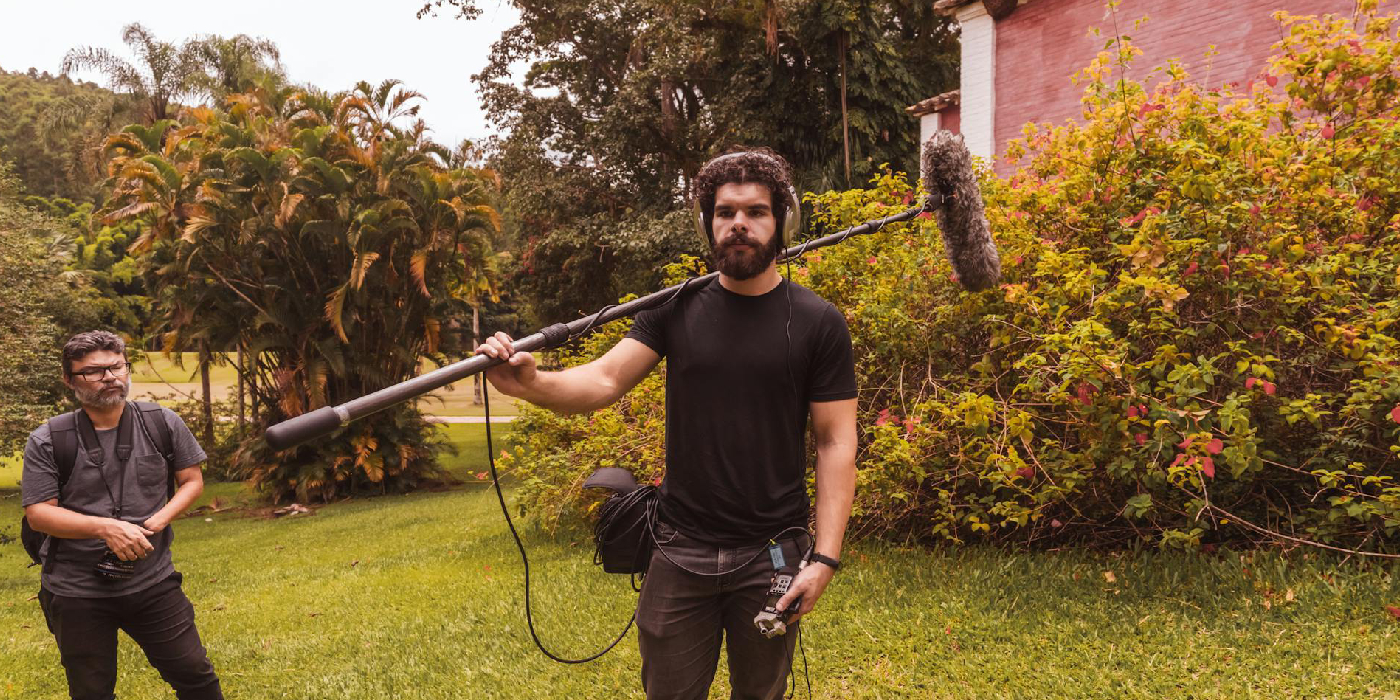
The boom operator usually holds the microphone above the speaker. In some shots, the operator places it below the speaker and aims it upward. The best position depends on the camera frame, lighting, clothing, background noise, and actor movement.
A useful rule is to point the microphone at the speaker’s chest or upper chest area rather than directly at the mouth. This often produces a more natural tone and gives the speaker room to move.
Main Types of Boom Mics
Not every boom mic uses the same microphone. The right choice depends on the room, the speaker, and the type of production.
Shotgun Microphones
Shotgun microphones are the most common choice for film and video boom work. They have a long interference tube that helps narrow the pickup pattern.
A shotgun mic captures sound mainly from the front. It also rejects some sound from the sides. This makes it useful when the microphone must stay outside the frame.
Shotgun microphones work best in open spaces or outdoors. They can sound unnatural in small rooms with hard walls because reflected sound may enter the microphone from the sides.
Hypercardioid Microphones
A hypercardioid microphone has a focused pickup pattern but usually sounds more natural indoors than a long shotgun microphone.
Many sound professionals choose a hypercardioid mic for rooms with low ceilings, bare walls, or strong reflections. It may reject less side noise than a shotgun mic, but it often produces a smoother voice indoors.
Cardioid Microphones
A cardioid microphone picks up sound mainly from the front and rejects much of the sound behind it. It has a wider pattern than a shotgun or hypercardioid microphone.
This type can work well for interviews, stage performances, and controlled indoor settings. It is also less sensitive to some room reflections.
Boom Arms and Studio Boom Mics
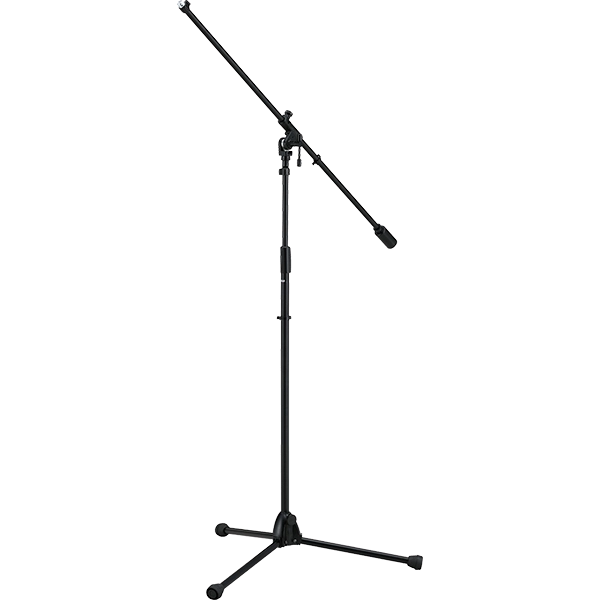
A studio boom arm holds a microphone over a desk, table, or recording space. It is common in podcasts, voice-over work, radio, and streaming.
Unlike a handheld boom pole, a studio boom arm stays fixed or moves only within a small area. It keeps the microphone stable and leaves the speaker’s hands free.

Boom Mic vs. Lavalier Mic
A boom mic and a lavalier mic solve the same basic problem in different ways.
A lavalier mic, also called a lapel mic, clips to a person’s clothing. It stays close to the mouth and can provide steady volume while the person moves.
A boom mic stays off the person. It can produce a more open and natural voice because it does not rub against clothing or sit near the speaker’s chest.
Here is a simple comparison:
• Boom mic: Often sounds natural and stays out of the shot
• Lavalier mic: Supports movement and keeps a steady distance
• Boom mic: Needs an operator or support arm
• Lavalier mic: Can pick up clothing rustle and cable noise
• Boom mic: May struggle in loud or reflective spaces
• Lavalier mic: May be easier to hide in some scenes
Many professional productions use both. The boom mic serves as the main track, while the lavalier provides a backup. Recording two microphone types can save a scene when one track has noise or poor placement.

Boom Mic vs. Built-In Camera Microphone
A built-in camera microphone is convenient, but it is usually far from the person speaking. That distance causes room noise, echo, and background sound to become more noticeable.
A boom mic can move much closer to the speaker. This usually creates a stronger voice signal and a better balance between speech and background noise.
The difference is easy to hear. A camera microphone may make a speaker sound distant, thin, or echoey. A well-placed boom mic can make the same speaker sound clear, warm, and present.
A camera microphone still has value. It can record a reference track, help match video and audio, or serve as an emergency backup. However, it is rarely the best choice for professional dialogue.

How to Position a Boom Mic
Good placement often matters more than an expensive microphone. A basic mic placed well can outperform a costly mic placed too far away.
Follow these steps:
Place the microphone as close as the frame allows.
Aim it toward the speaker’s upper chest or mouth area.
Keep the microphone outside the camera’s viewing angle.
Hold the mic steady to avoid handling noise.
Move with the speaker during walking or turning shots.
Monitor the sound through closed-back headphones.
Check for shadows, reflections, and visible microphone parts.
The microphone should usually sit just above the frame and point downward. This position often gives the voice a clear tone while avoiding clothing noise.
When the microphone is below the frame, aim it upward. Watch for noisy clothing, necklaces, tables, and other objects that can block or reflect sound.
Do not point the microphone from too far away just to keep it hidden. A microphone several feet from the speaker may capture too much room sound. It is better to adjust the camera frame, lens, or boom angle when possible.

How Far Should a Boom Mic Be From the Speaker?
A boom mic should be as close as possible without entering the shot or causing unwanted shadows. In many talking scenes, the microphone may sit around 12 to 24 inches from the speaker, but the ideal distance changes with the microphone and environment.
A highly directional microphone may work from a greater distance. A small room with hard surfaces may require closer placement and careful microphone choice.
Distance also affects voice tone. Moving the mic closer can make speech fuller and stronger. Moving it too close may create excessive bass, breath noise, or sudden volume changes.
During a real shoot, I have found that sound checks prevent many problems. Ask the speaker to use the same volume and movement they will use in the scene. Then listen for echo, clothing noise, traffic, fans, and changes in tone before recording the full take.
What Equipment Do You Need?
A simple boom mic kit can start small. You do not need every professional tool on your first day.
A useful basic kit may include:
• A directional microphone
• A boom pole or studio arm
• A shock mount
• An XLR cable or compatible audio connection
• A portable audio recorder or camera input
• Closed-back headphones
• A foam windscreen
• A furry wind cover for outdoor use
• Spare batteries, if the microphone needs them
• Gaffer tape for securing cables
Professional productions may add a field mixer, wireless monitoring system, multiple microphones, timecode equipment, and a dedicated sound bag.
Use an XLR connection when possible for longer professional cable runs. It is designed for balanced audio and helps reduce certain types of electrical interference.
A microphone with a 3.5-millimeter connector can work well for simple cameras and mobile video setups. Always confirm that the connector, power needs, and camera input match before recording.

Common Boom Mic Mistakes
Even experienced creators can make avoidable mistakes. These problems often come from placement, monitoring, or poor preparation.
Holding the Mic Too Far Away
Distance is one of the biggest causes of weak dialogue. When the microphone moves away, the room becomes louder compared with the speaker.
Keep the mic close and move smoothly with the person. If you cannot keep it close, consider a lavalier microphone as a second option.
Pointing the Mic at the Wrong Place
A boom mic should aim toward the speaker, not simply hang above them. Small changes in direction can affect clarity and background noise.
Listen while adjusting the angle. The best direction may not be obvious by looking at the setup.
Touching the Pole
Hands can create low rumbles and bumps that become obvious during editing. Use a shock mount, hold the pole lightly, and avoid changing your grip during a take.
Ignoring Wind
Even light wind can overload a microphone. A foam cover may help with mild airflow, but outdoor recording often needs a furry windshield.
Failing to Monitor Audio
A recording can look perfect and still have unusable sound. Wear headphones during the take, not only during setup.
Letting the Mic Enter the Frame
Check the top and bottom edges of the frame. Wide lenses can reveal more than expected, especially when the camera moves.
In my experience, the most painful mistakes are the ones that seem harmless during filming. A faint fan, loose cable, or small pole bump may become impossible to remove later. Record room tone, monitor continuously, and review short test clips before the main scene.
Indoor and Outdoor Boom Mic Use
Indoor and outdoor spaces create different sound challenges.
Using a Boom Mic Indoors
Indoors, walls and ceilings reflect sound. A long shotgun microphone may produce a hollow or phasey tone in a small room.
For indoor work, consider a hypercardioid or cardioid microphone. Add soft materials when possible. Curtains, rugs, sofas, and blankets can reduce harsh reflections.
Turn off noisy fans, air conditioners, refrigerators, and computer equipment when practical. Also listen for traffic, plumbing, footsteps, and electrical hum.
Using a Boom Mic Outdoors
Outdoors, wind is often the main concern. Use a proper wind protection system and keep the microphone stable.
Outdoor recordings may also include traffic, birds, insects, airplanes, construction, and nearby conversations. Choose the quietest location you can, and record several seconds of natural background sound.
A boom mic can sound excellent outdoors because there are fewer hard surfaces to create reflections. However, wind protection and careful monitoring are essential.
Benefits and Limitations of a Boom Mic
A boom mic offers several strong benefits:
• It can produce natural-sounding dialogue
• It stays away from the speaker’s clothing
• It can remain outside the camera frame
• It works well for film, interviews, theater, and live video
• It allows the speaker to look and move naturally
• It can serve as a professional backup to a lavalier mic
It also has limitations:
• It needs careful positioning
• It may require a trained operator
• It can pick up room noise and wind
• It may be difficult to use in crowded spaces
• A long session can cause operator fatigue
• Poor placement can create weak or uneven audio
Understanding these limits helps you choose the right tool. A boom mic is not automatically better than every other microphone. It is most effective when the environment, microphone pattern, and operator technique work together.
Tips for Better Boom Mic Recording
Use these practical tips to improve your results:
• Record a short test before the full take.
• Keep the microphone close but out of frame.
• Use headphones with good isolation.
• Protect the microphone from wind.
• Keep cables away from feet and moving equipment.
• Mark the best boom position for repeated shots.
• Record room tone for easier editing.
• Watch for microphone shadows under strong lights.
• Keep spare cables and batteries nearby.
• Do not rely on audio editing to fix every problem.
Set your recording level with enough room for sudden loud speech. Avoid recording too quietly, but also avoid clipping. Once audio clips, the distortion may be permanent.
If the speaker changes position, adjust the boom angle. The microphone should follow the sound source, not remain fixed while the speaker turns away.
The best boom operators are quiet, patient, and alert. They watch the frame, listen to the audio, and predict movement before it happens. That skill is less about holding a pole and more about understanding the entire scene.
When Should You Use a Boom Mic?
Use a boom mic when you want clear, natural dialogue without attaching a microphone to the speaker.
It works especially well for:
• Narrative films
• Short films
• Documentaries
• Interviews
• Corporate videos
• Live theater
• Educational videos
• News and field reporting
• Podcasts with multiple speakers
• Streaming and voice content
A boom mic is a strong choice when the speaker stays in a limited area and the sound team can work close to the action. A lavalier may be better when the speaker moves widely or when there is no room for a boom operator.
For important productions, use both a boom mic and a lavalier when possible. Redundancy gives you more options during editing and protects the project from one failed track.
Frequently Asked Questions About What Is a Boom Mic
What is a boom mic used for?
A boom mic is used to record clear speech while keeping the microphone outside the camera frame. It is common in film, television, interviews, theater, documentaries, and online video.
Is a boom mic the same as a shotgun mic?
No. A boom mic describes a microphone setup or placement method, while a shotgun mic describes a microphone design with a narrow pickup pattern. A shotgun microphone is often placed on a boom pole, but other directional microphones can also serve as boom mics.
Are boom mics better than lavalier mics?
Neither is always better. A boom mic often sounds more natural, while a lavalier mic can provide steady volume when a person moves around.
Can you use a boom mic with a camera?
Yes, if the camera has a compatible microphone input. For professional recording, you may connect the boom mic to a portable recorder or mixer and then sync the audio with the video.
How do you hold a boom mic?
Hold the pole with both hands when possible, keep your grip light, and avoid touching or moving the cable. Place the microphone close to the speaker and keep it just outside the camera frame.
Can a boom mic record sound from far away?
A directional boom mic can record from some distance, but sound quality usually improves when the microphone is closer. Greater distance increases room sound, background noise, and echo.
Do boom mics need power?
Some boom microphones need phantom power from a recorder, mixer, or camera. Others use batteries or plug-in power, so check the microphone’s specifications before use.
Conclusion
A boom mic is a directional microphone placed on a pole, arm, or stand to capture clear speech without appearing on camera. Its success depends on close placement, correct microphone choice, steady handling, wind protection, and active headphone monitoring.
For natural dialogue, a well-positioned boom mic remains one of the most useful tools in video and audio production. Start with a simple setup, test it in your real recording space, and learn to judge sound by listening rather than relying only on equipment prices. Try these techniques in your next project, and explore more recording guides to keep improving your production skills.